How to Inspect a Roof
Roof repairs and replacements are one of the most costly investments for residential homeowners and commercial property managers. Many assume that a roof is in working order so long as there aren’t any apparent leaks or cracks. Neglecting regular maintenance and inspections can, in the long-run, be more costly and cause more inconvenience than necessary. Structural damage usually happens by the time most are even able to detect a roof leak. Rather than take this path, it’s important to schedule regular maintenance to ensure proper care for an expensive investment. Roofs, after all, are what protect your home and business from outside elements. Want to learn more about how to inspect a roof? We’re giving you more tips below.
Why Is Roof Inspection Important?
A routine roof inspection is one of those preventive maintenance tasks that often go overlooked. Instead, try to stay on top of it. Why are inspections important, though? Roof inspections allow you to stay engaged with the overall health of your roof and it allows you to take proactive steps prior to having to make drastic and costly repairs. Be sure to set your calendars for once-per-year reminders for general roof inspections and roof maintenance. While it’s advisable to utilize a trusted Colorado roofing expert to complete this task, it’s also possible to do-it-yourself. Learn more about the specifics on how to inspect a roof below.
Regular inspections are usually covered with most roofing craftsmanship warranties. Be sure to check on this before you hire a Colorado roofer.
Roofing inspections conducted by professionals are usually completed quickly and painlessly. Whatever roofing company installed your roof should be able to provide these services, especially if they are trusted and reliable experts. Typically, they have a set of procedures to execute in order to evaluate and provide a clear idea of some key factors. Most roofers are looking for the following details during their roof inspection:
- What is the integrity of the current roof?
- How much longer will it last?
- Are there damaged areas or areas of concern?
- When will a new roof installation be absolutely necessary?
Hiring Experts for Your Roof Inspection
Hiring an expert to complete a roof inspection is a good idea for a few reasons. First, professional roofers have tools and experience in evaluating thousands of roofs. They automatically understand the components that make up a roof and can easily spot detect areas of concern. Additionally, roofers often don’t need to tear anything apart. Most will use an infrared device to detect hot spots. Heat escaping will be immediately evident, thus making it fool-proof in finding compromised sections in your roofing structure. The roofer can then call out those areas as ‘problematic’ and possibly prone to leaks or damage.
How to Inspect a Roof
If you’re not wanting to hire a roofing expert for your roof inspection, it’s still important that you continue with regular maintenance. Similar to changing the oil in your car, having someone examine the roof quality can help to avoid extremely expensive repairs. In addition, because roof replacements are an investment, insurance companies and lenders will often require documentation of ongoing maintenance to ensure proper care before coverage is dispersed.
Knowing how to inspect a roof is an important part of property ownership. To begin, always start by taking a walk around the perimeter of the property. You’ll want to examine for noticeable damage, such as cracked, and lifts in the roofing material. Significant damage will always be immediately apparent, while more subtle issues less so. Still, taking a walk around your property may help you to evaluate gradual changes in your roofing systems, especially after a storm or natural occurrence.
Be sure to inspect your roof from the inside out. Here are a few suggestions on how to inspect a roof inside for possible leaks.
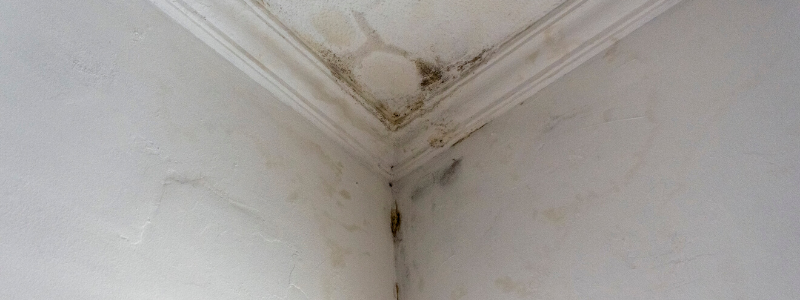
Potential signs of leaks occurring inside:
- Dark areas on ceilings
- Peeling paint or wallpaper
- Damp spots along fireplaces
- Water stains on pipes venting the water heater or furnace
- Water spots or wet roof decking (seen through the attack)
Potential signs of leaks occurring outside:
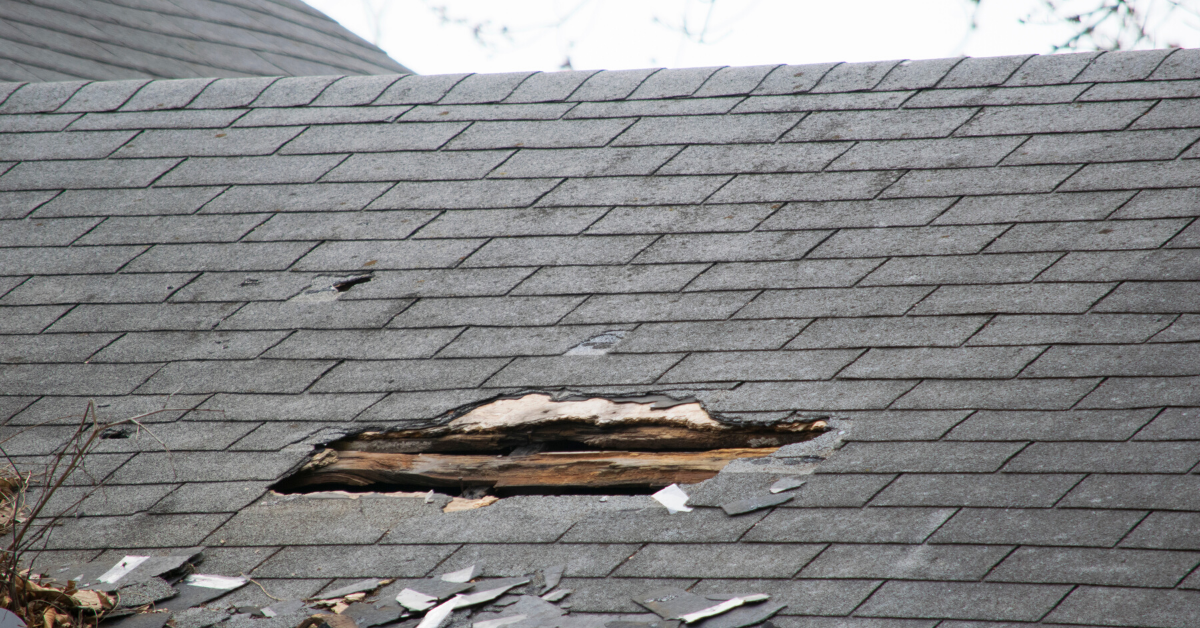
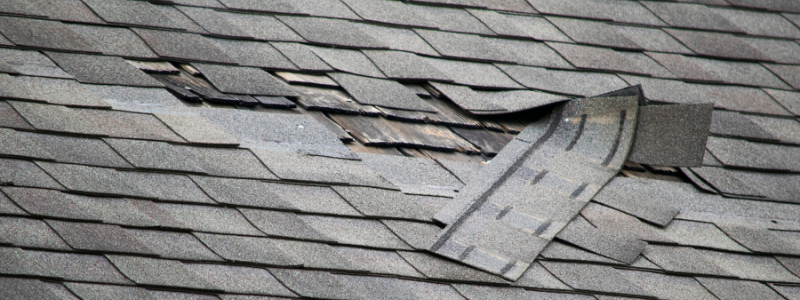
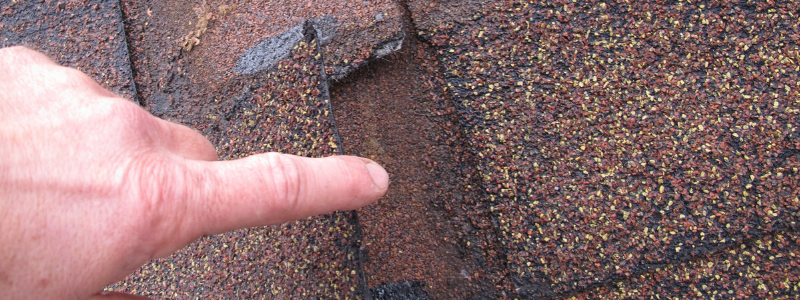
- Missing or torn shingles. Old shingles will curl, split, and lose their waterproofing effectiveness.
- Rusted or missing flashing can result in a leaking roof
- Check gutters, downspouts and splash pans for evidence of decay or damage
If leaks are detected early enough, repairs may help to keep costs down and support the integrity of the roof. If left unattended, leaks can lead to structural damage and cause a cascade of other issues such as electrical faults, mold, and plumbing issues. Request a leak repair from B&M Roofing in Colorado here.
Other Tips: How to Inspect a Roof
Need more tips on how to properly inspect a roof. Consider the following tips:
- Identify areas with moss, algae, and piles of leaves – these areas are notorious for causing costly leaks and water damage.
- Keep your eye out for buckled and curled shingles! Hot air from attics often causes shingles to buckle and curl away from the home, putting your roof and home at great risk for weather damage and poor roof ventilation.
- Look for missing, damaged, and aged shingles – this is the leading cause of roof damage.
- It is so important to clean your gutters and roof overhangs and maintain your downspouts.
- Look closely for granule loss (texture on shingles). Granule loss indicates that shingles have aged or have been affected by severe weather, and are no longer protecting your home against damaging storms.
- If your roof has an attic look for a possible indication of warping wood, water damage, and damaged trusses.
B&M Roofing in Colorado
We stand behind the workmanship of every roof we install for Colorado commercial and residential properties. We encourage our customers to consider regular maintenance and can offer plans through our roof asset management program. In addition, we offer leak repair services that can help prevent you from having to drop thousands in new installation costs.
Roofing Basics
Roofs are complex structures that consist of many different components. To understand how a roof is built and maintained, it’s important to know some roofing basics. This will allow you to feel more confident when hiring an expert roofer. This information may provide useful when the time comes to make needed repairs or completely replace a roofing system.
These roofing basics consist of knowing for definitive characteristics:
- what roofs are made of
- the individual structures that comprise a roof
- how a roof is built
- what to look for when purchasing a new roof
Read on for more, or contact us directly at (303) 443-5843 for immediate answers. We’re happy to provide general information on roofing systems as well as a free estimate.
Roofing System Basics
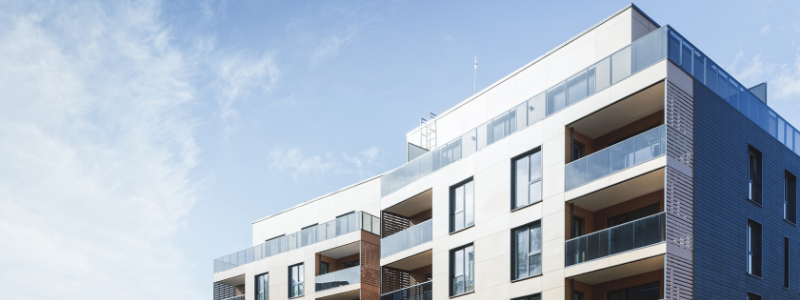
Roofs can be made out of a variety of different materials. Each material serves the same basic function—keeping the interior of your home protected from the elements. However, some materials are better at serving that function than others. It depends on the home itself, as well as the climate of where the home is located.
Here are some good roofing basics to remember about climate and roof styles. The two most common roof types are flat roofs and sloped roofs. Flat roofs are often used in areas where the climate is dry and arid, meaning that rain and snow are rarities. Sloped roofs are often used in areas where rain and snow are more frequent since sloped roofs allow rain and snow to be redirected off of the roof and into the ground.
Flat roofs
Flat roofs are often made of a built-up roof, PVC membrane, EPDM rubber, or modified bitumen. Each one of these materials is quite inexpensive, making them easier to use and install than the materials you would use for a sloped roof. But, along with that, these materials are designed for durability and longevity. They can withstand heavy foot traffic as well as intense heat.
Sloped roofs
Sloped roofs are often made of materials such as wood, steel, slate, or sometimes flagstone. These materials form the tiles, corrugated sheets, or shingles that protect the under-portion of the roof from rain and snow. While these materials are quite durable, they are used, primarily, to prevent water from flowing into the under-portion of a sloped roof.
Roofing Structure
Every roof consists of several different facets. Each one of the facets that comprise a roof serves a very important function that ensures the roof is stable and capable of serving it’s primary function – keeping the interior of your home protected from the elements.
Rafters/Trusses
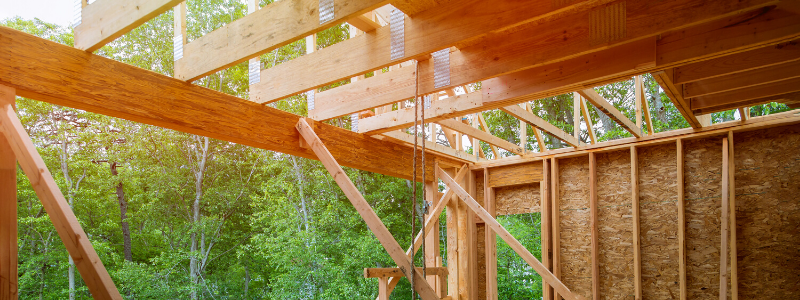
In order for a roof to be held up, there must be a structure in place that has the ability to hold up the roof. For most roofs, this structure consists of several rafters, or trusses, depending on the roof. Rafters/trusses are often made of either metal or wood, and they serve as the basic foundation of every roof.
Sheathing
On top of the rafters/trusses, there is sheathing. Sheathing often consists of solid boards or sheet material. With this sheathing, the structure above the rafters/trusses – your home – is not only protected, but the structure above the rafters/trusses has a stronger foundation, which allows the roof to be stable and secure.
Underlayment
To enhance the effectiveness of the sheathing, underlayment is laid. Most underlayment is made of paper, and it’s used to shield the sheathing from rain and snow.
Roof Covers
On top of the underlayment, there’s the roof cover. For flat roofs, this is usually PVC membrane, built-up roof, EPDM rubber, modified, or modified bitumen. These materials form the flat surface of the roof. But, for sloped roofs, the roof cover usually takes the form of shingles and tiles.
How Is A Roof Constructed?
Let’s review some roofing basics for the actual roof build. In order for a roof to be constructed properly, there are all kinds of different variables that must be considered and understood.
Select styles
To begin constructing a roof, a style must be chosen. As mentioned earlier, the two most common roof styles are flat and sloped. For wet and snowy climates, like in Colorado, a sloped roof is far more practical. But, for arid climates where rain and snow are rarities, a flat roof can be very useful.
Select materials
When a style has been chosen, materials must be selected. Flat roofs tend to work very well with materials such as asphalt and metal. Sloped roofs work well with wood and metal, as well as tiles and shingles made of clay, wood, and metal.
Measuring a roof
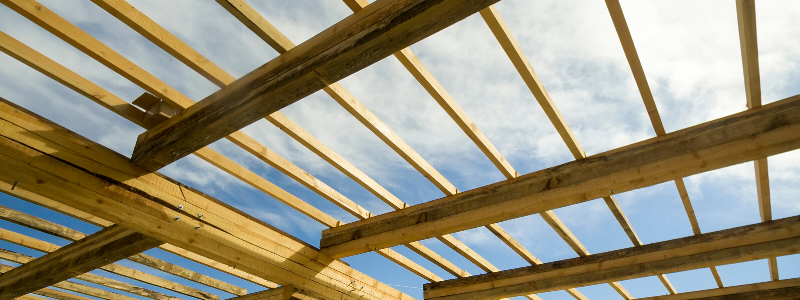
Right after the style and materials have been chosen, a series of measurements must be taken. During this step, it’s important that strict attention to detail is provided; the measurements should be precise for a final, quality product. These measurements have to do with the
- size of the roof
- where the roof is going to be installed
- the pitch of the roof.
Without these measurements, it’s likely that the roof will be inconsistent and, as such, inadequate for the building it’s being installed on.
All of the style and material choices will take a while, and the same goes for the measurements. But, when that process is finished, the actual building of the roof can commence. Building the roof consists of four basic stages.
Construction roofing basics
The first stage consists of setting up the trusses/rafters. Without these structures, there’s no foundation for the roof. Then, the second stage consists of laying out sheathing along the trusses/rafters, and the sheathing provides the basic surface of the roof. Right after that, underlayment is laid across the sheathing, to protect the sheathing from rain and snow. Finally, the cover of the roof is installed.
For people who own commercial properties, it’s especially important that they understand how the commercial roof of that property was installed. Without an understanding of the materials that were used, the measurements of the roof, and the roofing systems that the commercial roof uses, it’s a lot more difficult to properly clean that commercial roof.
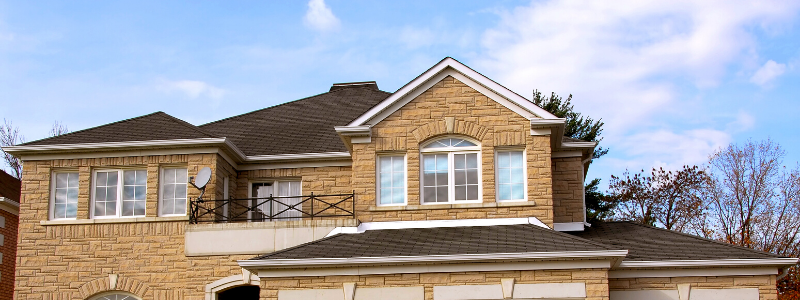
What Should New Homeowners Know About Their Roofs?
When buying a home, homeowners should be aware of several key attributes. Each one of these attributes greatly affects the longevity and quality of the roof, as well as the roof’s ability to keep your home protected from the elements.
Age of Your Roof
Every new homeowner should be aware of just how old their roof is. Most roofs last twenty-five-years, give or take. Past that date, though, the roof gradually loses its durability and becomes weaker. If the roof of that new home is old, then it may need to be replaced far sooner than expected.
Type of Roof
Every homeowner should be aware of whether or not any of the shingles – or tiles, depending on the roof – on their roof have fallen off, or are in the process of falling off. If they are, that can easily lead to moisture falling through the roof and into the home. Plus, it also means that the roof is quite old and in need of repairs and, possibly, a replacement.
Condition of Your Roof
If those same shingles are falling apart and losing granules – granules are small pieces of the shingle that comprise the entirety of the structure- that’s a sign that the shingles need to be replaced. Without these granules, the shingles are incapable of protecting your home from the elements.
On a flat roof, new homeowners must make sure that the roof is smooth, clean, and free of punctures and cracks. Punctures and cracks can easily allow for moisture to flow straight into the home.
Along with that, it’s also important to check for whether there’s a build-up of mold or mildew, and whether or not water is congregating along a certain area of the roof. If there’s a build-up of mold and mildew, this could lead to structural problems later on. If water is pooling up around certain areas, that’s a sign that the drainage on the roof is lacking.
Summary of Roofing Basics
- On a flat roof, it’s important to make sure that the roof is free of punctures and cracks
- The two most common styles of roofs are flat roofs and sloped roofs. Flat roofs are meant for arid climates. Sloped roofs are meant for climates where rain and snow is a regular occurrence
- Roofs are comprised of rafters/trusses, sheathing, underlayment, and roof covers. Each has its own function and is an essential part of keeping a roof healthy and maintained.
- Different materials and styles are better choices, depending on the climate
- New homeowners should make sure there is no mold, mildew, or water on the roof
- If the shingles are losing granules, that means that they must be replaced because those shingles protect the home from rain and snow. For more tips on when it’s time for a replacement roof, go here.
- Every new homeowner must know the exact age of their new home’s roof
Hiring a Roofer
When hiring a roofer you should consider a few key points that will ensure quality roofing for residential and commercial properties. Unfortunately, there are plenty of unethical roofing companies that make it difficult to decide what roofers are trustworthy and reliable. Since roof repairs or replacement services come at a premium price, it’s important to protect your investment and work with a reputable Colorado roofing company. There are two things you should consider:
- What to look for
- What to look out for
These tips will help you when it comes time to hiring a roofer. B & M Roofing provides quality customer care, expert guidance, and exceptional workmanship for Colorado commercial and residential properties. Contact us today for a FREE ESTIMATE.
Hiring a Roofer: Tips to Consider
Before you begin an existing or new roofing project, be sure that you’re considering a few key things prior to committing to a company’s services. Roof repairs and new replacements are required for buildings and homes, especially if you’re considering the value of your home or commercial property. Your roof serves to protect the structure and, thus, it’s essential that whoever is hired has the credentials and experience to provide quality work.
1. Make Sure The Roofer Has Insurance
While searching for a roofer, make sure to ask each roofer that you contact whether or not they have insurance. If they don’t have insurance, then you shouldn’t hire them.
Every roofing contractor should have workmans compensation and liability insurance. Workmans’ compensation protects you from any legal damages if one of the roofing employees gets injured. Liability insurance protects you from any of the damages caused to your home/business during the roofing process.
Without workman’s’ compensation, if a roofing employee gets injured, it’s likely that you’ll have to pay their medical bills. Without liability insurance, you’ll have to pay for the damages caused during the roofing process.
2. Find A Roofer That Offers A Good Warranty
Every roofer should offer a warranty of some sort. That way, if the roof falls apart before a certain period of time, the roofer will repair that roof at no extra cost to you. But, remember that this is a roofer warranty and not a materials warranty, so you may still have to pay for new materials.
Ideally, the warranty that the roofer offers will be at least one year. If it’s less than that, or if they don’t offer a warranty at all, then that’s a sign that the roofer doesn’t trust the quality of their work.
3. Read Through Testimonials
The roofer that you hire should have past customers who were happy with their work. That’s why it’s important to ask for testimonials from past customers. If the testimonials include phone numbers or email addresses, you should email those people and ask them what they thought about the roofers’ work.
By doing this, you’ll get a solid idea as to the overall quality of the roofers’ work. This makes it much easier to determine if that particular roofer is the right one to go with.
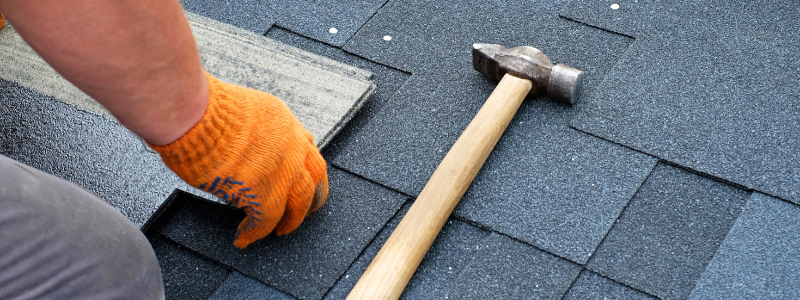
4. Find Pictures Of Previous Roofing Jobs
To get a solid idea as to what the roofers’ work looks like, you should ask for pictures and, if possible videos. By looking at these pictures, you’ll be able to see what your roof will look like – at least, in part – when it’s finished.
If you like what you see, that’s a good sign. But, if you don’t, then that roofer probably isn’t right for you.
5. Check The Materials The Roofer Offers
Before hiring a roofer, get a list of needed materials. They should provide a list of options, which you will be able to select your own preference. A good roofer will work with you directly on determining the roofing materials that are right for you. But, if a roofer is only offering one type of material, that usually means that they aren’t too interested in giving you the roof that you’re looking for.
When you are speaking with roofers, make sure that they offer a multitude of different choices for both the materials and the colors of those materials. It’s also worth asking about which materials the roofer is most familiar with.
6. Determine If The Roofer Uses Subcontractors Or Employees
When speaking with roofers, ask if the roofer hires employees or subcontractors. If a roofer hires subcontractors, ask if those subcontractors are insured.
It’s very important that the subcontractors who work for the roofer are all insured. If those subcontractors aren’t insured, then if an accident were to take place, it’s likely that you would be the one paying for that subcontractor’s medical bills.
7. Compare Prices Between Roofers
Know how to choose a roofer and gather quotes from multiple Colorado roofing companies. While speaking with different roofers and comparing their services, make sure to write out the price of each roofer’s service. By doing this, you’ll be able to obtain an understanding of what each roofer offers and how much those services cost. This makes it easier to find the roofer that is right for you.
Along with that, however, you’ll be able to notice any major variations, in price, between roofers. If you see that most roofers offer one particular price, and then another roofer offers a much lower price, that usually means the service is less than ideal.
8. Don’t Be Pressured Into Signing A Contract
When speaking with roofers, never be pressured into signing a roofing contract before you’ve made up your mind. This is especially important if your insurance company is in the process of estimating the damages.
Instead of pressuring you into signing a roofing contract, a good roofer will tell you all about their services, what they can do for you, give you testimonials, and allow you to then make the decision that’s right for you.
9. Make Sure The Roofer Is Good At Communicating With You
In a roofing project, communication is key. That’s why it’s absolutely vital that the roofer you hire is able to communicate with you on a frequent basis and that they work with you regarding the needs and specifications that you have for your roofing project.
When speaking to a roofer, take note of whether or not they answer all of your questions. Make sure that they’re honest and direct about what they offer and how they can help you. If you need help understanding something about the roofing process, ask them and make sure they can give you a straight-forward answer.
If that type of straight-forward and direct communication isn’t happening, then there’s a good chance that roofer isn’t the one for you
10. Check Their BBB Rating
The Better Business Bureau is a nonprofit organization that offers a website that allows you to search for any business. Make sure you go onto the Better Business Bureau’s website and look up the roofer that you’re thinking about hiring.
When you go onto that website, read the customer reviews and any other pertinent information. If their overall ratings are low, then that means their work wasn’t very good. But, along with that, if they don’t have a BBB page at all, that could mean that they don’t have very much experience.
Average Lifespan of a Roof
Selecting a roof for your residential or commercial property is a huge investment, not to mention, extremely important. After all, the roof you select can ultimately affect the overall health of the entire building or home. Additionally, the expense of roofing systems is usually at the forefront of property owners’ evaluation. Many questions may crop up such as: how much should I expect to pay? What is the process of a new roof installation? And above all, what is the average lifespan of a roof? Knowing this information ahead of time can give you an idea of what to expect and the steps to take to extend the average lifespan of a roof.
Learning maintenance tricks and reasons why certain roofs simply last longer may be helpful to the structural integrity of your business’ or homes’ roof. Learn about the average lifespan of a roof and follow these tips to extend its lifetime.
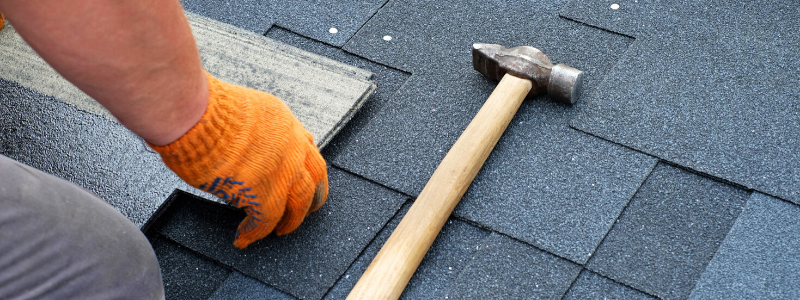
The typical lifespan of a roof
How long can you expect your roof to last? Why is it important? For one, making a proper investment in a roof can determine how frequently you replace it. Roofing systems, especially when it’s a new install, are not cheap. For this reason, it’s good to understand what questions to ask your roofing contractor to ensure the best possible product and service. Additionally, you’ll want to know the average lifespan of a roof.
Roofing systems are built differently, depending on the types and needs of a property. For example, there are several different kinds of roofs, such as:
- Slate
- Tile
- Shingles/Composition — architectural, asphalt, wood shake
Due to the variety of selections, there isn’t a really set answer to the average lifespan of a roof. Rather, it depends highly on two very important factors, including:
- Materials Used
- Workmanship
These two factors are a true testament to ensuring that homeowners and property managers can get the most out of their roofing investment. To some degree, weather can also determine how often you have to repair and/or replace a roof. Colorado, for example, is known to experience frequent hail storms — which means that considering metal roofs, which are more durable, might be a safer option.
In general, though, the average lifespan of a roof usually falls into these timeframes:
Asphalt shingles
One of the most common types of roofing material sold through the US are the affordable asphalt shingles. They average $70 to $150 per square and include warranties of up to 25 years. They’re usually comprised of organic materials and cement fibers. They can provide protection against UV rays, wind, and rain. That said, they typically last between 15 and 30 years depending on maintenance and upkeep.
Architectural Shingles
Much like asphalt shingles, architectural shingles are made up of similar organic materials and cement fibers. However, these more “premium” options can be made up to three times thicker for a more resilient roof. They also come at a higher cost between $250 and $400 per square. Typically, the average lifespan on these roofs are 25 to 30 years.
Wood Shingles
Also known as wood shakes, this material is beautiful, not to mention functional. Cedar is the most common type of wood shingle and is ideal for cottage owners and wood cabin enthusiasts. They’re resistant to insects and bugs, but they require annual upkeep. These materials can last up to 50 years in the right regions, but probably aren’t functional for Colorado properties. Due to inclement weather, wood shingles often don’t fare well in this area.
Tile Roofs
Tile can come ready with clay or slate. Clay tile tends to be the cheaper of the two at $600 to $800 per square. They are low maintenance and can easily last up to 50 years, with a manufacturers warranty from 30 years to a lifetime. However, again, they may not do well with ongoing hail storms.
Slate, on the other hand, is a natural stone with fine grain appearances. It is the pricier option in tiled roofs ranging from $600 to $1,500 per square. On the plus side, slate is incredibly durable and can withstand most ominous weather patterns. Slate is, also, one of the few roofing options that doesn’t necessarily require replacement in the span of a lifetime. However, homeowners or property owners must not forego routine maintenance. It’s important to clean and restore cracked or broken areas.
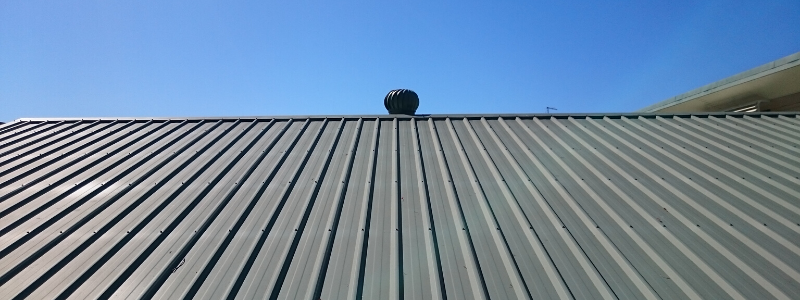
Metal Roofs
Higher-end metal roofs are attractive and incredibly durable. Standing-seam panels in aluminum or steel can cost around $115 per square and $900 per square for stone-coated steel or standing-seam copper panels. Metal roofs also feature different levels of thickness, with the most-thick being the most durable. On the thinner end, expect the average lifespan of a roof to be between 20 to 25 years. Higher quality, thicker metal roofs can range 20 years to a lifetime.
Extend the Average Lifespan of a Roof
As with most things, you can work to ensure you’re getting the most out of your roofing investment. Be sure to ask your Colorado roofing contractors what they recommend with respect to the materials you’ve selected. An experienced Colorado commercial or residential roofer will be able to explain the importance of maintenance the steps needed to continue enjoying your beautiful roof for years to come.
That said, here are some general tips to consider in order to extend your roof’s life.
Maintenance is a Must
Extending the lifespan of your residential or commercial roof starts with maintenance. Just as you keep up with regular maintenance on your car, you need to keep up with proper maintenance for your property.
Schedule regular roof inspections to identify any weak areas or damaged shingles and flashing. Take care of repairs as soon as possible to ensure that the damage doesn’t worsen. If properly maintained, your commercial roof can last well beyond the specified warranty period.
Communicate
Develop a relationship with your contractor and establish open lines of communication on both ends. Contact your contractor immediately to take care of repairs and let them know exactly what you need and when you need it done by. Good roofing contractors should let you know exactly what to expect, including the project timeline and budget. Transparency is key here.
Ask Questions
Your roof is one of if not the most important element of your commercial building, therefore it’s important to get very familiar with your roof and develop trust with your contractor. Be sure to ask as many questions as possible until you feel comfortable with the direction of your contractor’s plan.
Understand Your Warranty
Get your manufacturer warranty in writing and be sure you understand what the warranty covers when your new roof is installed. Roof warranties can cover anything from the materials themselves to workmanship so speak with your contractor and the roof manufacturer to understand exactly what your warranty covers so there are no surprises down the road. You should also keep a detailed record of all inspections and repairs.
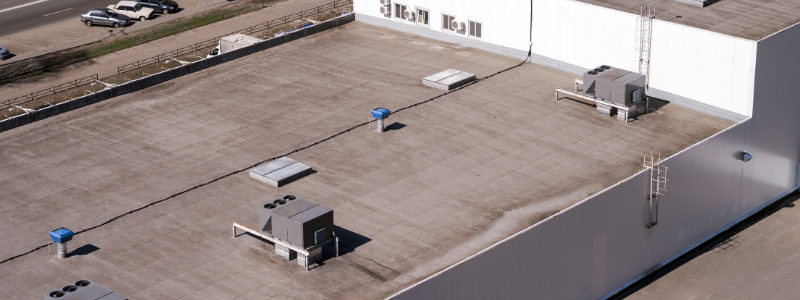
Know When to Repair or Replace
Deciding whether you should repair or replace your roof after structural damage is a huge decision. There are many factors to take into consideration when deciding whether to repair or replace including the extent of the damage, how it affects the entire building and how long you plan on owning the building.
Roof restoration is also a viable option following commercial roof damage. Restoration allows you to extend the lifespan and increase the value of your existing roof when it is in fairly good shape. An added benefit of restoration is that you may be able to reap tax benefits and other cost savings.
Speak with your contractor when making this decision to develop a customized plan that suits your commercial building.
Work with the Pros
Choosing the right contractor for your roof is integral to the life expectancy of your roof. Your commercial roofer should:
- Have written documentation stating that they are approved contractors to install the manufacturer’s roofing system
- Be in good standing with the top commercial roofing manufacturers
- Be someone you can trust and develop a relationship with over a long period of time
To find out more about selecting a commercial roofer, fill out a free estimate form here and a member of our team will be in touch.
When to Get a Commercial Roof Inspection
Protecting a commercial roof ensures longevity and health for all buildings. For businesses, in specific, it also helps to protect business owners from liability and it allows the business to operate efficiently and effectively without setbacks or interruption. For this reason, it’s usually a good idea to have a commercial roof routinely assessed or evaluated to ensure there are no needed repairs or replacements. By having your commercial roof inspected regularly, you’ll always be up-to-date on the current status of the roof. In addition, Colorado commercial roofs are especially vulnerable to the elements given the wide range of storms and weather patterns that change frequently. Always take preventive measures to reduce costs and the need for commercial roof replacements.
That said, if you’re looking for a commercial roof repair or replacement, roofing projects typically begin with a thorough inspection, as well. So you may be thinking, okay, when is the best time to get a commercial roof inspection complete. B & M Colorado commercial roofing experts are answering that question below.
For a free commercial roof inspection schedule it directly with our professional, reliable Colorado roofers at (303) 443-5843 today.
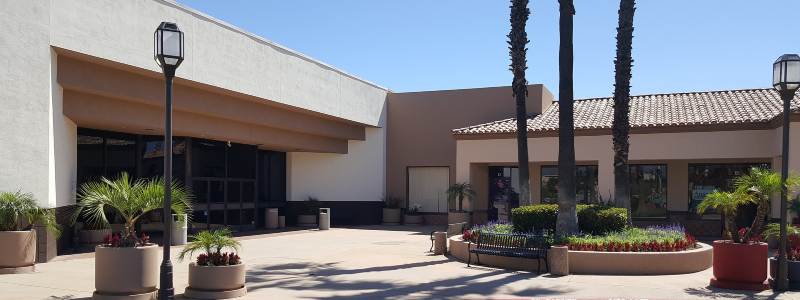
Commercial roof functionality
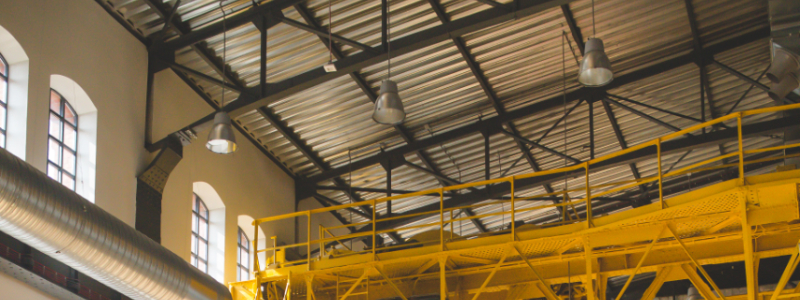
A commercial roof is a roof that is designed to shield a commercial property from the elements. Most commercial roofs are flat, and they are designed for practicality and durability, rather than aesthetics. Since most commercial roofs are flat, they give the owner of the commercial property more space to work with, for things like storage and setting up maintenance systems for the property.
In essence, a commercial roof is a roof that is designed to shield a commercial property from the elements. Some of the most common types of commercial property are properties such as retail stores, office buildings, and apartments. Each one of those commercial properties requires a roof that is durable and functional, so that it can protect the interior of the property from things like snow and rain.
Most commercial roofs are flat, which is unlike the majority of residential roofs. More often than not, flat roofs are stronger than sloped roofs, which makes them better for protecting valuable commercial property. Along with that, however, is the fact that flat roofs give the owner of the commercial property more space to work with. The space on the roof can be used for storage, for example, while also serving as an easy place for things like drainage and HVAC systems to be set up.
Why commercial roof inspections are needed
Having a commercial roof inspected regularly is very important, as it ensures that you are aware of the current status of your commercial roof and whether any work is needed. After all, repairs are significantly cheaper than full roof replacements. As with most things, it’s important that you prepare for routine maintenance and take preventive measures to proof a commercial roof for seasonal storms and possible issues.
During a commercial roof inspection, the individual facets that comprise your commercial roof – such as the material of the roof, the drainage system, whether the roof has shifted or not – will be inspected and analyzed. From that, the inspector will determine the current status of your commercial roof, whether or not any damages have taken place, and whether it’s best to repair or replace the commercial roof.
Protect your commercial roof
Commercial roofs are important because they protect a commercial property – a big-box store, for example – from the elements. But, just like all roofs, there are times when commercial roofs suffer from damages and need to be repaired. In order for you to be aware of how your commercial roof is holding up, it must be inspected.
For any commercial property, a commercial roof is very important because it protects that property from things like snow and rain. Without a good commercial roof, the entirety of the commercial property is far more susceptible to the elements, which could easily lead to a significant loss in both the value of the property itself, as well as what’s contained within the property.
Since commercial properties contain so much value – and are valuable in of themselves – it’s important that the commercial roof the property relies on is inspected. These commercial roof inspections will allow the commercial property owner to know the current state of their commercial roof, and how everything is holding up. From this, the property owner can then choose to repair certain elements of the commercial roof or to replace it altogether.
However, if the commercial roof is rarely inspected, it’s far more likely that a variety of damages will pop up. And, it’s likely that these damages will go unnoticed for a long period of time, which can easily lead to a series of problems that affect not just the commercial roof, but the entirety of the property and what’s stored in the property.
- Commercial roofs protect the entirety of a commercial property, and what’s inside of that property
- Since commercial properties are so valuable, it’s important that the commercial roof protecting the property is inspected regularly
- Inspections will reveal the current state of the roof, whether or not there are any damages and any problems that need to be dealt with
- Without regular inspection, those problems will go unnoticed and become far more troublesome to deal with as time passes

When Should You Get A Commercial Roof Inspection?
In a single yearly period, you should have your commercial roof inspected twice. Each inspection will reveal the current state of the commercial roof, as well as whether any repairs – or even a replacement – is needed. But, by only getting an inspection once-a-year, it’s far more likely that the commercial roof will have problems that you were unaware of, and that these problems could’ve been treated if you were aware of them earlier.
Every year, you should have your commercial roof inspected at least twice. Each one of those inspections will reveal the state of the commercial roof, and whether or not any repairs are needed.
If a commercial roof goes a long time – more than one year, for example – before being inspected, it’s far more likely that various damages will pile up. Taking care of these damages will be far more costly than if they had been noticed, and dealt with, earlier.
Sometimes, you’ll need to have your commercial roof inspected, even if the last inspection wasn’t that long ago. These are times when you notice things like the roof leaking, parts of the roof falling apart, or rust. If you encounter those things – or something similar to that – on your commercial roof, then it’s important that you have the roof inspected as soon as possible.
B & M Roofing offers a Commercial Roof Inspection service that will determine the current state of your commercial roof, and whether anything needs to be repaired or replaced.
-
- Ideally, you’ll have your commercial roof inspected, at the very least, twice-a-year
- If a commercial roof goes too long without being inspected, it’s far more likely that the roof will succumb to various damages that will cost a lot of money to fix
- Sometimes you should have your commercial roof inspected, even if you already had it inspected recently
- These are times when the roof leaks, parts of the roof are falling apart, or rust is forming on the metal components of the roof
- B&M Roofing offers a Commercial Roof Inspection service that will help you determine the current state of your roof, and what needs to be done
B&M Hail Damage Inspection Checklist
As we approach the end of winter and as we get closer to prime hail season (March through June), you’re probably wondering what the spring and summer weather will do to your roof. Spring and summer in Colorado bring beautiful colors and temperatures, but with them come severe thunderstorms that are capable of causing significant damage to your home and roof.
Colorado Hail Damage
When we get hail in Colorado, it hits hard and fast, leaving its mark on your roof that can be difficult to see. The type of hail that will fall differs from region to region, affecting our service areas. Depending on the size, shape, and hardness of the hail, damage can come in the form of small indents or actual tears in your roof. If you live in Colorado, chances are you’ll see some sizable hail this spring, which is where it comes in handy to know how to spot damage, so proper roof repairs may be done.
If you know your roof really can’t take another storm season, take a look at our hail damage inspection checklist that walks you through what you need to know and do to ensure your roof replacement goes smoothly. No matter the amount of damage, B&M Roofing can help give estimates on repairs and/or even roof replacement.
Usually, you can’t spot hail damage from the ground because of the small indents it creates on shingles. After the storm, you may see obvious damage to things such as your car or home siding so it is safe to assume the storm also affected your roof. Because the damage from hail is often invisible from the ground, it’s important to have an experienced, professional inspector and insurance claim specialist check your roof as soon as possible.
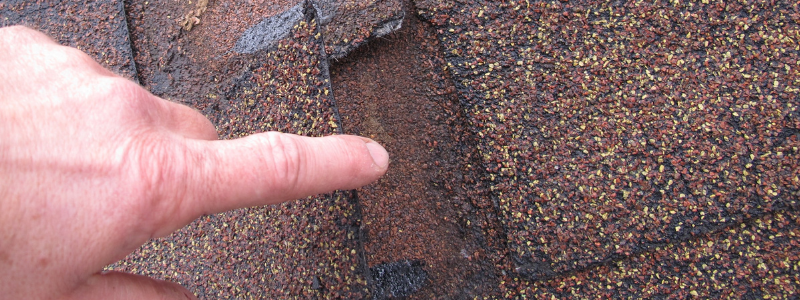
Until then, here is a quick guide on what to do when a hailstorm hits:
Hail Damage Inspection Checklist
Hail damage can sometimes be hard to spot. However, even hail damage that may seem insignificant can prove to be costly. Staying proactive by properly inspecting your roof will help you minimize damage and repair costs.
Assess your roof for storm damage
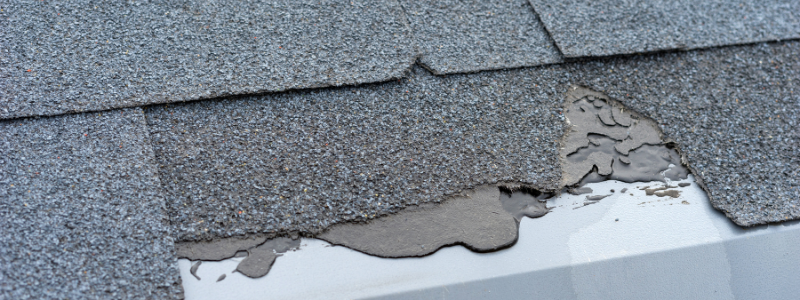
We do NOT advise climbing up on your roof to do this. Instead, walk around the perimeter of your home and photograph any visible damage. Fairly obvious signs of damage may include dented, discolored, torn, curled, or missing shingles. Given you have 2nd-floor windows that overlook the lower part of the roof, this may be a good vantage point to estimate the amount of hail damage, as you can see flashing and gutters from above instead of below.
Look for leaks & water spots in your attic and ceilings
Roof damage can be deceiving. Even if your roof looks undamaged from the outside, wind and hail may have caused significant leaks internally. Be sure to check your ceilings and light fixtures for signs of water damage. Inspect your attic closely with a flashlight to really get a sense of any hidden damage.
Check your gutters and windows
While your roof shingles may look fully intact, look for dented gutters and downspouts. Dents in other areas, like gutters and roof vents, may point to hidden and serious damage on your rooftop, as well. Do not forget to inspect windows for cracks, loose weatherstripping, and torn screens.
Inspect the area around your home
While some things may be obvious, like fallen tree limbs or broken fences, total damage may be hidden. Assess any damage to lawn furniture and exterior decorations. Check all flat surfaces such as patios and decks for additional signs of hail damage. Another good sign that you may have hail damage on your roof is by checking for damage on other things around the perimeter of your home, like umbrellas, tables, and even your air conditioner. Any dents or hail splatter can mean your roof may also have damage.
Call your insurance company
Refer to your notes, report a claim with your insurance company, and arrange for a more detailed inspection. Remember to save a copy of each picture you take for reference or in case you ever have a problem with the claim (we can help with that, too).
Remember, after a storm, there will likely be a number of roofing contractors and storm chasers competing for your attention. To REALLY be prepared for hail damage, get to know roofers around town and which roofers your neighbors are using. Finding a contractor you trust is a crucial aspect of a smooth roof repair or replacement.
If you need an expert to come and further inspect your roof for hail damage, call B&M Roofing and we’ll inspect your roof. No matter the amount of damage, B&M Roofing can help give estimates on repairs and/or even roof replacement. At B&M Roofing, we come equipped with extensive knowledge and comprehensive industry experience. With more than 60 years of experience, we’re not here to scam you; we’re here to make sure your roof is safe and sturdy.
For more information on B&M Roofing or to simply get to know us before hail season hits, give us a call at 303-443-5843.
Commercial Roof Replacement
What is involved in a commercial roof replacement? For commercial businesses, it’s important to know what to expect. For one, there are a number of items that should first be accounted for. For example, an experienced Colorado commercial roofing company should conduct a thorough roof inspection to determine if a roof replacement is viable. Selecting a competent, licensed roof replacement specialist can determine existing damages and to what extent. Roofing experts, like those at B&M Roofing, will guide you through the process and help you formulate a sound decision for your commercial roof replacement.
Below we’re outlining a few important details in this process. In addition, we’ll review what you should prepare for in terms of expected job completion and how to prepare your commercial space for the construction.
Evaluating Commercial Roofing Needs
Ideally, the roof of your business should be checked by qualified roof repair professionals twice a year in the fall and spring. If you have a severe weather event like ice, hail, heavy rains or high winds, your roof should be checked more frequently as it can pose issues and even be hazardous for your commercial business.
The material of which your roof is made is also a factor. Some roofing materials are not as sturdy as others. For example, roofs made of so composite shingles, asphalt shingles, and wooden shingles might need to be inspected only every three years. Tile roofs may need an inspection only every five years. Typically, sheet metal roofs are the most durable and can save on upkeep and maintenance costs. B&M Roofing offers expert architectural metal roofing for commercial businesses.
In terms of evaluating your commercial roofing needs, be sure to contact experts that can conduct a thorough review of the current state of a commercial roof. While you can do spot checks yourself, it is often better and safer to have a professional check it. Roofing professionals have the tools and knowledge to do this safely and competently. You might miss important signs of roof wear that can be costly in the long-run. Additionally, you could also fall and seriously injure yourself.

Is it time for a Commercial Roof Replacement?
Of course, it is always better to have a professional roofing inspection done. But, you can check your roof for indicators of a need for repair yourself by asking these questions:
1. How Old is the Roof?
This is a good place to start. Roofing specialists recommend replacing roofing that is over fifteen years old. A roof may last about twenty years. This varies with the material used. According to research reported in US News, asphalt shingles don’t last more than ten years while wood shingles may last a quarter-century.
2. Are there Buckled and/or Curled Shingles?
The shingles on your commercial building should be flat on the roof. Have them inspected for curling, buckling, or damage. Be sure to have gutters and downspouts checked for shingle granules. These indicate that your roof is shedding.
3. Are the Roof Valleys Rusted?
Those V-shaped metal channels in the “folds” of your roof are roof valleys. They help precipitation go off the roof into the gutter. If these get rusted, your roof may leak.
4. Is the Roof Missing Shingles or Tiles?
Have a roofing specialist check for missing shingles, tiles, or shakes.
5. Are there Gaps in the Chimney Flashing?
The flashing around vents, chimneys, or keep these areas from leaking. It’s vital that they are not cracked or broken. Metal flashing usually lasts longer.
6. Can I See Daylight through the Roof Boards?
Look in your attic. Check the roof. Look for daylight through the roof boards.
7. Do I Notice Sagging and Moss on the Roof?
Look for signs of sagging and/or moss. This indicates moisture. Look at the insulation in the attic for moisture. Sags in the roof indicate roof rot.
For more information about qualified roof checks, be sure to check out this resource from Modernize.

When is it Better to Repair a Roof?
According to builder Bob Villa, there are signs that help you decide when it is better to repair than replace the roof of your business.
It is relatively inexpensive to repair your roof by replacing only the shingles that were damaged by wind, sun, snow, ice, hail, tree branches or other events. If some shingles are torn or damaged, these can quickly be replaced making roof repairs easy and cheap. Damage doesn’t always mean complete roof replacement on your commercial property is called for.
However, Bob Villa points out, if your roof isn’t fairly new, expect to be patching frequently. In a case like that, replacement might have been a better plan.
If you plan to sell your business in the next few years, it is often better to repair. The trick is to make sure the shingles match. For curb appeal, badly mismatched shingles do not impress clients or potential buyers. In such cases, whole roof replacements may be warranted.
There is a third option, Bob Villa notes, you could choose to do partial roofing done. However, you need to know that often partial roof replacement is costlier per square foot than whole roof replacement. The tipping point seems to be areas greater than 10 feet by 10 feet.
Another consideration is the number of previous shingle layers that already exist. If there are two or more layers, roofers often recommend a full roof replacement. The increased cost of labor and disposal often makes a partial roof replacement less appealing and less cost-effective than a full roof replacement.
Aesthetically, partial roof replacements are also risky. You may end up with uneven shingles and/or a noticeable hump.
Commercial Roofing Experts Provide Better Results
When you have a professional roofing crew already on-site with their scaffolding, ladders, and other roofing equipment it is also best to give serious attention to replacing the entire roof.
Another consideration when deciding between repair and replacement is your business’ susceptibility to future severe weather events. Is a full roof replacement going to be sturdier for other hurricanes, torrential rains, hail, snow, ice, or high winds?
Roofing specialists know that they should use more durable shingles. They are aware that there is now better adhesive than those used in previous roof installations often had. They know six nails per shingle is better than four. They also use sturdier roofing nails than previous jobs even had available back then.
Due to severe weather events, rules have changed. The International Residential Code is a body aimed at meeting home and commercial building owners’ needs through regulations that ensure public health and safety. The ICC states that roof repair services cannot replace a roof over two or more roof coverings regardless of the type of roof covering.
If you decide to replace the entire roof, it gives you a valuable chance to take a look at the condition of your roof. You can have roofing specialists check for wood rot. They can also check the sheathing fasteners. Making necessary repairs and/or adding fasteners to sheathing can help avoid the serious losses caused when sheathing blows off the roof. These repairs also keep rain from getting into your building and causing dramatic and costly damage to the interior.
Expectations during Roof Replacement
Depending on the size of your building and the size of the roofing crew, your company is looking at one or two weeks of workplace disruption. Your roofing specialist will give you an accurate timeframe for the job. It will take the company up to a week to order materials and get work equipment set up at your site. The contractor may also have other jobs ahead of yours. Again, the roofing specialist can give you an accurate assessment.
First, the roofing company will remove and dispose of the current shingles. Things will be a little noisy and messy during this period of a day or more but contractors will have a dumpster and haul-away plans in place.
While the new roof is being installed, there will be noise. However, your business should not be disrupted during the roof replacement. Think of employee incentives like a free lunch or treats during the installation to thank them for overlooking the distraction.
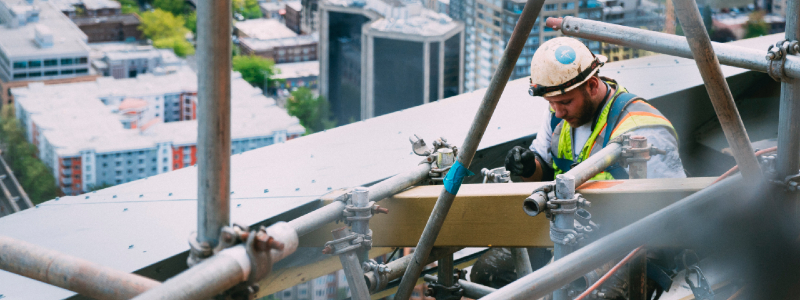
Why Choose B&M Roofing?
When you are looking for a qualified and competent roofing specialist, the best guarantee of good service is customer satisfaction. Ask trusted friends, relatives, co-workers, and neighbors about their roof repair or replacement. Check out the testimonials on our website. We’ll be happy to put you in touch with our clients.
Of course, a full roof replacement is a big-ticket item. However, if it is properly installed by competent roofing specialists like B&M Roofing, it will last your company for decades. With something as vital as the roof you’re your head, it is important to get the job done right.
For more information about our company’s guarantee and to schedule a free roof inspection and estimate, contact us for a free commercial roof inspection by calling (303) 443-5843.
Do I Need to Replace Roof after Hail?
Hail storms, unfortunately, have become all too frequent in the Colorado region. In fact, Colorado has seen some of the most costly damages resulting directly from extreme hail storms. In August 2019, Colorado had the second-highest number of hail claims in the United States. So what should you know about hail in this region?
First, hail season in the Centennial state is considered to be from mid-April through mid-September. Your home is susceptible to damage during hail season and it’s important to know and understand repairs and replacements for roofs. The first question many homeowners should ask the experienced Colorado roofers at B&M Roofing is, do I need to replace roof after hail? The answer varies depending on the severity of the damage, but here are some key points to remember.
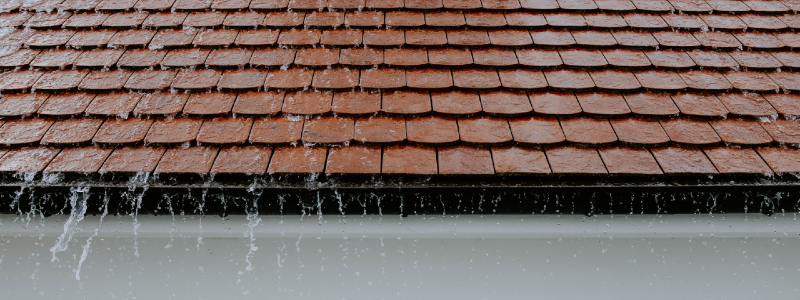
Dangers of Hail
Hail develops when the updraft from a wind carries rain into higher layers of the atmosphere, freezing the rain to create hailstones. Hailstorms negatively impact a number of local areas. It is catastrophic for a number of reasons, but mainly:
- – Hailstorms and the powerful winds that most often accompany them can also destroy crops. During hailstorms, farmers suffer losses that can wipe out their entire crop.
- – Hailstorms pose a high risk for airplanes. Aircraft can be seriously jeopardized if they are caught in the middle of a hailstorm. Planes can also be damaged when they are trying to land or take off in a hailstorm. In 2018 a Mexican airplane crashed when attempting to take off.
- – Hail can be catastrophic for land driving too. Hail can shatter windshields. Reduced visibility can cause roads to become hard to navigate. Hailstones make roads slippery and dangerous to drive on.
- – Hail can be dangerous. Larger hailstones—some as large as golf balls—destroy homes, especially since roofs are unprotected and bear the brunt of the impact.
- – Enormous hailstones can cause fatal head injuries and life-threatening concussions.
In 2014, America experienced the largest insured loss event when hailstorms hammered an area from Colorado to Pennsylvania in mid-May. The result was insured losses of almost three billion dollars. Homeowners were quick to file insurance claims and request inspections for hail damage. Unfortunately, there were long wait times given the influx of homeowner needs. For this reason, it’s important to know – do I need to replace roof after hail?
Hail Storms in Colorado
As we mentioned, Colorado’s hail season extends from mid-April to mid-September. The peak season is May, June and July.
Much of the area northeast of Boulder is open farms and ranches. Cumulonimbus clouds gather over the Rocky Mountains. They bring with them the potential for destruction: lightning, rain, tornados, and hail.
Colorado is especially prone to hail destruction. The state’s position is directly in what weather forecasters call Hail Alley. The state is also a mile closer to those dangerous slate-grey clouds than states like Florida.
Nationally, the annual hail damage is over $10 billion. Not surprising, Colorado is the number two state for hail insurance claims just behind Texas. Hail damages paid out by insurance companies continues to grow.
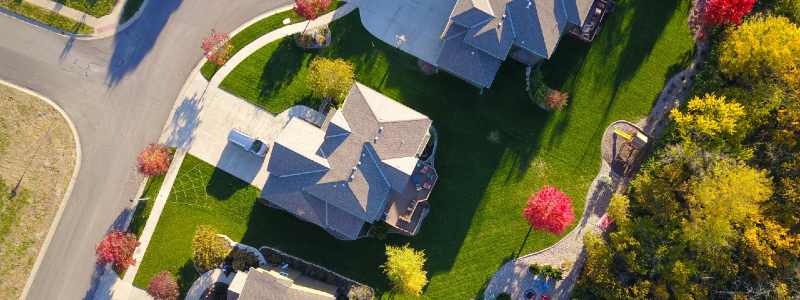
How Hail Impacts the Health of Your Home
Hailstorms are one of the most destructive forces in nature. They fall from great heights, traveling at high speeds.
Severe hailstorms can lead to huge losses to homes and vehicles. Hailstones easily penetrate glass roofs and skylights. Metal roofs are less likely to be compromised by hailstones. However, dents to roofs and automobile surfaces often require repair or replacement.
Hail, water, snow, and ice can all cause major damage to homes and commercial buildings. Due to the intensity of these storms, roofs can leak. This can lead to flooded basements, moldy attics, and collapsing ceilings. High winds that accompany hailstorms can shatter windows, blowing debris around to crash into windows and siding. Metal roof pieces can be ripped off.
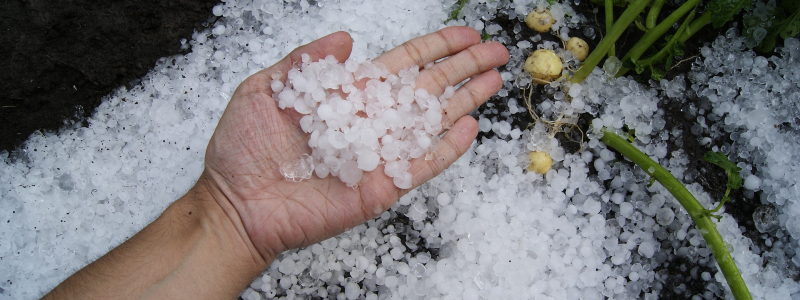
The Process of Inspecting Buildings for Hail Damage
The damage from hailstorms needs to be assessed by an experienced Colorado roofing company. This specialist will look at several aspects of hail damage to your home’s roof.
Roof storm damage is all too common during a hail storm. During the initial inspection, a Colorado roofer at B&M Roofing will look for cracks, splinters, dents, dings, etc. On the more extreme side, they may evaluate holes/punctures, rips, and overall lasting impact on your home. On your roof, they look for things that are present or potential problem leaks down the road. It is crucial that the roof of your home be in good shape. After all, your roof protects the interior of your home.
Hail damage must be assessed or inspected before your insurance company will cover the damage. Before repairs are approved, you will need to get an assessment and an estimate from a Colorado roofing company that specializes in hail damage. They will be able to answer, do I need to replace roof after hail?
Before you contact a roofing specialist, here are some areas to look at:
Metal Roof Damage
Metal roofs are structurally the toughest material to protect your home or business against hail storms. However, metal roofs are not immune to issues caused by sizable hail. Denting on metal roofs may force their replacement if there’s a concern for cracking either immediately or with time. Cracking will eventually lead to leaks and, consequently, more damage to your home. During a check of your metal roof, be sure to inspect the vents, flashing, and metal valleys for dents or ensure that your hired professional metal roofer is paying strict attention to these details. Also, pay special attention to areas constructed of soft metal. Look for evidence of hail damage.
Asphalt and Composition Shingles Hail Damage
Climb to the top of the roof or have a damage specialist do this. Look at the ridge cap for signs of hail damage. For asphalt and composition shingles, hail damage will almost always be evident. Be sure to identify any of the below:
- – Random damage with no discernable pattern.
- – Hail hits that are black in color.
- – Loss of granules, which may expose the roof felt.
- – Asphalt and/or mat that appears shiny.
- – Hail hits that are soft to the touch, like the bruise on an apple.
Other Types of Roofs
There are a variety of roofs and all of them are susceptible to some degree of damage, some more than others. A trust roofing company like B&M Roofing can help you understand how hail damage has impacted your home both short-term and long-term. Contact us for a free inspection or estimate if your home has been damaged by a common occurring hail storm.
Types of Hail Damage
- – Hail causes three types of roof damage: bruising, cracking, and missing granules on the surface of asphalt shingles.
- – Large hailstones can cause cracks on the shingles.
- – Missing pieces on asphalt shingles can be the result of hail damage.
- – Bruising of shingles is harder to see. Finding bruising requires that you feel for small dents. The areas of these small dents will eventually break down.
Other Hail Damage Areas
Inspect other areas including gutters, downspouts, HVAC units, and decks.
Gutters that are dented, dinged, or cracked may need to be replaced. Otherwise, blockages may cause water to seep into the foundation.
Siding and windows can also be damaged by hail. Look for dents and dings. Check for damage to soffits and flashing.
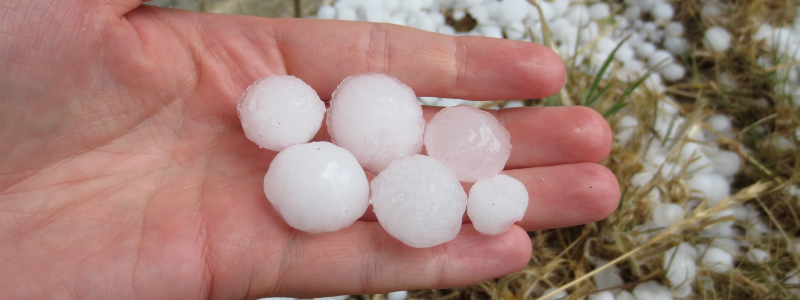
Do I Need to Replace Roof after Hail?
If they are not replaced or repaired, roofs, soffits, gutters, and roof caps can result in severe damage to the interior of your home from water damage, mold growth, and broken windows. If not addressed immediately the damage can spread rapidly. Never ignore potential damage from hail. If a hailstorm has passed through your area, always assume it has done damage to your home until a storm damage specialist has assessed the damage.
When it comes to restoring properties from storm damage, make sure you choose a professional who specializes in roof repair and roof restoration. Look for a roof repair or restoration specialist who has both experience and excellent references. The roof of your house is its first defense against internal damage. It never pays to ignore hail damage or assume there was none simply because your untrained eye did not note any. Whether your structure needs a few repairs or major reconstruction, a knowledgeable, experienced roof repair and restoration specialist can bring your roof back to top condition.
If you are unsure about the condition of your home after a hailstorm, it is wise to contact an experienced Colorado roofing company for a Denver roof inspection. B & M Roofing will provide a free inspection and estimate to replace your roof.
Cleaning Leaves from Rain Gutters Safely
Cleaning leaves from rain gutters is the single most important task you can undertake to preserve your roof. Inspections and clearing of gutters should happen each spring and autumn which can be costly and inefficient for a time-sensitive project.
There are plenty of safe ways to clean your rain gutters on your own. But only take on this task if you feel comfortable working from a high ladder on your roof. Be sure to follow our ladder safety tips whenever you’re getting on your roof.
How to Clean Your Gutters
-
Blow Out Debris with Leaf Blower:
If you use this method to rid some of the debris, make sure to wear goggles, dust mask and gloves for protection.
-
Scoop Out Loose Debris:
Use a narrow garden trowel or gutter scoop to scoop debris into a plastic bucket.
-
Flush Gutters with a Hose:
This can sometimes be the messy part of the job, but the most effective when gutters are full of leaves, mud and debris.
-
Clear Obstructions in Downspout:
If water doesn’t drain after flushing, use a plumber’s auger to free debris from the downspout and pull out the bottom or through from the top.
-
Check Downspout:
Always check for rust, flaking or peeling paint, plus leaks, and make sure the downspout is tightly against the fascia boards.
-
Inspect Fascia Boards:
Check all fascia boards for dry rot or other damages.
Why is it important to clean gutters? Gutters are just as much part of your home as your foundation. They protect the flow of rainwater into your roof, walls, foundation and landscape. When neglected, uncluttered gutters can cause a leaky roof or water damage to the interior or exterior of your home.
Remember, safety is always of paramount importance. If you don’t feel comfortable on a ladder or on your roof, call a contractor for cleaning leaves out of rain gutters.
10 Roof Maintenance Tips for Fall
As we roll into autumn, the clear skies of summer are waning and thunderstorms and snow will be making their way to Colorado. Roof maintenance is often neglected during this time of year, but seemingly small problems can turn into costly repairs down the line. Taking the time to inspect your roof now will save you some cash and a headache in the future.
Here are our top 10 roof maintenance tips for fall.
- 1. Look out for leaks
- If you see signs of leaking, mold, or dampness in your attic, call a professional ASAP. Catching a leak early will only cost you a few bucks to fix, but the worse it gets, the more expensive it will be to repair.
- 2. Get rid of debris
- Excess debris can damage shingles, allow algae to grow and clog your gutters. To prevent this, make sure to sweep off sticks and leaves from your roof whenever you’re cleaning your gutters.
- 3. Don’t let the snow pile up
- Colorado has been known to see it’s first snow as early as October. When the first snowstorm hits, take a shovel or rake and gently pull snow off the roof to avoid it from collapsing.
- 4. Manage the moss
- Routinely checking for signs of fungus and algae. Fungus and algae create moss, which can retain moisture and freeze, causing damage to your shingles. If you do happen to find moss, invest in some zinc or lead control strips to get rid of it.
- 5. Trim the trees
- Long branches can scratch or even remove roofing materials. Removing branches that are getting close to your roof can save you a ton in the long-run.
- 6. Inspect your shingles
- After hailstorms, make sure to check for curling or loose shingles and for damaged flashing. These things can get worse over time, so catching them early will help your roof last as long as possible
- 7. Never power wash
- When you see fungus or debris on the roof, you may get the urge to power wash it all off. Don’t do that. Power washing can push water under your shingles and weaken the roof’s structure. Carefully removing debris and fungus with a broom or rake is the best way to go.
- 8. Clean your gutters
- Fall is one of the worst times of the year for your gutters. The leaves will fall from your trees and accumulate in your gutters, leading to clogs. Cleaning these leaves out will prevent damage by allowing rain to drain properly off your roof.
- 9. Watch for pests
- Termites, rats, squirrels, and other pests can cause serious damage to your roof. If you see signs of small animals or pests try to remove them immediately.
- 10. Install insulation
- Insulation not only keeps your house warm during the cold months of fall, but it can also prevent your roof from warping. It prevents snow from refreezing and causing water damage to your roof. If you don’t already have attic insulation, invest in some as soon as possible.
Consider these maintenance tips to save time and money on your roof this fall. Contact us with any questions you have!
