Roof Pitch Examples
The roof pitch of your home decides its lifespan, cost, and appearance. In Colorado, keeping your home safe from water, ice and snow is essential.
“Roof pitch” is sometimes referred to as “roof slope.” The term refers to the steepness of a roof measured as a rise in inches for every horizontal foot of length. An example is a 6/12 roof with a vertical height of six inches per horizontal foot. In this article, we will give you roof pitch examples and information for you to consider when making repairs.
What Are The Most Common Types of Roof Pitch?
Different structures come with different types of roof pitch. It can never be assumed that the pitch of one home or business will work on all buildings. The pitch will also determine which materials can be withstood by the structure. Roofs with higher pitches work best with shingles, tiles, shakes, asphalt, or wood, while low-slope roofs allow for roll roofing with exposed nails. The following are the most common types of roof pitch examples:
Residential
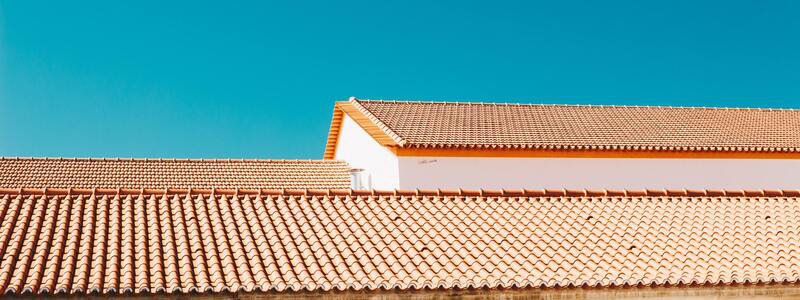
Residential roofs usually have conventional sloped roofs, meaning the roof has a pitch between 4/12 and 9/12 on most homes. Roofs that have angles exceeding 9/12 are considered steep slope roofs.
Commercial and Industrial
Commercial buildings will typically have low slope roofs. These roofs have pitches between 2/12 and 4/12. Flat roofs have a low rise, most commonly found in industrial facilities such as factories and warehouses. Although, the minimum slope of a roof must be at least ¼” to ensure proper drainage.
Different Examples of a Pitch Roof
Roof pitches boil down to the architecture of the building and what it’s being used for. Typically, hip and gable roofs are most popular in homes and residential structures, whereas flat roofs are seen in commercial and residential buildings. Here are some roof pitch examples:
Hip Roof
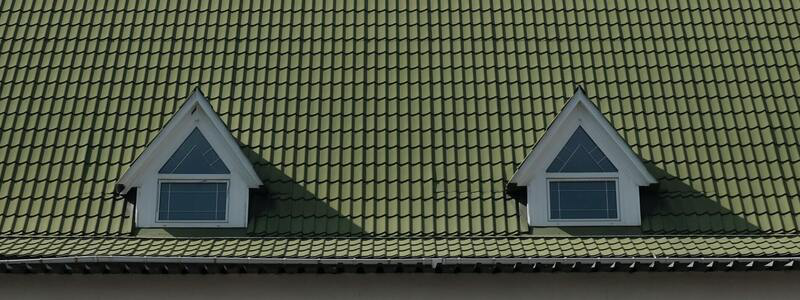
A gable roof consists of two faces whose upper horizontal edges meet to form a triangular-shaped ridge. This is the most common type of roof used in residential areas, which makes for exceptional water drainage, reducing the risk of water buildup.
Gable Roof
Hip roofs are pitched roofs with more than two surfaces. Hips are the term that refers to the outer angles two tops create, which are usually more than 180 degrees. This roof pitch has all sides sloping downwards, meaning a hip roof has no gables.
Mansard Roof
Mansard roofs are commonly seen in French architecture and contain unique design elements such as windows and attics. Every four sides of a mansard roof have two pitches. Typically, the lower pitches are steeper than the upper pitches.
Flat roof
Flat roofs have a pitch of up to 10 degrees, which is the minimum slope a building needs for water to drain. As mentioned previously, flat roofs are mostly seen on industrial and commercial buildings. Still, they are also becoming popular in residential buildings such as townhome complexes, where they are converted into common areas such as patios and green spaces.
Mono-pitch roof
Mono-pitch roofs contain a single-pitched roof surface and only slant in a single direction. This type of roof pitch is usually seen in modern residential architecture. Mono-pitch roofs consist of rafters and beams to support roofing materials, and because there is only one flat surface – it’s easier to build.
Low vs. Conventional vs. Steep
When it comes to the steepness of your roof, there are three categories. These are:
Low-slope:
- 1/12 Roof Pitch
- 2/12 Roof Pitch
- 3/12 Roof Pitch
Conventional:
- 4/12 Roof Pitch
- 5/12 Roof Pitch
- 6/12 Roof Pitch
- 7/12 Roof Pitch
- 8/12 Roof Pitch
Steep Slope:
- 9/12 Roof Pitch
- 10/12 Roof Pitch
- 12/12 Roof Pitch
How Can I Tell What Pitch My Roof Is?
I very great way is to grab a tape measure and level. The level should be at least 12” long. Safely climb your roof and place the end of your level against the roof surface and hold the level straight until the bubble is centered. Then, measure the vertical distance down from the 12” mark on the level down to the roof using your tape measure.
Climbing your roof can be dangerous, and it’s essential to take safety precautions. Sometimes, it’s best to leave it to the experts to prevent accidents and injuries.
B&M Roofing – Colorado’s Most Trusted
B&M Roofing is Colorado’s most trusted and knowledgeable roofing company. We offer expert roof services and care for commercial and residential buildings across Colorado and nearby states. Our commitment to quality has been the B&M Roofing standard since 1947.
Contact us today for a free assessment if you’re looking for a new roof or need some repairs. Our team of experts can evaluate the right services for your roofing needs. Whether it’s a new roof installation or repair job, we promise to work until you are completely satisfied.
For more information about roof maintenance, repair, or replacement. Call us at 303-816-0068 or fill out a contact form.
Roof Restoration vs Replacement
Let’s just face the truth – the cost of fixing or replacing your roof isn’t something anybody wants to contemplate happening to them. It is perhaps one of the largest home repairs people can encounter as a homeowner.
A sturdy and reliable roof protects you and your family from the weather and various other forces of nature. Your rooftop should be a constant on your checklist of top home-owning concerns. After all, a solid roof overhead is essential for keeping you and your loved ones safe and secure.
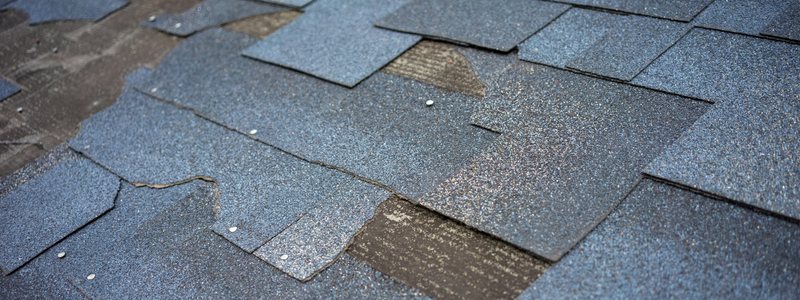
Roof maintenance requires a regular cleaning/visual inspection. When inspecting your roof, see if you can spot any damage and assess the severity of the damage.
When you address rooftop damage early, you spare your roof from any additional damage it might receive. Saving yourself time and money.
So, when your roof starts to show signs of wear and tear, you will be presented with two options: roof restoration vs replacement.
But should you do a roof restoration or a roof replacement?
What is the difference between the two?
Let’s look at the two and see which option might be best for you.
What is Roof Restoration Exactly?
Roof restoration incorporates replacing broken tiles, deep cleaning and painting over worn-out areas of the roof, and any other maintenance your rooftop requires.
This is an appealing option for commercial building projects which may not hold the kind of budget for a complete roof replacement.
In the event that you’re thinking about restoring your rooftop, there are sure instances when roof restoration is a much better option for you than replacement.
The following are some instances where roof restoration may be a better option vs replacement:
Hail damage
Colorado summers are very well-known for bringing a good amount of hail. The state even brings in some of the biggest pieces of hail recorded. These kinds of storms can bombard the roof of your home and in some cases, cause massive damage to the surface of the roof. Whole rooftops aren’t typically destroyed, allowing you to restore the specific sections harmed.
Water damage
During the rainy and snowy seasons, water can find a way into the shingles, felt underlay, and occasionally through the decking of your roof. With the water on the roof typically being able to slide off, instead, water sinks into the roof.
This can be extremely damaging to rooftops in Colorado. Colorado can dump snow or rain in large quantities during certain times throughout the year. Water accumulates on a roof and cannot always evaporate quickly enough to rid itself of the excess water. If it’s a particularly cold day in the state, water will seep into various cracks and openings in the roof, freeze, and then expand as the water forms into ice. Water/ice and roofs do not mix well together.
High-wind damage
Another weather trait Colorado is known for is producing high-speed winds. High-speed winds are another instance that can damage your roof.
Speedy gusts of wind can pick up and remove pieces of your shingles. Since wind at high speeds has the ability to push over trees and slam various debris into your roof, this can lead to major damage caused.
In contrast to a complete roof replacement, a roof restoration is considerably friendlier on the ol’ wallet. The process requires fewer materials and labor than a roof replacement.
A restoration, when done properly, can extend your rooftop’s life by up to 10 years.
The Benefits of Roof Restoration
- Restoration is a more affordable option compared to replacing your entire roof.
- A restoration of your roof is a much more environmentally-friendly option due to reusing parts of the roof.
- Restoration improves the quality of your current roof and doesn’t start everything from scratch.
- The lifespan of your roof extends to up to 15 years after a restoration.
Okay, What About A Roof Replacement Then?
When rooftop damage is severe enough, all materials are completely removed and new installation is required. This is a roof replacement, when a roof is partially or completely replaced.
At the point when the damages on your rooftop become significant enough, all materials are removed thoroughly and a new roof installation begins. When a roof is partly or completely replaced, this becomes a roof replacement.
If you’re probably having persistent roof-related problems like water leaks, replacement becomes the option when your rooftop is well beyond any kind of repair. These kinds of roof ailments can lead to the roof collapsing.
It is kind of a rule of thumb that your roof has about 20 years before needing a complete replacement.
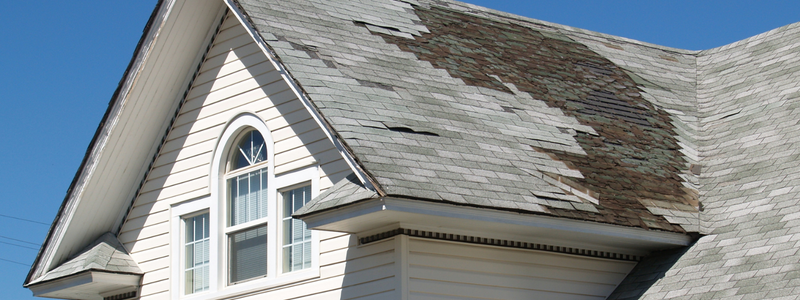
In this amount of time, roofing is known to show mold, moss, bald spots, cracked/curled shingles, and much more. These are potent indicators that your roof more than likely needs to be replaced.
A complete roof replacement is certainly more expensive than a roof restoration but sometimes you have no other option but to do a replacement for roofs with extreme/irreversible damage. Long term, it’s a smart, money-saving investment.
On the bright side, your new roof will allow you the reassurance that your household is protected and will add overall value to your home.
The Benefits of Roof Replacement
While it may seem like the bigger headache, a roof replacement isn’t always a bad thing. If it’s happening sooner than every 15-20 years, you may need to reconsider options, but there are many advantages of a full roof replacement.
- A complete replacement of your roof will last longer than a restoration.
- Replacement addresses issues like underlying rot, making for a sturdier and safer rooftop.
- Replacement allows for a fresh start in your roof maintenance and enables you to identify early signs of rot/sagging caused by water damage.
Is It A Better Idea To Repair Or Replace Your Roof?
There are going to be many factors in determining if your roof needs a restoration or a replacement.The material types used, climate zones and the roof’s age are all ultimately going to impact whether your roof can be restored or should be replaced altogether.
A rooftop with lots of documented problems like leaks, moss/fungus growth which leads to overall decay, and any moisture found in the insulation or deck beneath the roof, will need to have a roof replacement. Restoration just isn’t an option when decay becomes present.
When your rooftop is hit with various weather conditions and damaged; a restoration is probably what you would want to go with.
With a better understanding of roof restoration vs. replacement, you can make a more informed decision on which route you may need to take. But, you are not alone.
B&M Roofing and Roof Restoration vs Replacement
B&M Roofing has been providing the best commercial/residential roofing restorations and replacements since 1947. We bring superior knowledge and experience in metal roofing, shingles, tile, low slope roofing, asphalt, and much more. Our inspections help to give you the best options on roof repair, or roof restoration vs replacement and pros and cons of each option.
If you believe your business or commercial roof is in need of repair, please contact our Colorado roofing company for a free assessment.
With our knowledgeable professionals, we are dedicated to ongoing support. We promise to leave you feeling assured that your roofing needs are our #1 priority.
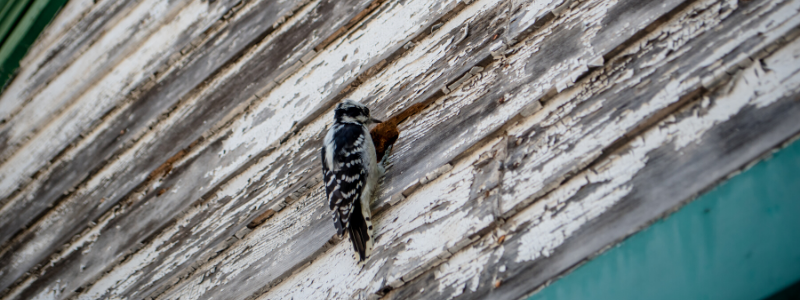
Woodpecker on a Roof
A woodpecker on a roof can pose a serious issue for homeowners. If you’ve ever been awoken to the incessant pecking of a woodpecker, note that is a process to deter them. These birds are known for their many benefits. On one hand, they’re extremely fun to watch, plus they’re extremely resourceful hunters, usually eating their body weight in insects. They can help prevent insect infestation in your home. However, while beautiful and majestic creatures, woodpeckers are also known for causing damage to homes and commercial buildings and, yes, occasionally being a nuisance. It can be difficult to get rid of these birds once they’ve become fixated on your home’s wood frame and its roof. A woodpecker on a roof can be extremely costly.
Looking for a way to dissuade woodpeckers from sticking around for a long time? Read below on some preventive steps you can take.
Nature of Woodpeckers
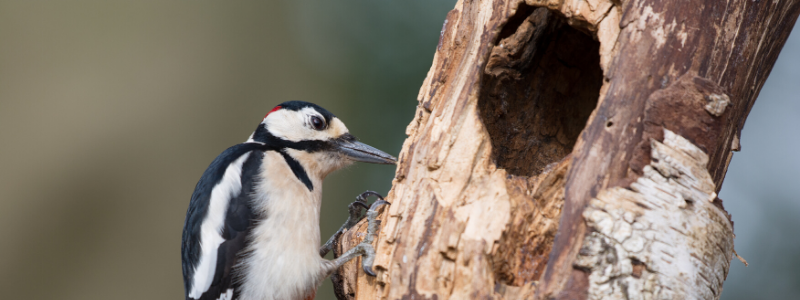
A woodpecker on a roof is a common occurrence simply because of their nature and preferences. Your home can be an ideal place for pecking holes or creating a space for nesting. In Spring, male woodpeckers will begin drilling, or what is technically referred to as drumming, to attract female woodpeckers. Generally, woodpeckers will select trees to initiate their mating calls. However, it can cause issues if they select your home for drilling, instead. It’s true. These birds have, indeed, taken a liking to home materials such as metal gutters, siding, window frames, and roofing.
Woodpeckers are known to peck 20 times per second. This can cause significant damage. Woodpeckers eat bugs, sap, fruit, nuts, and seeds. In the yard, they are often attracted to suet feeders or nut feeders, and may even visit nectar or jelly feeders. Hanging bird feeders isn’t only appealing to hummingbirds. For a woodpecker on a roof, it can be yet another reason for them to stick around.
Woodpeckers usually hammer on homes for four different reasons:
- It certifies their territory and works for mating purposes.
- They are burrowing to make a nest. The hole will be large and round.
- The woodpecker may be drawn to insects that are feeding on the house.
- They, also, drum to create a place for food storage.
Understanding the specific reasons a woodpecker may be drawn to your home will give you a better idea of how to address the underlying issue. A woodpecker on a roof may mean that you’re experiencing termite issues. Therefore, addressing a termite problem may help to deter the woodpecker from continuing its drilling. On the other hand, if they’re attempting to make a nest, making that area of your home inhospitable can quickly solve your issue, too.
Woodpecker Deterrent
How can you deter a woodpecker on a roof? Given the many reasons a woodpecker is drawn to your home, it’s important to first identify what is appealing. A quick way to determine these circumstances is to take a look at what types of holes they are drilling or drumming. If they’re creating a nest, the hole will be in a focused area and allow for enough space for the bird to climb in comfortably. If they’re drilling for insects within the home, you’re more likely to see sporadic drilling. Sporadic drilling can be more costly to repair given that there isn’t any containment of the damage.
Regardless of why a woodpecker is on a roof, it’s important to note that there are various methods for deterring a woodpecker. There are objects that can serve to dissuade these birds from taking up your home as their residence. Similarly, you can make your home inhospitable to insects, which will also make it less appealing for woodpeckers who prey on these same bees, mosquitos, caterpillars, termites, and more.
Here are a few methods for deterring a woodpecker on a roof:
Motion Deterrent
Windsocks or windmills placed around the roof, particularly near affected areas may work to scare woodpeckers away. Because birds tend to ignore visual stimuli, visual deterrents should move with the wind to be most effective. Plastic owls and other birds of prey are less effective, as woodpeckers will acclimate to their presence after a few days, and ignore them.
Don’t have anything on hand? Some homeowners opt for using something cost-effective and found laying around. A compact disk, for example, is a great visual aid to dissuade woodpeckers from visiting. Simply hang an old CD from a string or fishing wire near the area where drilling has started. Subtle movements and the reflection on the CD aid in helping the woodpecker to see movement on the home, successfully scaring them away.

Visual Deterrent
Some woodpeckers may be frightened by reflections and the shadows they create. Hanging aluminum pans or aluminum foil around affected areas of your home may scare them away. Homeowners may also use mirrors or wind chimes that can reflect sunlight. These can be used in combination with motion deterrents.
Audio Deterrent
Many hardware stores carry motion-activated alarms that emit noises that scare woodpeckers away. These may simply emit a loud noise that keeps woodpeckers from becoming comfortable around your home, or sounds of predators and woodpeckers in distress.
Pest Control
Woodpeckers may be attracted to your home because of an infestation of insects. Talk with an exterminator to eliminate the food supply that draws woodpeckers to your home. Dealing with infestations of insects is a good maintenance practice.
Physical Deterrent
Many hardware stores offer bird deterrent products such as bird repellent tape that can be installed in areas around the affected area. If you’re noticing oblong shaped holes in your home’s roof, it may be an indication that the male and female woodpeckers are nesting. Consider building an external nesting box.
FAQ – Woodpecker on a Roof – B&M Roofing

Can a Woodpecker Damage Your Roof?
Woodpeckers use their sharp beaks to make holes in trees, then stick their long, forked tongues inside to search for insects. Woodpeckers also drum to mark their territory and find mates. If one of these birds sees your house as its territory, it could cause damage and disturb you with its drumming.
What to do if a woodpecker is pecking your roof?
Here are some ideas on how to keep woodpeckers away from your property.
- Check your home for signs of insect infestations. If woodpeckers are repeatedly drumming in your house, they are probably doing so for a good reason; your house may contain insect populations, such as bees, ants, or termites.
- Place a woodpecker feeder with bait near the outside of your house. These birds like to feed on bait made from beef fat; you can buy it at a pet store. We recommend hanging the feeder on a tree so that no other creatures eat the bait.
- Plant fruit trees and berry bushes. Woodpeckers are attracted to sweet fruits, so planting fruit trees and berry bushes around the perimeter of your yard rather than near your house may keep them away from your dwelling.
Can woodpeckers damage shingles?
It is not common for woodpeckers to damage or create holes in your shingles. But, if it does happen, we recommend that you fill the holes or cracks with caulk. However, it would be best to replace the damaged shingles with new ones.
B&M Roofing Colorado
B&M Roofing is experienced with expert roofing installations, repairs, and overall maintenance. Our 24/7 support line is here to help immediately with emergency roof repair. Calling sooner means less of a wait and more opportunities to repair before extensive damage is done. We offer work throughout Colorado, including:
- Denver
- Colorado Springs
- Fort Collins
- Boulder
- Greeley
- Rocky Mountain areas
- Surrounding states including Wyoming, Utah, Kansas, Nebraska
Call us today at 303.938.9642 to schedule a visit from our emergency repair team or visit our leak repair request page to submit your information and have one of our team members contact you.
Commercial Roof Leaks
No one wants to find water leaking through their roof. Sometimes harsh weather or not taking proper care of your roof can cause it to leak. If you do notice that your roof is leaking, then you need to identify the problem and solve the problem as quickly as possible.
There are many causes that can cause commercial roof leaks. Alongside this, you should look for when you may have a leaking roof. In this article, we will discuss everything relating to commercial roof leaks, so that you are better prepared in case it happens to you.
Common Types of Roof Leaks
If you’re wondering how much a commercial roof leaks repair cost, it will depend on the type of damage your commercial roof has been exposed to. So here, we will list the most common types of roof leaks.
Poor Maintenance
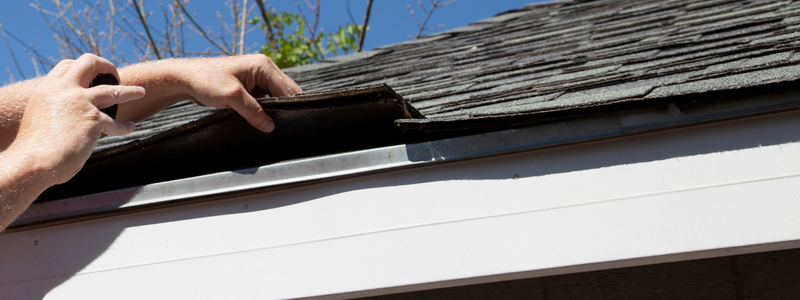
You want to make sure that you are maintaining your roof on a regular basis. This includes checking the flashing around the perimeter of the building and making sure that all vents and downspouts are clear of debris. Make sure that the gutters are clean and free from clogs. Check the roof for damage and cracks. All of these things can help prevent a roof leak.
Weather Damage
There are times when the weather conditions can cause a roof leak. Hail storms can cause severe damage to roofs. When this occurs, you want to make sure that the roofer has taken the necessary precautions to protect the roof during such incidents. They should have put up tarps or other protective measures to keep the roof dry.
Damaged Membrane
On commercial roofs, there is a membrane that acts as a waterproof layer on the roof. When this is damaged due to multiple reasons like weather or age. Then, once it is damaged, water can start to leak through the member and into the insulation and into the building.
Overly Exposed Roof
If you feel that your roof is too exposed to the elements, then you should consider having it covered with some type of protection. This can include tarps, plastic sheeting, or even metal panels.
Roof flashings may also be installed onto your roof to areas like the roof edges or chimney. However, if this isn’t installed properly, or the roof flashing is old it can become damaged easily, which can then cause a leak.
Roof Collapse
If you ever notice that your roof appears to be collapsing, then you should contact a roofer immediately. An improperly built roof can collapse under heavy rain, causing significant damage. If the roof is beginning to collapse, then leaks will start to form.
Blocked Drainage
When a commercial roof is installed, then the contractor will take into account where the water from rainfall will drain to. This can be through gutters, drains, scuppers, and downspouts. However, these need to be cleaned often to make sure water is removed from your roof.
If the water isn’t draining properly, then you will produce ponding or standing water on your roof. This standing water will increase the chances of the water leaking through the roof membrane and adding more weight to the building’s structure, causing leaks.

Signs That Your Roof Is Leaking
It is important that you look for signs that your roof may be leaking. These signs are quite obvious and very difficult to miss. The main signs are the following:
- Water Inside – A very noticeable sign is that you will find water in your home. This is a clear sign that your roof or something is leaking in your building. You may notice either a puddle on the floor or water dripping above your head.
- Stained Walls – When ceiling systems or tiles are exposed to water for a long period of time, this will discolor the walls and ceiling.
- Mold And Odor – Mold loves moist environments and grows well there. If water is leaking into your building, then there is an increasing chance that mold is growing and spreading in the building. You can easily smell the mold as it has a foul smell.
Where Is The Leak Coming From?
It can be difficult to pinpoint where the leak is coming from sometimes. However, once you do know where your leak is coming from, then it is much easier to find a solution to the leak.
There are a couple of ways to identify where the leak is coming from. You can enter either the underside of the roof or the attic of your building. Often You will see the origins of the leak from a joint between two pieces of plywood. However, the leak isn’t always visible.
In the case where the leak is not immediately visible, then you do have another option. As long as you are safe, go onto your roof and have a look around. If you still can’t see what may be the cause, then take your garden hose and add a controlled amount of water onto the roof. Run the hose over areas where you think the leak may be. Then, by having someone inside in the attic look where the water is coming from.
It is important, that once you have found the leak, you fix it as soon as you can.
How to Fix a Leaking Roof?
The first thing to do when fixing a small commercial flat roof leak is to stop the leak. Once you have stopped the leak, then you can begin to repair a roof. You can use many methods when you wonder how to fix a leaking roof. Some of them include, but are not limited to, the following:
Patch It With Tear-Away Tape
This method involves using tear-away tape. This is a type of tape that comes with a sticky side and a non-sticky side. The tape is to be used to cover the hole in the roof membrane. The tape would stick to the roof membrane and also to the roof shingle. Once the tape is stuck to both sides of the hole, then you could apply some caulking to make sure that the tape stays stuck to the roof membrane.
Use Caulk
This method involves applying caulk to the roof membrane. This would help to seal up any holes that may be in the roof membrane. After you have applied the caulk, then you should wait until it dries before moving on to the next step.
Replace The Membrane
If you want to replace the whole roof membrane then you need to get a new one. You can buy a new roof membrane at most roofing stores. However, if you just want to patch up the leak then you don’t need to get a new roof membrane. Instead, you can cut out the area where the leak is coming through and then put some tar paper over it. Once this is done then you can apply some asphaltic based roofing cement to the area. This will help to seal up the leak and prevent it from recurring.

What Should You Do When You Want To Stop A Commercial Roof Leak?
To stop commercial roof leaks, you need to take several steps. First off, you need to identify the source of the leak. Once you know where the leak is coming from, then you can start to find a solution for the leak.
As you can see above, there are simple ways to fix a small leak. However, if the leak is quite large, or you don’t feel comfortable fixing it yourself, or you can’t find the leak at all. Then we recommend calling B&M Roofing, as we offer you emergency roof service requests. Fixing your roof leaks as quickly as you can is very important.
B&M Roofing Colorado: Commercial Roof Leaks
Call us today at 303.938.9642 to schedule a visit from our emergency repair team or visit our leak repair request page to submit your information and have one of our team members contact you.
Our 24/7 support line is here to help immediately with emergency roof repair. Calling sooner means less of a wait and more opportunities to repair before extensive damage is done. We offer work throughout Colorado, including:
- Denver
- Colorado Springs
- Fort Collins
- Boulder
- Greeley
- Rocky Mountain areas
- Surrounding states including Wyoming, Utah, Kansas, Nebraska
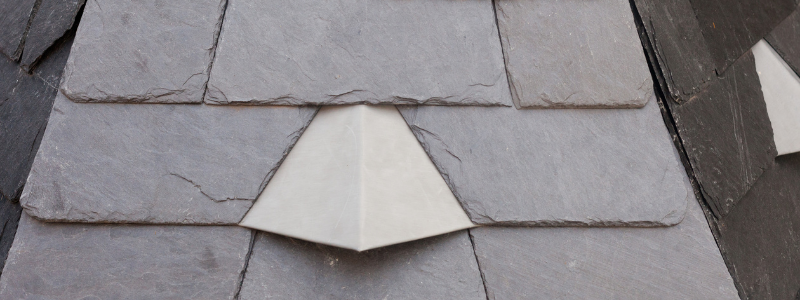
Slate Roof Pros and Cons
Whether you’re building a new house or looking to revamp your current house, one of the most important considerations is your roof. Deciding on the material of your roof is a massive consideration especially when it comes to affordability and aesthetics. Whilst there are so many different materials to choose from, some materials are considered to be better than others as they stand out considerably from the rest. One of the most popular roofing materials that continue to grow in desirability is slate roofing. This post will explore the slate roof pros and cons to help you decide on installing the perfect roof for your home or building.
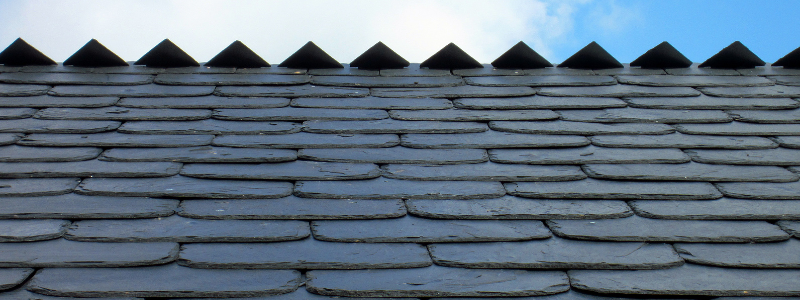
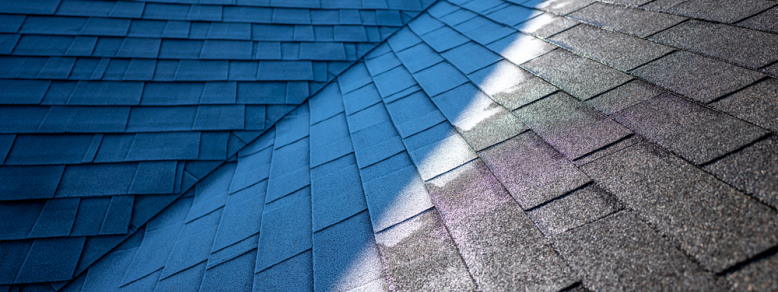
What is a Slate Roof?
A slate roof is a type of roof made from natural slate.
The tiles themselves have been cut into shapes that resemble traditional roof tiles, but with a more modern, natural, rock-like look.
They can be used to create a variety of designs and styles such as pitched roofs, flat roofs, gable roofs, and mansard roofs. Even the types of slate roofs can vary.
They are also often used in conjunction with other types of roofing materials such as shingle roofing.
Now that we know what it is and why it’s trending, let’s look at the slate roof pros and cons.
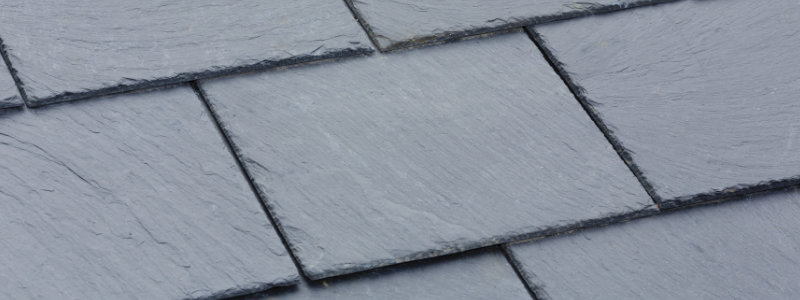
Slate Roof Pros
Slate is a unique and widely valued material due to its luxury and delicate aesthetic, lightweight, and durability. Some of the core benefits of slate roofing include:
Lightweight
Slates are also very lightweight which makes them easy to install and transport. They are also much easier to handle than other roofing materials such as tiles and asphalt shingles.
Longevity
The longevity of slate roofs is unmatched by any other roofing material available today. The reason for this is because it’s made up of natural minerals which means it can last for hundreds if not thousands of years.
Durability
Not only does slate have an incredible lifespan but it also has exceptional resistance to wear and tear. It can withstand extreme weather conditions such as hail storms, snowstorms, strong winds, and even fire. Slate has long been considered a durable and long-lasting roofing solution. It has been used for centuries and remains strong and sturdy after all these years.
Aesthetics
Slate roofs offer a luxurious look and feel that no other roofing option can match. The beauty of slate roofs lies in their natural appearance. From the way, it looks to how it feels underfoot, slate offers something special and distinctive that makes it stand out amongst all other roofing materials. Slate produces a unique and distinct sheen that makes for an elegant and eye-catching spectacle. Slate roofing looks fantastic and adds value to your property. Not only do they look great but they also add character to your home.
Eco-friendly
Slate roofs are eco-friendly. Unlike other roofing materials such as asphalt shingles, slates are naturally formed and don’t require any form of the manufacturing process. This means that they are completely free from harmful chemicals and toxins. They’re also derived from natural, sustainable resources and are recyclable, making them a great choice for an eco-friendly roof.
Slate Roof Cons
Although the pros of slate roofing far outweigh the cons, there are still some drawbacks that need to be considered before choosing this roofing material. These include:
Maintenance
Slate roofs require maintenance to keep them looking their best. This includes regular cleaning, sealing, and repointing. In addition, the slate requires regular re-roofing every 20 years or so.
Cost
As with any roofing material, the cost of slate roofing is dependent upon the size of the project. Though slate as a roofing material is considerably affordable compared to other materials, the additional cost to consider is its installation. It’s important to ensure that your slate roof is installed by professionals who know what they are doing to get the most out of your investment.
Slate can get pricey when it comes to roofing materials and cost. Slate roofs are a little more expensive compared to other roofing options. They come in a wide variety of styles, designs, and colors making them ideal for both commercial and residential applications.
Installation
Slate roofs are notoriously difficult to install. Installing a slate roof is more complicated than installing other types of roofing. The installation process involves cutting and fitting pieces together to create the desired shape. This is time-consuming and often requires specialist knowledge. Not only do they require skilled labor but they also require specialist equipment to ensure that they are installed correctly. Because of this, it’s imperative to hire professional roofers to carry out the job. If you don’t then you may find yourself with a leaky roof that could lead to water damage and costly repairs.
Weight
In accumulation, slate roofs are very heavy which can put a considerable strain on the structure of a home. In order to support the roof, a building may require additional reinforcement.
Fragility
Though durable, slate slabs are considerably fragile and hence should be handled with care on installation.
Things to Consider with Slate Roofs
Now that you’ve measured the slate roof pros and cons, there are a few other things that might influence your purchasing decision when it comes to the type of roof.
Lifespan
The lifespan of slate roofs depends on several factors including the type of slate used and the quality of workmanship. When properly maintained, slate roofs can last up to 100 years. However, if not cared for and maintained regularly, slate roofs will begin to deteriorate at around 30 years.
Cost
Depending on the size of the roof and the type of slate used, slate roofs can vary greatly in price. For the most part, they’re on the high end of the spectrum, but the value is present, decade over decade.
Final Considerations
Slate is a great choice of roofing both for its durability and distinct and luxurious aesthetic. If you’re considering having a slate roof installed, it’s essential you enlist trusted and reliable professionals for optimal installation and performance.
B&M Roofing is a leading roofing service provider that offers everything from installation, repair, maintenance, and construction. They pride themselves on providing exceptional service. If you’re looking to upgrade the roof of your home or commercial building, B&M Roofing can help.
Contact us today at (303) 443-5843.
How to Negotiate a New Roof When Buying a Home
So you’re about to buy a new home – CONGRATULATIONS! It can sometimes be a stressful process going through everything before the house is your home. One of the most overlooked things is perhaps getting a roof inspection before you purchase the house. A roofer will let you know if the roof is in tip-top shape or if repairs need to be done, or even – *gasp* – a replacement roof is needed. If either of the latter is true, then you might want to talk about how to include that in the overall price of the house. Here’s how to negotiate a new roof when buying a home.
Despite it likely being one of the most expensive things you’ll purchase in your entire life, buying a house is more like haggling at a flea market for an intriguing piece of upcycled furniture than it is paying for something in a store — it’s all negotiation.
Yep, as long as an agreement can be reached between the seller and buyer (within the confines of the law), no terms are off the table – which means, as the prospective buyer, you shouldn’t be scared to communicate your demands if you feel something needs addressing. Something like, say… a questionable old roof.
Is a roof replacement a big, not to mention expensive, job? Yes, but it’s also an essential part of the “product” you’re paying hundreds of thousands of dollars for. So, if you’ve found the house of your dreams, but the roof is more of a nightmare, let’s discuss further how to negotiate a new roof when buying a home.
Tips on Negotiating a New Roof When Buying a Home
Okay, so we know you’re probably not a professional roofer, (a professional roofer can most certainly help) but there are things you can look out for and questions you can ask when viewing a property that may shed some light on the state of a roof before you make an offer.
You need to find out…
- What materials were used on the current roof
- How old the roof is and who installed it
- When it was last inspected
And you should keep an eye out for…
- Sagging
- Water stains on the ceiling or walls of the top level of the property
- Mossy areas
- Missing or worn shingles
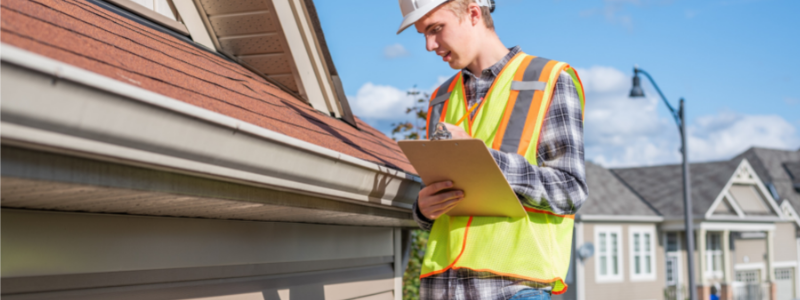
Inspections and Your Rights As A Buyer In Colorado
Inspections are a must when you’re thinking about buying a house. At your expense, an expert appraiser will assess the property and report back to you on any minor or major defects.
Do bear in mind, however, that a standard appraiser will only assess the roof from the ground.
To get a full roof inspection, you’ll need to contact a roofing specialist. It will give you leverage when thinking about how to negotiate a new roof when buying a home.
As per the standard Colorado real estate purchase contract, you’re then well within your rights to stipulate that the seller remedy any housing conditions that these inspections flag as unsatisfactory. After all, if the damage is severe, it may affect your ability to secure a mortgage or home insurance, in which case, the seller can kiss your offer goodbye!
In fact, as the climate in Colorado swings between extreme heat in the summer and lots of snow in the winter, roofs in our Centennial State often fall into disrepair, so it shouldn’t come as a shock to the buyer if the inspector finds some damage up there.
Whether the seller will agree to your terms is another matter entirely, but a new roof doesn’t necessarily have to be a dealbreaker if you know how to negotiate in these kinds of situations — let’s run through some key tips.
Establish Your Terms As Early As Possible
As discussed, you’re well within your rights to request structural defects of a home be remedied before you buy, but you need to give the seller plenty of notice. The earlier you lay your terms out on the table, the more receptive the seller will be.
How early, you ask? Well, we think it’s best that you establish a positive roof inspection as a contingency when you make your bid for the house. This way, the seller is well aware of your needs when they accept your offer, but don’t rest on your laurels just yet.
In order to be as forthright and efficient with your requests as possible, it’s important that you book the inspection sooner rather than later, so you and the seller are made aware of structural issues in good time.
Making A Strong Case
More than simply letting the seller know that you want the roof to be replaced, you need to really make your case, and explain why replacing the roof is the right thing to do.
To give your buying conditions a strong foundation, be sure to have the roofing specialist you hired to carry out the inspection provide a detailed rundown of what precisely is wrong with the current roof.
What’s more, if the roof is or is nearing the 20-year mark, remind the owner that if they weren’t selling, they would have to replace the roof anyway, and being that you’re not the one who’s been living in the home, the onus should not fall on you to pay for the replacement.
The overall message you should be sending is that for a quick and easy transaction, they need to accept your terms, otherwise they’ll have to put their home back on the market and place their life on hold for the foreseeable future.
If you know for a fact that the current owners need to get out fast, say… to purchase their new property before someone else has a chance, you can use this as leverage without seeming too forceful or demanding. You are, after all, addressing their needs by reminding them of the urgency of their situation.
Get Multiple Quotes
At this point, the seller may be hearing you, but worried about how much a new roof will set them back. Getting quotes can clear up this uncertainty, but it’s important that the seller feels this is done in a fair and impartial manner, which is why it’s a good idea to get three quotes in total and allow the current owners to select one of the companies.
You should also have each roofing company provide breakdowns detailing exactly how the money would be allocated between materials and labor.
Be Reasonable in Terms of Budget
As you’ll be moving into the house, you should get a say in the kind of roof installed, but to sweeten the deal a bit for the seller, you may want to go easy on the pricey materials, designs, and contractors.
Even though, ultimately, you want the owners to pay, trying to keep costs down and perhaps even secure a discount with a contractor may be the very thing that convinces them to submit to your requests.

Possible Options When Negotiating a New Roof
Now that you know a bit more about how to negotiate a new roof when buying a home, you’ll be presented with a few outcomes for you to consider:
Seller Pays For Roof Installation Before Closing
Your first option may be to have the seller pay to have the new roof installed before closing on the house.
Pros
- The house is complete when you move in.
- You won’t have to worry about organizing anything.
- You don’t have to pay the contractor any money.
Cons
- Roof installation can take between a day and a week depending on the complexity and size of the house and roof design, so the closing date will likely be a little delayed.
- Sometimes, the only people who can claim materials and workmanship warranty are those that pay for it. As such, it won’t transfer to you when you get the keys, leaving you in a sticky situation if there’s a problem with the new roof at a later date.
- You may not have as much say in the materials and design of the roof.
Seller Gives a Discount On the House
Another popular option (and probably your best option) is to have the seller deduct the cost of roof installation from the agreed offer on the house, so you can use the difference to have a roof installed yourself after closing.
Pros
- Sellers are typically far more likely to agree to these terms.
- As you’re technically paying for the roof, you shouldn’t have any issues with warranties.
- You may be able to negotiate a large discount for shouldering the burden of having to organize installation yourself.
- You get full control over materials and roof design.
Cons
- You have to organize the installation process. During this time, even though a good contracting company will strive to limit any inconvenience, you may not want to move in until after project completion.
Seller Pays You to Have Roof Installed After Closing
With this option, the value of the house remains the same, but the seller uses the equivalent of roof installation fees to reduce the buyer’s closing costs, thereby freeing up some funds for post-move installation.
Pros
- You get full control over the type of roof that gets installed.
- Sellers are more likely to accept this request.
- No warranty issues.
Cons
- Again, the responsibility falls on you to organize the installation, pay the contractors, and deal with any inconveniences during the installation process.

A Compromise
If the seller genuinely isn’t willing to budge, you could just call it quits and walk away, but as a last-ditch effort, you may also want to offer a compromise weighted heavily in your favor. For example, you could offer to split the costs 70/30.
The seller may push for 50/50, but as the buyer, you should be in charge of the negotiations, as you could retract your offer at any point. If you’re particularly in love with the house, going “halfsies” isn’t a terrible result, but it’s more than you should be willing to bend.
In this scenario, it’s a good idea to ask your realtor to inform the seller of what their house is likely to sell for now that the problems with the roof are common knowledge. This reminds them that they will have to deal with the roof issue eventually and that it’s best to address it now than to waste time putting the house back on the market and going through the same thing with a different buyer.
B&M Roofing and New Homes
Knowing how to negotiate a new roof when buying a home can add more layers to an already tricky situation, but with the right tools and experts involved, you’ll not only have the house of your dreams – but a nice roof to keep you cozy.
If you’re interested in purchasing a property in or around the Denver area, whether residential or commercial in nature, contact B&M Roofing today. We’ll send out a highly-experienced member of our team to inspect the roof and provide you with a quote for repairs, or, if necessary, a full replacement.
Our expert opinions, detailed reports, and great prices may be just the bargaining chip you need to get a new roof included as part of the sale on your soon-to-be dream house.
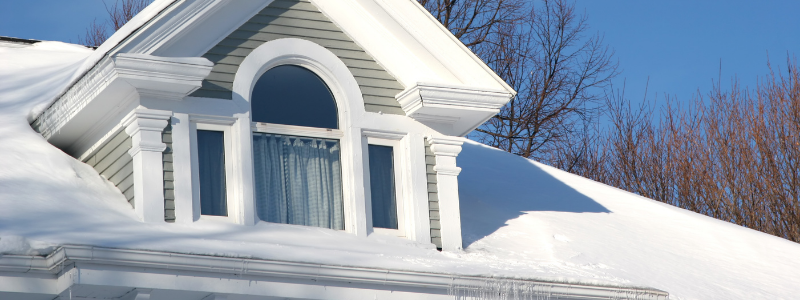
What Does Freeze Thaw Mean?
In our beloved state of Colorado is known to experience turbulent weather conditions. From facing heavy snow, ice, and low temperatures, it’s no surprise that the weather changes can cause havoc in areas of our lives.
The effects of such weather conditions can subsequently lead to freeze thawing. When we consider the science behind freeze thawing, we begin to see that it is a process that can potentially be destructive to just about anything. In this case, roofs.
But what does freeze thaw mean? This post will give you insight into what freeze thawing is and how you can prevent it from damaging your home and roof.
There are certain things you can do to winterize your roof, but knowing more about what freeze thaw means and what that means for your roof will give you an understanding of how to best prepare.
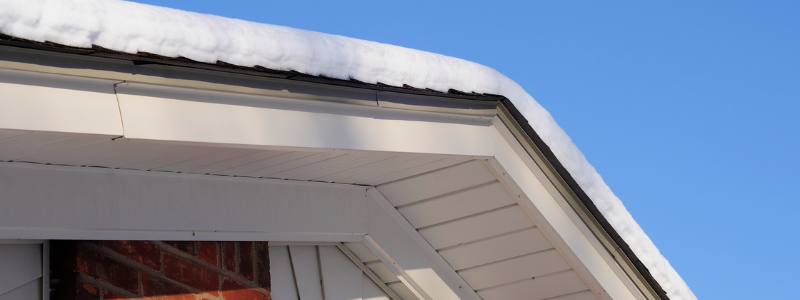
Freeze Thaw Weathering
Freeze thawing is characterized as a process of erosion that occurs when water enters cracks and crevices and expands as a result of low temperatures, this results in a build-up of pressure which is then released when temperatures increase.
The air consists of water and moisture.
A reduction in temperature causes water molecules to expand. Hence, when we consider the accumulation of rain, ice, and snow on roofs, we begin to see the signs of water expansion through roofing damage. The expansion of the water molecules causes a build-up of pressure. Roofing materials are not designed to be flexible and malleable, hence when water seeps beneath these materials and expands, it consequently causes damage such as cracks. A fluctuation in weather conditions with temperatures reaching freezing levels can have catastrophic effects as the freeze thaw cycle begins to add substantial stress on the roof’s shingles as it expands and contracts along with the weather.
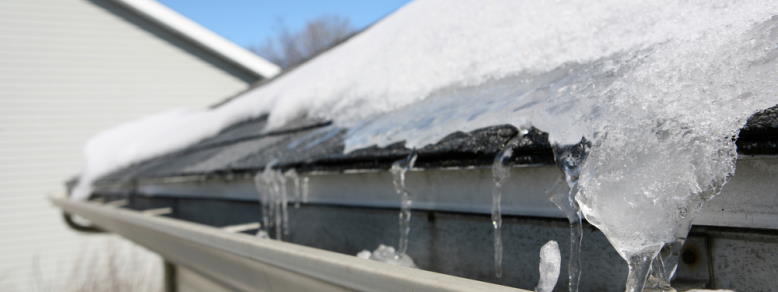
The effects of the freeze thaw cycle on roofing can result in:
- Seam damage
- Ice dam damage to guttering
- Condensation and mildew within the home
- Flashing leaks
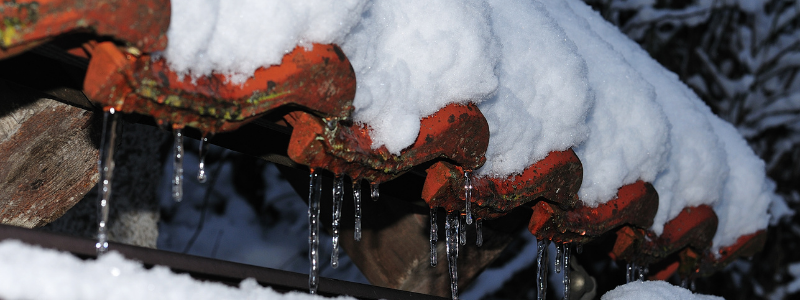
Freeze Thaw Damage
The roof of a building is designed to be a barrier that essentially protects the building from the elements. Hence, maintaining your roof is critical to ensuring that it performs in the way it is supposed to.
However, drastic weather conditions and unexpected turbulent storms can be the demise of a well-constructed roof. Despite having a sturdy roof, significant exposure to hard weather, ice, and water can cause severe roof damage with potentially long-lasting effects.
The residue water left from freeze thawing can be highly damaging as it results in water seeping under roof shingles and entering attic space. If this is not dealt with efficiently, it can lead to additional problems such as causing damp and leaks through ceilings, walls, and insulation. The presence of continuous stress applied to roofing can also result in a significant reduction in the roof’s lifespan as the cycle of contracting and expanding may bring it to a breaking point.
In addition to these damages, if your roof is made from natural material such as stone or concrete, the process of freeze thawing causes the materials to erode as a result of excessive water exposure. Consequently, this effect can become a catalyst for further damages such as water entering the home causing mold and mildew as a result of bacteria-ridden water molecules thriving in a warm environment.
How to Prevent Freeze Thaw Damage
Are you wondering if an ice and water shield is necessary?
The answer is we recommend it.
It’s critical that even if you’re not in a position where you want to completely replace your roof, you at least put the relevant precautions in place to ensure that your roof does its job effectively as it provides an additional layer of protection from weather damage. These types of shields are great for not only offering significant protection but also providing peace of mind in knowing that you don’t have to worry about the change in seasons.
An ice and water shield is a protective waterproof membrane that works to protect the roof from damage from ice dams, snow, and rainwater. It works to provide a form of protection that makes the building weather-resistant. Learn more about the benefits of an ice and water shield.
Besides implementing additional roofing protection, there are additional steps you can take to avoid winter roof problems. One of the most significant steps to take is to analyze your roof early on to ensure that any existing problems can be dealt with in advance before winter sets in. Find out more on winterizing your roof effectively.
How B&M Roofing Can Help With Freeze Thaw
If you’ve started to notice any of the signs of the effects of freeze thawing, it’s not too late to get your roof back into shape.
The best thing you can do is to ensure that your roof is regularly maintained and to hire a professional to put the necessary weather protection in place. At B&M Roofing, we pride ourselves on providing leading roofing solutions and services. We offer services that ensure maximum protection for both commercial and residential roofing. Our top services for weather protection from freeze-thawing include water and ice barrier installation and roof repairs and maintenance. Our services exist to give you maximum protection and peace of mind. We consist of a reliable team of roofing experts who are exceptionally skilled in a variety of roof types.
If you’re concerned about the current state of your roof as a result of weathering and snow and you’re considering a roof replacement, find out more about what type of roof is best for snow.
Between wear and tear, natural degradation, and weathering, our roofs are built to withstand extreme pressure. However, there is only so much that can be taken. In order to protect our buildings, it’s essential that we work to maintain the quality of roofs to maintain their lifespan. Doing this requires taking the necessary steps to ensure that the correct repairs are done and that the necessary precautions or protective measures are put in place to prevent long-term damage.
There’s no doubt that the process of freeze-thawing can be devastating.
However, with services such as those provided by B&M roofing, there are solutions to tackling and preventing the effects of freeze-thawing.
Snow Damage to Roofs
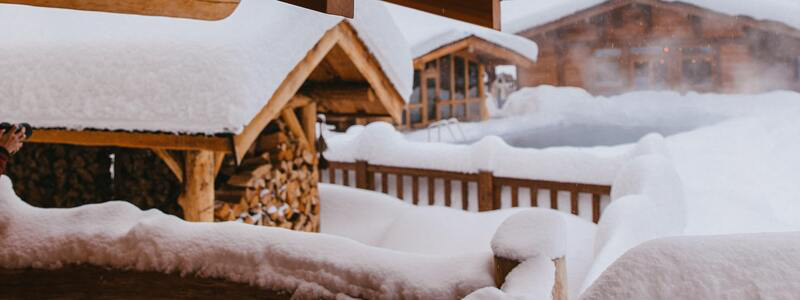
We’re no strangers to snow here in Colorado. Unlike most other places, we can get a thick blanket of the cold stuff every month of the year — not that we let it get in our way! However, when the winter months roll around, the snow can get particularly problematic, especially for our roofs.
As beautiful as a vista of wintery whiteness can be when we look out our windows in the morning, Jack Frost can damage our roofs in a number of ways. Snow damage to roofs is no joke, so it’s better to know what can happen to either prevent it from happening or know how to deal with it during the cold months.
Snow Damage to Roofs: Full On Collapse
A single snowflake may not weigh all that much (roughly 0.02 g), but when thousands of these little fluffy hexagons get together, they can be extremely burdensome for the surface beneath.
According to Accuweather’s in-house forensic meteorologist, the typical roof of a house in a northeastern State can support around 30lbs per square foot, while others in snowier states such as Colorado may be able to handle between 40 and 100 lbs per square foot.
This means that, depending on your location, anything upward of 4 ft of fresh snow or 2 ft of compacted snow can be a real threat, and roofs that haven’t been repaired or inspected in a while are at an even higher risk of collapse.
If you have any external roof units such as parapets or air conditioners, they can cause an excess drift in certain areas amounting to uneven weight distribution and, again, an increased risk of sagging or collapse.
Don’t worry if you’re not sure how much snow your roof is rated to hold, as you can check out our in-depth Colorado Snow Load Guide that takes you through a step-by-step snow load calculation process.
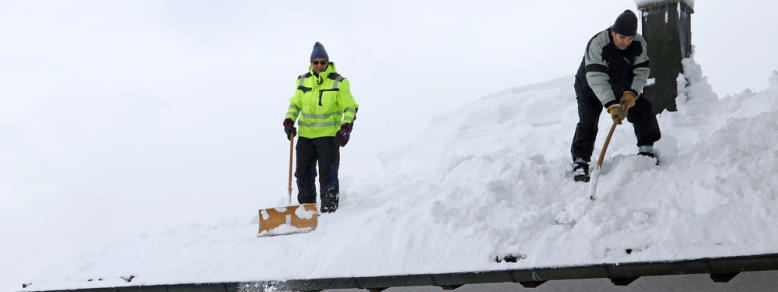
The Fix
The snow needs to be removed, otherwise, it will compact over time, and, eventually, rainfall will add to the weight, increasing the strain on your roof. You may want to invest in a scraping tool such as a roof rake to remove snow, but this should only be used if the roof is low and there is minimal risk of injury.
It’s also important to bear in mind that the scraping tool itself will add weight to the rooftop, and, in some instances, may end up being the straw that broke the camel’s back, which is why we’d recommend contacting our experienced team before attempting a DIY fix.
Preventative Measures
The best thing you can do to prevent a snow-based roof collapse is to contact your local roofing contractor before winter strikes. They will do a thorough inspection of your roof, and advise on any repairs or reinforcements that will help your roof shoulder the weight of the coming snow.
If you’re planning on having a roof installed in the coming months, It’s critical to understand what type of roof is best for snow, before construction commences. That way, you’ll put yourself in the best possible position if you’re hit by unusually extreme weather conditions come winter.
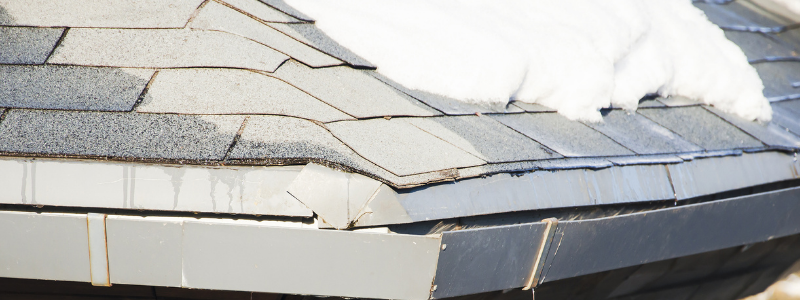
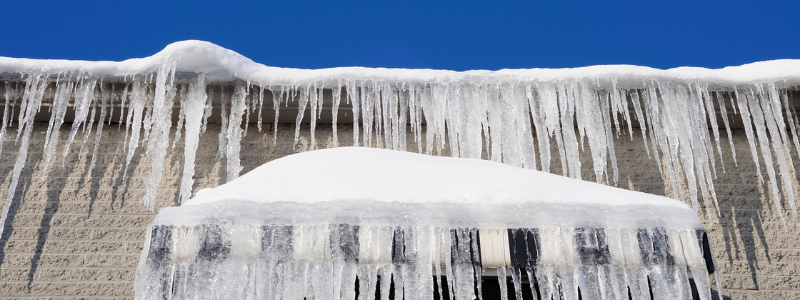
Snow Damage to Roofs: Snowmelt and Ice Dams
You’d be forgiven for thinking that if the snow on your roof starts to melt, your problems are a thing of the past, but sadly, they’re only just beginning.
As the snowy season is so cold, it stands to reason that you’ll be heating your house, either with fires or central heating. Well, the hot air that keeps your fingers, toes, and unmentionables from freezing, rises, eventually hitting the underside of your roof shingles.
Warming up over time, the central shingles melt the snow above, causing meltwater to run off towards the colder edges of your roof where it refreezes. The ice builds up at these peripheral points, amassing more and more meltwater.
What does this mean? Well, as snow and ice thaws and refreezes, it expands, prying open leakage points that can cause floods upon the next melt.
The Fix
There are a couple of things you can do to prevent further damage if you’ve already been struck by leaking caused by ice dams, including setting up a box fan in your attic aimed at the leak point to freeze the water as it enters the property.
Another neat trick is to fill some pantyhose with calcium chloride ice melter and lay them across the dam; however, you should only try this if it’s safe to do so.
Preventative Measures
The best way to ensure you never have to face damage from ice dams is to hire a contractor to make sure your attic is properly insulated and ventilated. We’d also recommend having an ice and water shield installed below your shingles.
Something you can do yourself to keep ice dams at bay is clearing your downspouts and gutters towards the tail-end of fall, so meltwater can flow freely from your roof.
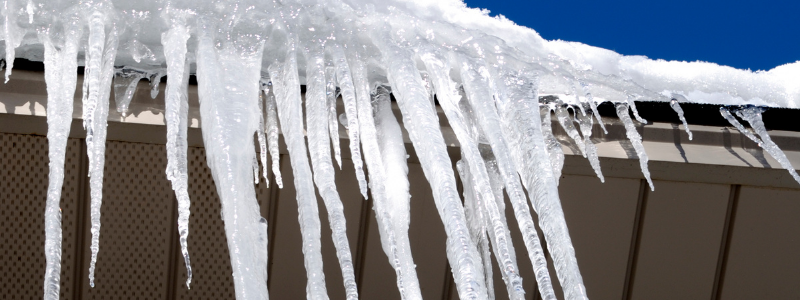
Snow Damage to Roofs: Icicle Formation
If your roof suffers from ice dams, then there’s a good chance you’ll notice the formation of icicles around its perimeter, and while these look quite pretty, they can be a big problem!
They can weigh down and break your gutters, damage your shingles, and possibly even snap, fall, and hurt unfortunate people or pets below.
The Fix
As long as it’s safe to do so, you can gently knock icicles loose using a broom or rake handle. If you’re climbing a ladder to reach them, make sure it’s secure, and recruit a friend or family member to hold it in place.
Preventative Measures
Much like ice dams, you can combat icicle formation by ironing out the kinks in your attic’s insulation and eliminating rooftop air seepage. Installing ice-melting roof cables is also an option.
Snow Damage to Roofs: Attic Condensation
Winter build-ups on your roof can also cause excessive condensation in your attic ceiling, especially if ice dams are already established. This may not sound that serious, comparatively speaking, but it can actually be incredibly damaging.
The excess moisture will saturate the wood, causing mold and wood rot, compromising the structural integrity of your roof from the inside. Then it’s at a greater risk of sagging and collapse due to diminished weight-bearing capabilities.
What’s more, the damp is liable to spread to attic furnishings and stored items, so it’s a good idea to clear the space if you notice any dark, moist areas in your attic ceiling.
The Fix
Your first port of call should be to remove or deactivate any appliances or plumbing that may be malfunctioning and worsening the moisture build-up. Once they’re out of the way, seek out and plug any leak zones in your attic floor insulation.
Preventative Measures
Once again, optimizing your attic insulation and ventilation is absolutely key in preventing the build-up of excess condensation.
How Much Snow Damage Is Too Much to Repair?
In an ideal situation, professionals such as ourselves will be able to repair and reinforce your existing roof, but if the damage is too severe, the only option is to replace the whole structure.
If, for example, you’re experiencing leaks at a number of points across the entire roof, repairs will only be a fleeting fix, as the issue is so widespread that it’s bound to flare up again.
A general rule of thumb most roofers live by is that repairs will be effective if they cover 30% or less of the damned roof. Anything beyond that is like placing a band-aid on a bullet wound.
How B&M Roofing Can Help with Snow Damage
We know that all this information can be quite jarring, and while it should be taken seriously, we want you to know that you’re not alone in dealing with your winter roof woes.
No matter which of these winter roof problems you’re worried about or are currently dealing with, B&M Roofing can help! Our team of seasoned experts has the skills to ease the burden the snow is placing on both you and your roof, so you can enjoy the holiday season knowing the roof over your head is safe and secure. We specialize in both commercial roofing and residential roofing, so if your property is situated in or around the Denver area, please don’t hesitate to contact us for some support in winterizing your roof.
What Temperature is Too Cold to Put On a Roof?
There’s nothing worse than a roofing emergency in the dead of winter — the cold is getting into your property, the snows are on the way (or already here), and roofing contractors are hesitant to come and help you out… but what temperature is too cold to put on a roof?
Well, although no one – save the man in red – enjoys being up on a roof battling against bitter winds and slippery surfaces, it’s not just a distaste for bad weather that gives us pause.
It’s actually more to do with the installation process and the materials we use.
A lot of people don’t realize it, but temperate weather is absolutely essential to the proper installation of many types of roofs. Ignoring this will only lead to further roofing emergencies, more stress, and, of course, more expense.
Let’s discuss the matter in more detail, so you’re never caught out when old Jack Frost rolls into town.
When is it Too Cold to Roof?
You may be wondering what temperature is too cold to put on a roof? Even if the wind is mild, the snow is yet to fall, and all have the correct safety equipment to get the job done safely, 30° Fahrenheit is considered too cold to perform repairs or install a new roof.
In fact, you’ll find that most roofing contractors draw the line at 40 degrees F, as this marks the industry-standard warranty threshold of most roofing materials.
This can, of course, be infuriating when you need a quick fix, but disregarding these warranties can be irresponsible, and may leave all involved parties out of pocket.
Why Is it Problematic to Roof In Cold Temperatures?
What temperature is too cold to put on a roof? There are three main reasons why attempting to roof in temperatures below 30 degrees F is a pretty bad idea.
Materials
The top layer of most roofs is composed of little tiles known as asphalt shingles. They’re durable and easy to work within temperate climates, but when the knee-knocking weather comes around, they become brittle, liable to snap or crack during the installation process.
But it’s not just asphalt shingles that hate the cold, other common roofing materials, such as concrete tiles, clay, and EPDM rubber membranes are also easily compromised in sub-zero temperatures.
Installation
To install shingle roofing, you need to form a base layer and an exterior layer. The base layer is secured to the roof deck with nails, which can be an issue if the surface or air temperature has rendered them brittle, and that’s not even the real trouble.
The top layer of shingles is fitted to the base layer with a thermally activated sealant. This sealant needs the heat of direct sunlight to cure properly and form a strong, long-lasting bond.
Without a sufficient amount of heat, the shingles will never fully adhere to the sealant, and strong winds could tear them away, revealing the under-layer. The threshold for being too cold for roofing is below 30 degrees F.
Rainwater and snowmelt will then seep into the attic via the nail holes in the first layer of shingles — not good!
Labor Difficulties and Expenses
Is it too cold to roof during winter? Due to the nature of the job, when the chill rears its ugly head in wintertime, roofing businesses are often left with no other choice but to increase their rates.
We all have to take the proper precautions to ensure our safety during a cold-weather project. These measures include…
- Clearing snow or ice from the work area
- Wearing heavier boots and protective clothing
- Working slowly to avoid mistakes, protect materials, and minimize risk
- Properly venting the attic below
- Checking for and unveiling hidden hazards such as skylights
- Taking breaks to sufficiently rehydrate and improve focus
- Possibly splitting the job into smaller sessions if the weather becomes too dangerous to work through.
Is Putting on a Roof in Cold Weather Completely Out of the Question?
As long as the weather isn’t so extreme that it would be dangerous to do so, it is possible to roof with the temperature-sensitive materials mentioned earlier, but it’s an exceedingly tough job.
Not only will all involved have to work slowly and with a light touch, but all materials will also have to be hand sealed with a cold-weather adhesive, as thermal sealant is no longer an option.
Things are a little easier if a roof requires metal, wood shingles/shakes, or slate, as these materials do not need to be glued in place, rather, they’re nailed to the roof bed, but it can still be a complex and unpleasant task in cold weather.
Is Roofing in Cold Weather Worth It?
We take pride in our work here at B&M Roofing, and we’re not happy unless you’re happy. You deserve our very best efforts, but when nature is working against us, we can only do so much. If at all possible, it’s much better to wait for a warmer time of year to repair, install, or replace a roof.
Check out a full list of our services here.
What’s the Best Time of Year for Working on a Roof?
The best time of year for roofing is either spring or autumn. These are the mildest of the seasons, neither too hot nor too cold, and the weather is often stable for days on end.
For asphalt shingles, manufacturers typically recommend waiting for 70–80° heat, and not just for installation, but for a few days after the fact as well, just to be sure the sealant has fully activated, and your roof is as robust as it could possibly be.
When is it too cold to roof? Temperatures below 30 degrees F are considered too cold for thermally-activated sealant to perform its job correctly.
Roof Maintenance: Winter Checklist
Here’s what you can do to make sure you’re ready for the winter in plenty of time
- Contact us for a free inspection and estimate on any work that may need doing.
- Check that there are no blockages in your gutters and that water is flowing freely.
- Check your attic is sufficiently insulated.
- Check your roof for visible cracks, missing shingles, and areas that could develop ice dams.
Cold Weather Roof Emergencies: What Are Your Options?
No matter how prepared you are, some incidents are unavoidable – and winter can come with its own set of roof problems.
Perhaps a tree fall has caused damage to your roof, or you missed a loose shingle during your checks… whatever the issue, here are some pro-tips for getting through this trying time…
- Get yourself and your family to safety. If you have somewhere else you can stay for a while, do so.
- Cut off the power supply to the affected area. I’m sure we don’t need to tell you that moisture and electronics don’t mix, so if your roof is compromised, get them out of there, or at the very least, shut them down.
- If it’s a minor leak, you can try and stop it temporarily.
- Call us! With over 70 years of experience in the roofing industry, if there’s anybody capable of conquering the bad weather and saving your home from further damage, it’s us. We’ll send out our very best to assess the issue, and even if the weather is too extreme for us to make immediate repairs, we’ll be able to advise you on what to do next.
B&M Roofing Colorado: Here to Help
So, what temperature is too cold to put on a roof? Well, roofing in sub-zero temperatures is always to be avoided whenever possible, but we’re not going to abandon you in your time of need. If the worst does happen, and you’re left with a serious roofing issue in the dead of winter, we’ll do everything in our power to help you out.
However, the best course of action is to schedule regular maintenance with B&M Roofing in spring and early fall, so we can winter-proof your home well in advance, and you can enjoy the holiday season worry-free!
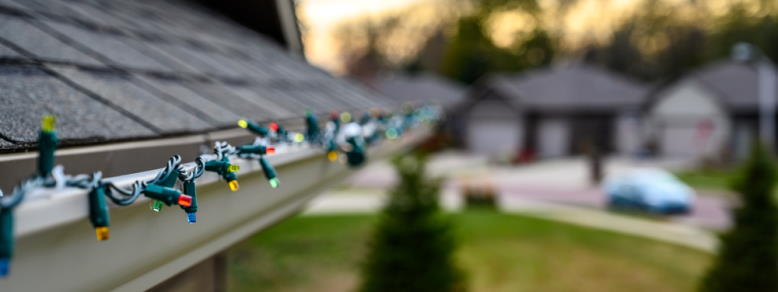
How to Hang Lights on Gutters With Guards
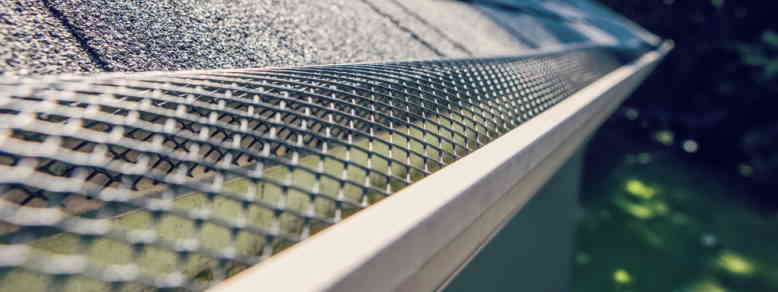
It’s easy to see why opting for a quality set of gutter guards can be highly beneficial for your home.
If you were to leave your gutters without guards, leaves and debris can start to build up in your gutters. This matter will decay over time, and can even clog up the gutters so that they can’t drain properly.
These will be especially useful during the fall and winter months when the leaves start to shed from the trees. If you have a lot of trees in your backyard, and particularly around your gutter, then you will need to have gutter guards installed to keep everything running smoothly.
The one time of year where gutter guards can complicate things is of course around the Christmas season. We all like to hang festive lights on our homes to celebrate the Christmas spirit. However, if you have gutter guards in place you may be asking yourself, how to hang lights on gutters with guards?
Today, we’re going to show you how you can hang lights on gutters with gutter guards. The good news is there is a variety of methods that you can use to keep things festive without compromising the integrity of your guttering.
How to Hang Lights on Gutters With Guards
How To Hang Christmas Lights On Gutters Without Clips
Below are some of the ways on how to hang lights on gutters with guards in place.
It will, of course, depend on the style of gutter guards you have in place. However, at least one of the below methods should help you to attach your festive lights to your guttering without you having to remove the gutter guards to do so.
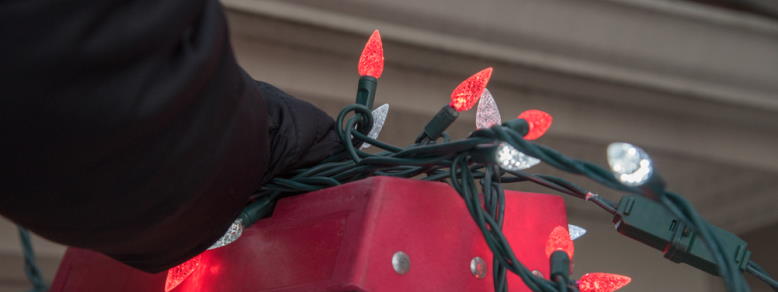
Christmas Hooks
One of the best methods is of course to invest in a quality set of Christmas hooks to help with hanging Christmas lights on gutters without clips.
These will essentially feature a length of wire that you can hook into the small holes of your gutter guards. These will then be able to support a variety of Christmas lights from standard fairy lights to icicle lights.
These types of Christmas hooks are perfect for gutter guards that feature a mesh, screen, or perforated design. The hooks can seamlessly fit into the smaller holes of your gutter guards without interfering with their usefulness. The hooks should measure around 3.5 inches, which should be more than enough length for your Christmas lights.
You can of course create your very own version using an old set of metal hangers.
However, you may find it easier to purchase a ready-made set that you can simply slide into your gutter guards.
Leaf Screen Clips
If you have a leaf screen type of gutter guard, then you can opt for a style of clip to help with hanging Christmas lights with gutter guards.
The great thing about leaf screen clips is that they can support the vast majority of Christmas lights. So if you want a more universal clip that will be able to hold your Christmas lights without damaging your leaf screen, this is the type that you should opt for.
This will of course involve climbing your ladder to slide them into place, so remember not to lean your ladder against your guttering. This will help to keep your guttering from becoming damaged.
All-In-One Clips
Depending on the style of gutter guards that you have in place, you might not be able to get any hooks or clips into the guard itself.
In this case, you should opt for a style of clips that you can slide under the shingles of your roof. This can help to keep your gutter guards intact, as you won’t have to fuss around with wiggling hooks into the holes of your gutter guards.
Simply slide the clips under your shingles, above the gutter guards, and you will be able to hang your Christmas lights off these. So while it’s worth noting that these types of clips will ensure that your Christmas lights are placed on top of your gutter guards, instead of having them dangling from your guttering, it still provides a relatively easy option for installing festive cheer.
Self-Adhesive Light Clips
Perhaps you don’t have large enough holes in your gutter guards for Christmas hooks, or can’t fit clips under your shingles.
In this case, you should opt for self-adhesive light clips. These can be secured underneath your guttering using the stick side of the clips. You can then hang your Christmas lights from the hooked end.
The best thing about these types of clips is that they can be used virtually anywhere on your roof. You can place them under your guttering, on the outside of your guttering, or even along the side of your home.
How to Hang Christmas Lights in Gutters Without Clips
While it can be frustrating trying to secure your Christmas lights to your guttering, it’s best not to remove your gutter guards to do this.
You should also not resort to hammering nails into your guttering or home just to hang your lights from them. This could impede the effectiveness of your guttering or guards, which we’re sure you don’t want to do.
To effectively hang your Christmas lights from your gutters without using traditional clips, you should instead opt for either Christmas hooks or self-adhesive clips. It will of course depend on the style of gutter guard that you have in place.
If you have holes or mesh on your gutter guards, then you should opt for Christmas hooks that can easily fit into these. You shouldn’t have to force these to remain in place, as you could damage the gutter guards.
Alternatively, you should opt for self-adhesive Christmas light clips that can be secured to the outside of your guttering without damaging them.
Happier Holidays with Hanging Lights
So there you have it!
Gutter guards are definitely worth the investment so as to keep your guttering free from leafy debris. The methods above show how to hang lights on gutters with guards without any damage.
But just because you have gutter guards in place it doesn’t mean that you have to go without your usual festive cheer during the Christmas season.
Installing Christmas lights to your guttering using some of the methods that we have gone into more detail about above will be super easy and effective.
Want to know more about gutter guards and how easy they will be to install on your guttering?