Best Solar Shingles
Homeowners are investing in new technology. Pioneered by tech giants such as GAF, Dow, and Tesla, solar shingles are paving the way for a new standard of living. Similar to solar panels, they work to convert sunlight into sustainable energy. However, solar shingle technology stands to provide a multitude of additional benefits due to its unique and innovative features. With the world moving toward sustainable living, solar shingles are undoubtedly setting the example of producing clean energy. This article will share not only the benefits of solar shingles but where you and how you can find the best solar shingles for your home.
What are Solar Shingles and How Do They Work?
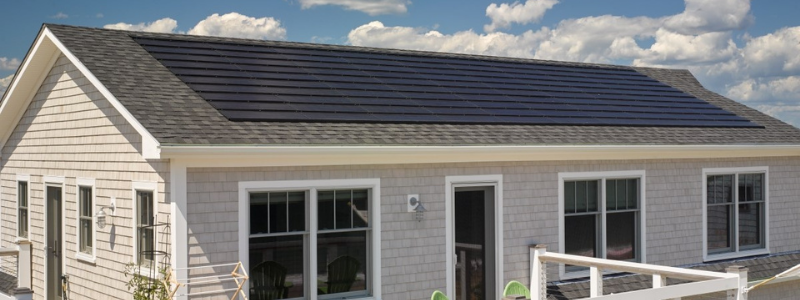
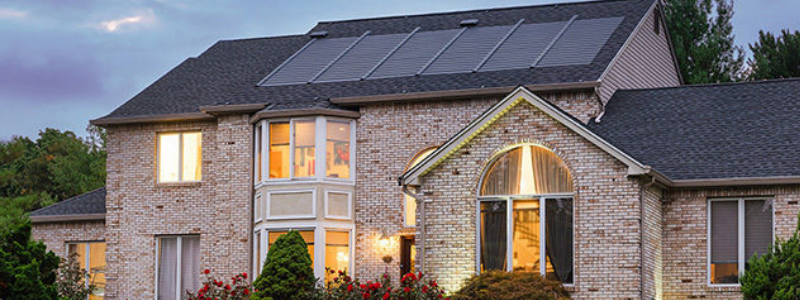
Rather than having solar panel sheets installed on top of your roof, solar shingles stand to be a long-term and energy-efficient solution to sustainable living that involves completely replacing the layer of your buildings’ existing roof shingles, with solar shingle technology. Solar shingles are characterized as innovative solar roof tiles that work to not only promote sustainable living but also significantly reduce your utility bills. Pioneered by leading brands such as GAF, CertainTeed, Dow, and Tesla, solar shingles are setting an example for the new way of roofing.
Why Should You Invest in Solar Shingle Technology?
Homeowners are recognizing the benefits that solar shingle technology can offer and are taking the step to invest in sustainable and modern technology. This cost-effective and eco-friendly option stands to offer a multitude of benefits from acting as a weatherproof protective roof, to providing sustainable energy and serving as a modern and trendy design in the process.
The Benefits and Drawbacks of Solar Shingles
Solar shingles are undoubtedly increasing in popularity due to their unique features and innovative design. So what’s all the hype about? Let’s explore some of the core benefits and drawbacks of investing in solar shingles.
Significant Benefits
Here are the reasons having these on your roof is a good idea.
Cost-effective
It’s no secret that solar technology is considered to be more cost-effective in the long term as the implementation of sustainable energy sources can significantly reduce electricity bills. Whilst the installation of solar shingles is considered to be expensive with brands such as Tesla solar roofs costing around $70,000, cheaper installation alternatives are averaging around $15,000 to $20,000. However, it’s important to keep in mind that the installation can be a considerably reasonable investment in the long run, especially if your building requires a roof replacement anyway. Once in place, your solar shingle roof can last for 30 years or longer and in the process, it may reduce your monthly utility bills by 40% to 70%. Additionally, the installation of solar shingles may increase the value of your home due to the potential long-term energy savings.
Aesthetic Appeal
As humans, we are genetically wired to be drawn to that which is pleasing to the eye. The design is characterized as a thin layer of PV (photovoltaic) sheets that can be installed to create a sustainable and energy-efficient roof. Its unique material is slick and appeals to the modern market as it blends seamlessly with an existing root.
Durable
Acting not only as an energy-efficient source, solar shingles also provide effective weather resistance as an upgraded roof shingle. Designed with durability in mind, rather than simply being placed on top of existing roof panels as solar panels are, solar shingle tiles are installed to create a new roof. Hence, its structural implementation along with its flexible, thin, and durable material, makes it highly effective at protecting the home from intrusive and harsh weather conditions.
Efficient
Solar shingle tiles can be accumulated over time to produce more energy. The ability to add more tiles as you go along works for many looking to improve their homes over time.
Drawbacks
There are some disadvantages, too. Here’s what to consider.
New Technology
Whilst solar panels have become a familiar phenomenon, solar shingle technology is a relatively new technology. Hence, in the wake of its advance, there are still some limitations, a significant one being that solar shingles can’t be installed on just any roof.
Minimal Manufactures
In addition to the solar shingle technology being relatively new, it follows from this that there are currently only several manufacturers creating solar shingle tiles. The effect of limited manufacturers means that there are currently limitations in roof tile styles and colors. However, as technology evolves and demand grows, so will a variety of styles.
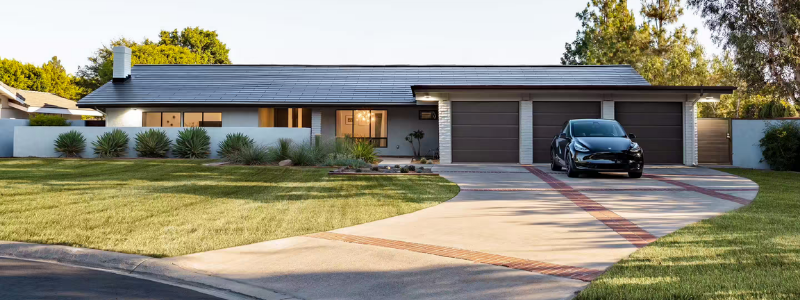
A Few Solar Shingle Brands
There are a ton of options out there and we’re happy to give our recommendations if you’re looking to invest in solar shingles, but here are some brands to get you thinking about what you may want to look for in a solar shingle.
GAF
GAF has been at the top of the roofing industry for quite some time now, and their solar options like Timberline Solar are a great (and popular) option for Colorado homeowners.
Tesla
Tesla is a leading technology company that manufactures quartz-based solar shingle tiles to provide an innovative energy-efficient solution. Their tiles are made from superior material, highly durable, and resilient, their tiles can last for 30 years or more.
Dow Powerhouse
Dow Powerhouse stands to be another significant solar shingle manufacturer that makes silicon solar shingles that offer superior energy conversion, resilience, and durability. Dow Powerhouse is a popular brand due to its high-end finish, superior features, and reasonable cost. A core difference between the Tesla and Dow Powerhouse solar shingles is the price, with Tesla tiles costing considerably more.
CertainTeed
CertainTeed is ideal for anyone who has had solar panels before and was happy with the performance as CertainTeed makes solar shingles using the same technology like solar panels. CertainTeed is a popular brand due to its efficiency as the installation of their solar shingles has been known to cover up to 90% of electricity bills.
Other great solar shingle brands include:
- SunTegra
- Luma
- SunFlare
B&M Roofing and Solar Roofing Options
At B&M Roofing, we recognize the shift in businesses and homeowners alike moving toward technology that provides renewable energy solutions. One of the leading innovations in sustainable energy is the implementation of solar shingle roofing. Since 1947, we have been committed to delivering high-quality roofing installations. With our expertise and experience, you can trust us to support you on your journey.
Offering luxury roofing solutions, B&M Roofing is an authorized dealer of Dow Powerhouse solar shingles.
We provide value in completing projects to an exceptional standard.
For more information, contact B&M Roofing directly at (303) 443-5843.
How to Negotiate a New Roof When Buying a Home
So you’re about to buy a new home – CONGRATULATIONS! It can sometimes be a stressful process going through everything before the house is your home. One of the most overlooked things is perhaps getting a roof inspection before you purchase the house. A roofer will let you know if the roof is in tip-top shape or if repairs need to be done, or even – *gasp* – a replacement roof is needed. If either of the latter is true, then you might want to talk about how to include that in the overall price of the house. Here’s how to negotiate a new roof when buying a home.
Despite it likely being one of the most expensive things you’ll purchase in your entire life, buying a house is more like haggling at a flea market for an intriguing piece of upcycled furniture than it is paying for something in a store — it’s all negotiation.
Yep, as long as an agreement can be reached between the seller and buyer (within the confines of the law), no terms are off the table – which means, as the prospective buyer, you shouldn’t be scared to communicate your demands if you feel something needs addressing. Something like, say… a questionable old roof.
Is a roof replacement a big, not to mention expensive, job? Yes, but it’s also an essential part of the “product” you’re paying hundreds of thousands of dollars for. So, if you’ve found the house of your dreams, but the roof is more of a nightmare, let’s discuss further how to negotiate a new roof when buying a home.
Tips on Negotiating a New Roof When Buying a Home
Okay, so we know you’re probably not a professional roofer, (a professional roofer can most certainly help) but there are things you can look out for and questions you can ask when viewing a property that may shed some light on the state of a roof before you make an offer.
You need to find out…
- What materials were used on the current roof
- How old the roof is and who installed it
- When it was last inspected
And you should keep an eye out for…
- Sagging
- Water stains on the ceiling or walls of the top level of the property
- Mossy areas
- Missing or worn shingles
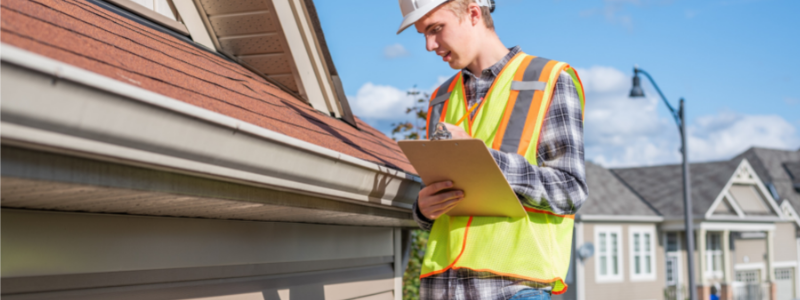
Inspections and Your Rights As A Buyer In Colorado
Inspections are a must when you’re thinking about buying a house. At your expense, an expert appraiser will assess the property and report back to you on any minor or major defects.
Do bear in mind, however, that a standard appraiser will only assess the roof from the ground.
To get a full roof inspection, you’ll need to contact a roofing specialist. It will give you leverage when thinking about how to negotiate a new roof when buying a home.
As per the standard Colorado real estate purchase contract, you’re then well within your rights to stipulate that the seller remedy any housing conditions that these inspections flag as unsatisfactory. After all, if the damage is severe, it may affect your ability to secure a mortgage or home insurance, in which case, the seller can kiss your offer goodbye!
In fact, as the climate in Colorado swings between extreme heat in the summer and lots of snow in the winter, roofs in our Centennial State often fall into disrepair, so it shouldn’t come as a shock to the buyer if the inspector finds some damage up there.
Whether the seller will agree to your terms is another matter entirely, but a new roof doesn’t necessarily have to be a dealbreaker if you know how to negotiate in these kinds of situations — let’s run through some key tips.
Establish Your Terms As Early As Possible
As discussed, you’re well within your rights to request structural defects of a home be remedied before you buy, but you need to give the seller plenty of notice. The earlier you lay your terms out on the table, the more receptive the seller will be.
How early, you ask? Well, we think it’s best that you establish a positive roof inspection as a contingency when you make your bid for the house. This way, the seller is well aware of your needs when they accept your offer, but don’t rest on your laurels just yet.
In order to be as forthright and efficient with your requests as possible, it’s important that you book the inspection sooner rather than later, so you and the seller are made aware of structural issues in good time.
Making A Strong Case
More than simply letting the seller know that you want the roof to be replaced, you need to really make your case, and explain why replacing the roof is the right thing to do.
To give your buying conditions a strong foundation, be sure to have the roofing specialist you hired to carry out the inspection provide a detailed rundown of what precisely is wrong with the current roof.
What’s more, if the roof is or is nearing the 20-year mark, remind the owner that if they weren’t selling, they would have to replace the roof anyway, and being that you’re not the one who’s been living in the home, the onus should not fall on you to pay for the replacement.
The overall message you should be sending is that for a quick and easy transaction, they need to accept your terms, otherwise they’ll have to put their home back on the market and place their life on hold for the foreseeable future.
If you know for a fact that the current owners need to get out fast, say… to purchase their new property before someone else has a chance, you can use this as leverage without seeming too forceful or demanding. You are, after all, addressing their needs by reminding them of the urgency of their situation.
Get Multiple Quotes
At this point, the seller may be hearing you, but worried about how much a new roof will set them back. Getting quotes can clear up this uncertainty, but it’s important that the seller feels this is done in a fair and impartial manner, which is why it’s a good idea to get three quotes in total and allow the current owners to select one of the companies.
You should also have each roofing company provide breakdowns detailing exactly how the money would be allocated between materials and labor.
Be Reasonable in Terms of Budget
As you’ll be moving into the house, you should get a say in the kind of roof installed, but to sweeten the deal a bit for the seller, you may want to go easy on the pricey materials, designs, and contractors.
Even though, ultimately, you want the owners to pay, trying to keep costs down and perhaps even secure a discount with a contractor may be the very thing that convinces them to submit to your requests.

Possible Options When Negotiating a New Roof
Now that you know a bit more about how to negotiate a new roof when buying a home, you’ll be presented with a few outcomes for you to consider:
Seller Pays For Roof Installation Before Closing
Your first option may be to have the seller pay to have the new roof installed before closing on the house.
Pros
- The house is complete when you move in.
- You won’t have to worry about organizing anything.
- You don’t have to pay the contractor any money.
Cons
- Roof installation can take between a day and a week depending on the complexity and size of the house and roof design, so the closing date will likely be a little delayed.
- Sometimes, the only people who can claim materials and workmanship warranty are those that pay for it. As such, it won’t transfer to you when you get the keys, leaving you in a sticky situation if there’s a problem with the new roof at a later date.
- You may not have as much say in the materials and design of the roof.
Seller Gives a Discount On the House
Another popular option (and probably your best option) is to have the seller deduct the cost of roof installation from the agreed offer on the house, so you can use the difference to have a roof installed yourself after closing.
Pros
- Sellers are typically far more likely to agree to these terms.
- As you’re technically paying for the roof, you shouldn’t have any issues with warranties.
- You may be able to negotiate a large discount for shouldering the burden of having to organize installation yourself.
- You get full control over materials and roof design.
Cons
- You have to organize the installation process. During this time, even though a good contracting company will strive to limit any inconvenience, you may not want to move in until after project completion.
Seller Pays You to Have Roof Installed After Closing
With this option, the value of the house remains the same, but the seller uses the equivalent of roof installation fees to reduce the buyer’s closing costs, thereby freeing up some funds for post-move installation.
Pros
- You get full control over the type of roof that gets installed.
- Sellers are more likely to accept this request.
- No warranty issues.
Cons
- Again, the responsibility falls on you to organize the installation, pay the contractors, and deal with any inconveniences during the installation process.

A Compromise
If the seller genuinely isn’t willing to budge, you could just call it quits and walk away, but as a last-ditch effort, you may also want to offer a compromise weighted heavily in your favor. For example, you could offer to split the costs 70/30.
The seller may push for 50/50, but as the buyer, you should be in charge of the negotiations, as you could retract your offer at any point. If you’re particularly in love with the house, going “halfsies” isn’t a terrible result, but it’s more than you should be willing to bend.
In this scenario, it’s a good idea to ask your realtor to inform the seller of what their house is likely to sell for now that the problems with the roof are common knowledge. This reminds them that they will have to deal with the roof issue eventually and that it’s best to address it now than to waste time putting the house back on the market and going through the same thing with a different buyer.
B&M Roofing and New Homes
Knowing how to negotiate a new roof when buying a home can add more layers to an already tricky situation, but with the right tools and experts involved, you’ll not only have the house of your dreams – but a nice roof to keep you cozy.
If you’re interested in purchasing a property in or around the Denver area, whether residential or commercial in nature, contact B&M Roofing today. We’ll send out a highly-experienced member of our team to inspect the roof and provide you with a quote for repairs, or, if necessary, a full replacement.
Our expert opinions, detailed reports, and great prices may be just the bargaining chip you need to get a new roof included as part of the sale on your soon-to-be dream house.
What Does Freeze Thaw Mean?
In our beloved state of Colorado is known to experience turbulent weather conditions. From facing heavy snow, ice, and low temperatures, it’s no surprise that the weather changes can cause havoc in areas of our lives.
The effects of such weather conditions can subsequently lead to freeze thawing. When we consider the science behind freeze thawing, we begin to see that it is a process that can potentially be destructive to just about anything. In this case, roofs.
But what does freeze thaw mean? This post will give you insight into what freeze thawing is and how you can prevent it from damaging your home and roof.
There are certain things you can do to winterize your roof, but knowing more about what freeze thaw means and what that means for your roof will give you an understanding of how to best prepare.
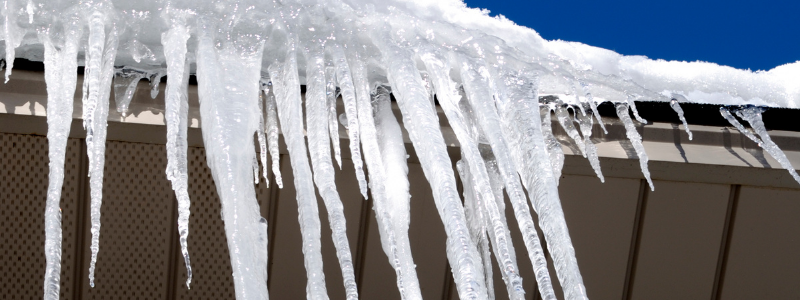
Freeze Thaw Weathering
Freeze thawing is characterized as a process of erosion that occurs when water enters cracks and crevices and expands as a result of low temperatures, this results in a build-up of pressure which is then released when temperatures increase.
The air consists of water and moisture.
A reduction in temperature causes water molecules to expand. Hence, when we consider the accumulation of rain, ice, and snow on roofs, we begin to see the signs of water expansion through roofing damage. The expansion of the water molecules causes a build-up of pressure. Roofing materials are not designed to be flexible and malleable, hence when water seeps beneath these materials and expands, it consequently causes damage such as cracks. A fluctuation in weather conditions with temperatures reaching freezing levels can have catastrophic effects as the freeze thaw cycle begins to add substantial stress on the roof’s shingles as it expands and contracts along with the weather.
The effects of the freeze thaw cycle on roofing can result in:
- Seam damage
- Ice dam damage to guttering
- Condensation and mildew within the home
- Flashing leaks
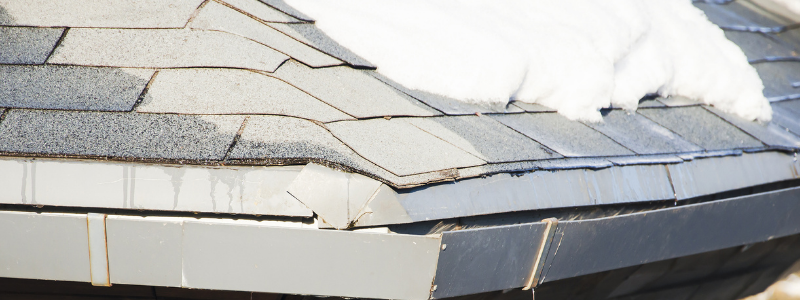
Freeze Thaw Damage
The roof of a building is designed to be a barrier that essentially protects the building from the elements. Hence, maintaining your roof is critical to ensuring that it performs in the way it is supposed to.
However, drastic weather conditions and unexpected turbulent storms can be the demise of a well-constructed roof. Despite having a sturdy roof, significant exposure to hard weather, ice, and water can cause severe roof damage with potentially long-lasting effects.
The residue water left from freeze thawing can be highly damaging as it results in water seeping under roof shingles and entering attic space. If this is not dealt with efficiently, it can lead to additional problems such as causing damp and leaks through ceilings, walls, and insulation. The presence of continuous stress applied to roofing can also result in a significant reduction in the roof’s lifespan as the cycle of contracting and expanding may bring it to a breaking point.
In addition to these damages, if your roof is made from natural material such as stone or concrete, the process of freeze thawing causes the materials to erode as a result of excessive water exposure. Consequently, this effect can become a catalyst for further damages such as water entering the home causing mold and mildew as a result of bacteria-ridden water molecules thriving in a warm environment.
How to Prevent Freeze Thaw Damage
Are you wondering if an ice and water shield is necessary?
The answer is we recommend it.
It’s critical that even if you’re not in a position where you want to completely replace your roof, you at least put the relevant precautions in place to ensure that your roof does its job effectively as it provides an additional layer of protection from weather damage. These types of shields are great for not only offering significant protection but also providing peace of mind in knowing that you don’t have to worry about the change in seasons.
An ice and water shield is a protective waterproof membrane that works to protect the roof from damage from ice dams, snow, and rainwater. It works to provide a form of protection that makes the building weather-resistant. Learn more about the benefits of an ice and water shield.
Besides implementing additional roofing protection, there are additional steps you can take to avoid winter roof problems. One of the most significant steps to take is to analyze your roof early on to ensure that any existing problems can be dealt with in advance before winter sets in. Find out more on winterizing your roof effectively.
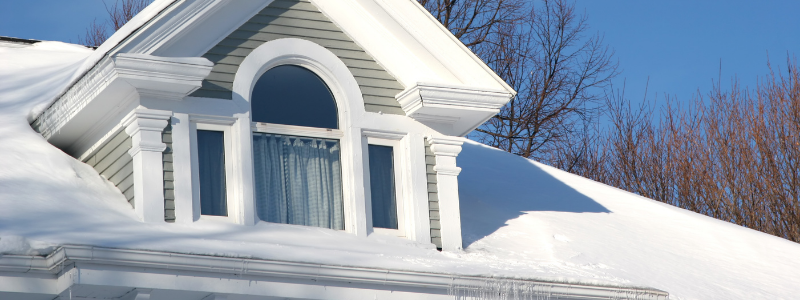
How B&M Roofing Can Help With Freeze Thaw
If you’ve started to notice any of the signs of the effects of freeze thawing, it’s not too late to get your roof back into shape.
The best thing you can do is to ensure that your roof is regularly maintained and to hire a professional to put the necessary weather protection in place. At B&M Roofing, we pride ourselves on providing leading roofing solutions and services. We offer services that ensure maximum protection for both commercial and residential roofing. Our top services for weather protection from freeze-thawing include water and ice barrier installation and roof repairs and maintenance. Our services exist to give you maximum protection and peace of mind. We consist of a reliable team of roofing experts who are exceptionally skilled in a variety of roof types.
If you’re concerned about the current state of your roof as a result of weathering and snow and you’re considering a roof replacement, find out more about what type of roof is best for snow.
Between wear and tear, natural degradation, and weathering, our roofs are built to withstand extreme pressure. However, there is only so much that can be taken. In order to protect our buildings, it’s essential that we work to maintain the quality of roofs to maintain their lifespan. Doing this requires taking the necessary steps to ensure that the correct repairs are done and that the necessary precautions or protective measures are put in place to prevent long-term damage.
There’s no doubt that the process of freeze-thawing can be devastating.
However, with services such as those provided by B&M roofing, there are solutions to tackling and preventing the effects of freeze-thawing.
Snow Damage to Roofs
We’re no strangers to snow here in Colorado. Unlike most other places, we can get a thick blanket of the cold stuff every month of the year — not that we let it get in our way! However, when the winter months roll around, the snow can get particularly problematic, especially for our roofs.
As beautiful as a vista of wintery whiteness can be when we look out our windows in the morning, Jack Frost can damage our roofs in a number of ways. Snow damage to roofs is no joke, so it’s better to know what can happen to either prevent it from happening or know how to deal with it during the cold months.
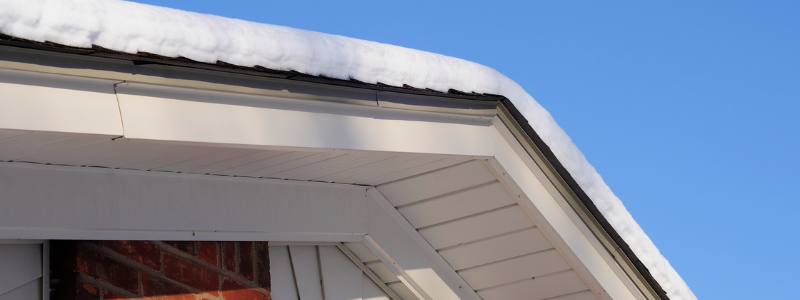
Snow Damage to Roofs: Full On Collapse
A single snowflake may not weigh all that much (roughly 0.02 g), but when thousands of these little fluffy hexagons get together, they can be extremely burdensome for the surface beneath.
According to Accuweather’s in-house forensic meteorologist, the typical roof of a house in a northeastern State can support around 30lbs per square foot, while others in snowier states such as Colorado may be able to handle between 40 and 100 lbs per square foot.
This means that, depending on your location, anything upward of 4 ft of fresh snow or 2 ft of compacted snow can be a real threat, and roofs that haven’t been repaired or inspected in a while are at an even higher risk of collapse.
If you have any external roof units such as parapets or air conditioners, they can cause an excess drift in certain areas amounting to uneven weight distribution and, again, an increased risk of sagging or collapse.
Don’t worry if you’re not sure how much snow your roof is rated to hold, as you can check out our in-depth Colorado Snow Load Guide that takes you through a step-by-step snow load calculation process.
The Fix
The snow needs to be removed, otherwise, it will compact over time, and, eventually, rainfall will add to the weight, increasing the strain on your roof. You may want to invest in a scraping tool such as a roof rake to remove snow, but this should only be used if the roof is low and there is minimal risk of injury.
It’s also important to bear in mind that the scraping tool itself will add weight to the rooftop, and, in some instances, may end up being the straw that broke the camel’s back, which is why we’d recommend contacting our experienced team before attempting a DIY fix.
Preventative Measures
The best thing you can do to prevent a snow-based roof collapse is to contact your local roofing contractor before winter strikes. They will do a thorough inspection of your roof, and advise on any repairs or reinforcements that will help your roof shoulder the weight of the coming snow.
If you’re planning on having a roof installed in the coming months, It’s critical to understand what type of roof is best for snow, before construction commences. That way, you’ll put yourself in the best possible position if you’re hit by unusually extreme weather conditions come winter.
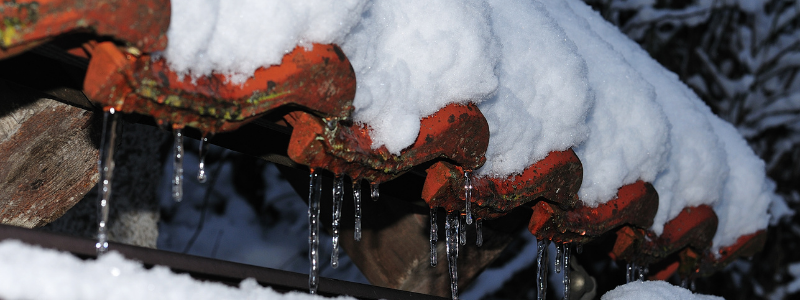
Snow Damage to Roofs: Snowmelt and Ice Dams
You’d be forgiven for thinking that if the snow on your roof starts to melt, your problems are a thing of the past, but sadly, they’re only just beginning.
As the snowy season is so cold, it stands to reason that you’ll be heating your house, either with fires or central heating. Well, the hot air that keeps your fingers, toes, and unmentionables from freezing, rises, eventually hitting the underside of your roof shingles.
Warming up over time, the central shingles melt the snow above, causing meltwater to run off towards the colder edges of your roof where it refreezes. The ice builds up at these peripheral points, amassing more and more meltwater.
What does this mean? Well, as snow and ice thaws and refreezes, it expands, prying open leakage points that can cause floods upon the next melt.
The Fix
There are a couple of things you can do to prevent further damage if you’ve already been struck by leaking caused by ice dams, including setting up a box fan in your attic aimed at the leak point to freeze the water as it enters the property.
Another neat trick is to fill some pantyhose with calcium chloride ice melter and lay them across the dam; however, you should only try this if it’s safe to do so.
Preventative Measures
The best way to ensure you never have to face damage from ice dams is to hire a contractor to make sure your attic is properly insulated and ventilated. We’d also recommend having an ice and water shield installed below your shingles.
Something you can do yourself to keep ice dams at bay is clearing your downspouts and gutters towards the tail-end of fall, so meltwater can flow freely from your roof.
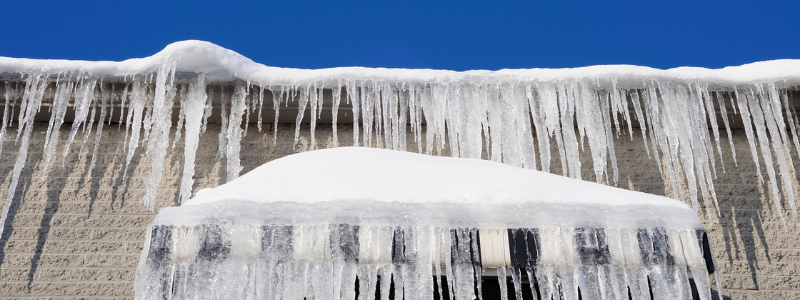
Snow Damage to Roofs: Icicle Formation
If your roof suffers from ice dams, then there’s a good chance you’ll notice the formation of icicles around its perimeter, and while these look quite pretty, they can be a big problem!
They can weigh down and break your gutters, damage your shingles, and possibly even snap, fall, and hurt unfortunate people or pets below.
The Fix
As long as it’s safe to do so, you can gently knock icicles loose using a broom or rake handle. If you’re climbing a ladder to reach them, make sure it’s secure, and recruit a friend or family member to hold it in place.
Preventative Measures
Much like ice dams, you can combat icicle formation by ironing out the kinks in your attic’s insulation and eliminating rooftop air seepage. Installing ice-melting roof cables is also an option.
Snow Damage to Roofs: Attic Condensation
Winter build-ups on your roof can also cause excessive condensation in your attic ceiling, especially if ice dams are already established. This may not sound that serious, comparatively speaking, but it can actually be incredibly damaging.
The excess moisture will saturate the wood, causing mold and wood rot, compromising the structural integrity of your roof from the inside. Then it’s at a greater risk of sagging and collapse due to diminished weight-bearing capabilities.
What’s more, the damp is liable to spread to attic furnishings and stored items, so it’s a good idea to clear the space if you notice any dark, moist areas in your attic ceiling.
The Fix
Your first port of call should be to remove or deactivate any appliances or plumbing that may be malfunctioning and worsening the moisture build-up. Once they’re out of the way, seek out and plug any leak zones in your attic floor insulation.
Preventative Measures
Once again, optimizing your attic insulation and ventilation is absolutely key in preventing the build-up of excess condensation.
How Much Snow Damage Is Too Much to Repair?
In an ideal situation, professionals such as ourselves will be able to repair and reinforce your existing roof, but if the damage is too severe, the only option is to replace the whole structure.
If, for example, you’re experiencing leaks at a number of points across the entire roof, repairs will only be a fleeting fix, as the issue is so widespread that it’s bound to flare up again.
A general rule of thumb most roofers live by is that repairs will be effective if they cover 30% or less of the damned roof. Anything beyond that is like placing a band-aid on a bullet wound.
How B&M Roofing Can Help with Snow Damage
We know that all this information can be quite jarring, and while it should be taken seriously, we want you to know that you’re not alone in dealing with your winter roof woes.
No matter which of these winter roof problems you’re worried about or are currently dealing with, B&M Roofing can help! Our team of seasoned experts has the skills to ease the burden the snow is placing on both you and your roof, so you can enjoy the holiday season knowing the roof over your head is safe and secure. We specialize in both commercial roofing and residential roofing, so if your property is situated in or around the Denver area, please don’t hesitate to contact us for some support in winterizing your roof.
What Temperature is Too Cold to Put On a Roof?
There’s nothing worse than a roofing emergency in the dead of winter — the cold is getting into your property, the snows are on the way (or already here), and roofing contractors are hesitant to come and help you out… but what temperature is too cold to put on a roof?
Well, although no one – save the man in red – enjoys being up on a roof battling against bitter winds and slippery surfaces, it’s not just a distaste for bad weather that gives us pause.
It’s actually more to do with the installation process and the materials we use.
A lot of people don’t realize it, but temperate weather is absolutely essential to the proper installation of many types of roofs. Ignoring this will only lead to further roofing emergencies, more stress, and, of course, more expense.
Let’s discuss the matter in more detail, so you’re never caught out when old Jack Frost rolls into town.
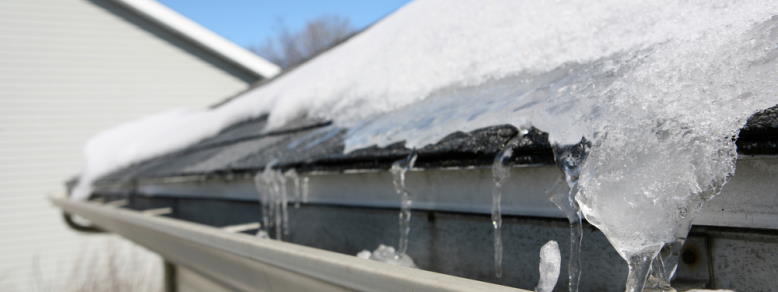
When is it Too Cold to Roof?
You may be wondering what temperature is too cold to put on a roof? Even if the wind is mild, the snow is yet to fall, and all have the correct safety equipment to get the job done safely, 30° Fahrenheit is considered too cold to perform repairs or install a new roof.
In fact, you’ll find that most roofing contractors draw the line at 40 degrees F, as this marks the industry-standard warranty threshold of most roofing materials.
This can, of course, be infuriating when you need a quick fix, but disregarding these warranties can be irresponsible, and may leave all involved parties out of pocket.
Why Is it Problematic to Roof In Cold Temperatures?
What temperature is too cold to put on a roof? There are three main reasons why attempting to roof in temperatures below 30 degrees F is a pretty bad idea.
Materials
The top layer of most roofs is composed of little tiles known as asphalt shingles. They’re durable and easy to work within temperate climates, but when the knee-knocking weather comes around, they become brittle, liable to snap or crack during the installation process.
But it’s not just asphalt shingles that hate the cold, other common roofing materials, such as concrete tiles, clay, and EPDM rubber membranes are also easily compromised in sub-zero temperatures.
Installation
To install shingle roofing, you need to form a base layer and an exterior layer. The base layer is secured to the roof deck with nails, which can be an issue if the surface or air temperature has rendered them brittle, and that’s not even the real trouble.
The top layer of shingles is fitted to the base layer with a thermally activated sealant. This sealant needs the heat of direct sunlight to cure properly and form a strong, long-lasting bond.
Without a sufficient amount of heat, the shingles will never fully adhere to the sealant, and strong winds could tear them away, revealing the under-layer. The threshold for being too cold for roofing is below 30 degrees F.
Rainwater and snowmelt will then seep into the attic via the nail holes in the first layer of shingles — not good!
Labor Difficulties and Expenses
Is it too cold to roof during winter? Due to the nature of the job, when the chill rears its ugly head in wintertime, roofing businesses are often left with no other choice but to increase their rates.
We all have to take the proper precautions to ensure our safety during a cold-weather project. These measures include…
- Clearing snow or ice from the work area
- Wearing heavier boots and protective clothing
- Working slowly to avoid mistakes, protect materials, and minimize risk
- Properly venting the attic below
- Checking for and unveiling hidden hazards such as skylights
- Taking breaks to sufficiently rehydrate and improve focus
- Possibly splitting the job into smaller sessions if the weather becomes too dangerous to work through.
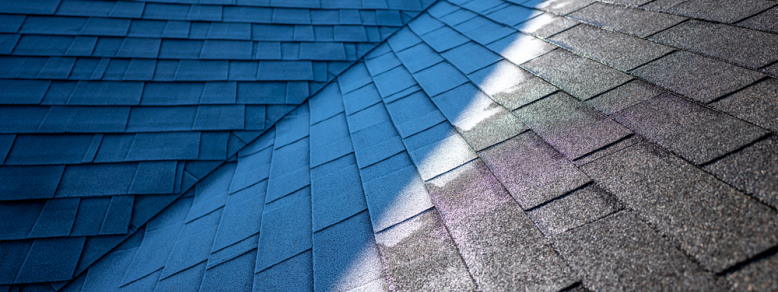
Is Putting on a Roof in Cold Weather Completely Out of the Question?
As long as the weather isn’t so extreme that it would be dangerous to do so, it is possible to roof with the temperature-sensitive materials mentioned earlier, but it’s an exceedingly tough job.
Not only will all involved have to work slowly and with a light touch, but all materials will also have to be hand sealed with a cold-weather adhesive, as thermal sealant is no longer an option.
Things are a little easier if a roof requires metal, wood shingles/shakes, or slate, as these materials do not need to be glued in place, rather, they’re nailed to the roof bed, but it can still be a complex and unpleasant task in cold weather.
Is Roofing in Cold Weather Worth It?
We take pride in our work here at B&M Roofing, and we’re not happy unless you’re happy. You deserve our very best efforts, but when nature is working against us, we can only do so much. If at all possible, it’s much better to wait for a warmer time of year to repair, install, or replace a roof.
Check out a full list of our services here.
What’s the Best Time of Year for Working on a Roof?
The best time of year for roofing is either spring or autumn. These are the mildest of the seasons, neither too hot nor too cold, and the weather is often stable for days on end.
For asphalt shingles, manufacturers typically recommend waiting for 70–80° heat, and not just for installation, but for a few days after the fact as well, just to be sure the sealant has fully activated, and your roof is as robust as it could possibly be.
When is it too cold to roof? Temperatures below 30 degrees F are considered too cold for thermally-activated sealant to perform its job correctly.
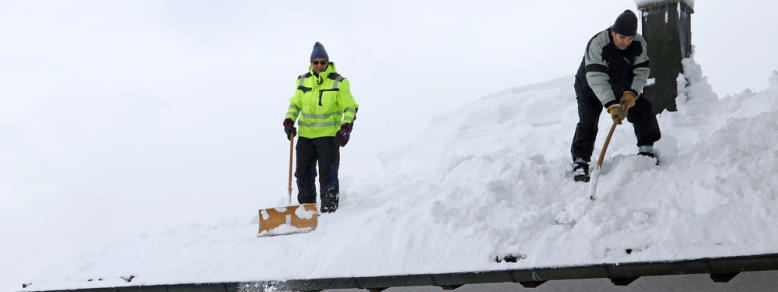
Roof Maintenance: Winter Checklist
Here’s what you can do to make sure you’re ready for the winter in plenty of time
- Contact us for a free inspection and estimate on any work that may need doing.
- Check that there are no blockages in your gutters and that water is flowing freely.
- Check your attic is sufficiently insulated.
- Check your roof for visible cracks, missing shingles, and areas that could develop ice dams.
Cold Weather Roof Emergencies: What Are Your Options?
No matter how prepared you are, some incidents are unavoidable – and winter can come with its own set of roof problems.
Perhaps a tree fall has caused damage to your roof, or you missed a loose shingle during your checks… whatever the issue, here are some pro-tips for getting through this trying time…
- Get yourself and your family to safety. If you have somewhere else you can stay for a while, do so.
- Cut off the power supply to the affected area. I’m sure we don’t need to tell you that moisture and electronics don’t mix, so if your roof is compromised, get them out of there, or at the very least, shut them down.
- If it’s a minor leak, you can try and stop it temporarily.
- Call us! With over 70 years of experience in the roofing industry, if there’s anybody capable of conquering the bad weather and saving your home from further damage, it’s us. We’ll send out our very best to assess the issue, and even if the weather is too extreme for us to make immediate repairs, we’ll be able to advise you on what to do next.
B&M Roofing Colorado: Here to Help
So, what temperature is too cold to put on a roof? Well, roofing in sub-zero temperatures is always to be avoided whenever possible, but we’re not going to abandon you in your time of need. If the worst does happen, and you’re left with a serious roofing issue in the dead of winter, we’ll do everything in our power to help you out.
However, the best course of action is to schedule regular maintenance with B&M Roofing in spring and early fall, so we can winter-proof your home well in advance, and you can enjoy the holiday season worry-free!
Is an Ice and Water Shield Necessary?
The roof of a home is meant to protect the inside from nature’s elements. That’s why it’s important to ensure your roof does its job properly, and that ice and water are directed towards the proper gutter and drainage systems. However, extreme and unexpected weather might cause water to pass through the gaps between your shingles.
Installing an ice and water shield to your roofing system is essential in keeping your home dry and protected from damage. This extra layer of protection is important if you live in areas that receive significant amounts of precipitation and snow coverage, like Colorado. However, it’s also beneficial for homes in areas that don’t typically see instances of extreme weather.
So you might be wondering, what can an ice and water shield do for me and my home? Is ice and water shield necessary? We’ve outlined everything you need to know below.
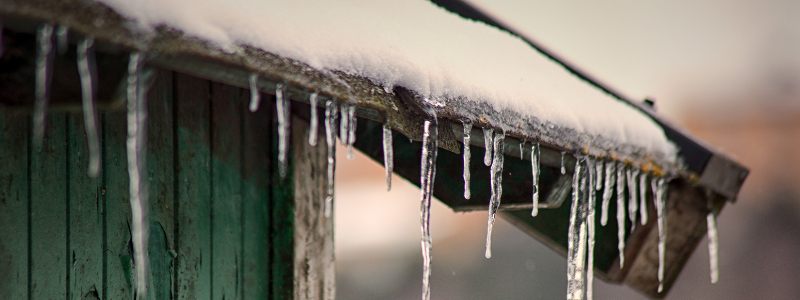
What is an Ice and Water Shield?
An ice and water shield is a waterproof self-adhering membrane made from rubberized asphalt. It is installed underneath the shingles of your roof and is designed to protect your roof deck from ice and water damage. This includes damage from ice dams, melting snow, and rainwater.
The peel-and-stick backing bonds to the roof deck, sealing around laps and nail punctures to keep water out. These protectors contain a film made of modified bitumen that attaches to the roof deck forming a watertight seal, so water can’t seep through cracks and crevices.
The slip-resistant top surface also creates better traction, making your home more resistant to strong winds and horizontally-propelled precipitation.
Is Ice and Water Shield Necessary?
Ice and water shielding is necessary for your roof, especially for homeowners in Colorado. This is because much of the state sits above 7000 feet in elevation. However, ice and water shields aren’t only limited to homes and buildings in high-altitude areas. Defending any structure from any type of weather-induced damage starts with the roofing system.
If your home is in an area that typically doesn’t see extreme weather, you might think you don’t require this extra layer of protection. However, if left untreated, all the small damages on your roof can eventually add up, leading to more serious damage.
Being prepared with an ice and water shield installed can reduce the need for constant repairs and extend the lifespan of your roof.
Nature vs. Your Roof
No matter where you live, natural elements can cause damage to your roof. These types of damage include:
- Curled shingles
- Cracked shingles
- Interior water damage
- Insulation damage
…and more!
Strong winds and extreme weather can cause horizontally propelled rain, hail, and snow. Shingles are designed for precipitation that falls vertically, but extreme weather can cause shingles to curl and push rainwater underneath into your roof’s foundation.
In places with low temperatures and snow, the accumulated weight of snow on your roof can also crack shingles. This may create more entryways for water to flow inside your home. Additionally, homes in colder climates are more susceptible to ice dams and frozen gutters. Installing an ice and water shield will prevent the chance of leaks from winter-roof damages.
Many home insurance companies don’t cover damages from wind-driven rain or ice-packed roofs. Therefore, it’s in your best interest to prepare and protect your home from any risk of weather-induced damage.
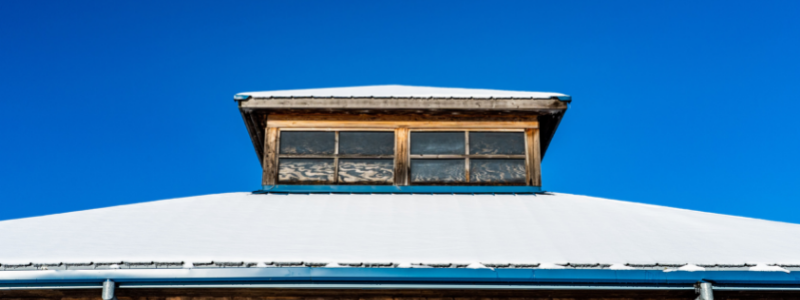
The Dangers of Ice and Water Damage
We know that water and ice can damage your roof. What you might not know is that the resulting water damage can extend to the interior of your home. Water that does not drain properly can work its way under your shingles, into your attic, and further through your insulation, ceilings, walls, and other areas.
If your exterior or masonry is made from natural stone and concrete, too much water exposure will cause these materials to erode. This can cause water to further pass through the cracks on your roof, walls, and possibly the basement of your home.
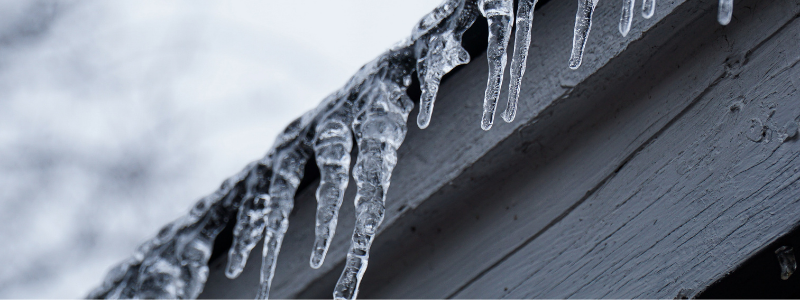
In colder climates, the formation of ice dams and heavy snow loads can cause severe damage to your roof. It can break off your gutters, loosen shingles and cause water to leak into your home. When water enters the home, it can cause paint to peel off the walls while ceilings and floors can start to warp and stain, becoming very unsightly.
Water entering the home can not only cause several types of structural damage, but it can also lead to mold and mildew to grow on eaves, slidings, and walls. Mold and mildew can result in health problems such as asthma, sudden allergies, and an increase in sinus infections.
Spend to Save
Spending the money on ice and water shielding will help you save money in the long run. Skipping out on the ice and water shield for your roofing system can save you money in the short term, but it will most likely lead to problems that can cost thousands of dollars to repair later on. Roof damage will also impact the insulation of your home, causing you to rely more on your heating and cooling system, increasing your household’s utility bills.
With an ice and water shield, homeowners can save on the cost of constantly getting their roofs inspected for repairs or damages. Roof maintenance can be costly. It can become a dreaded task on your chore list. Opting for an ice and water shield is a more permanent solution if installed correctly. It will greatly reduce maintenance efforts on your end.
There’s no better way to protect your home (wherever you are in the world) from leaks and water damage than installing an ice and water shield in your roofing system. The shields are durable and effective in keeping your home dry and well-maintained. Because it can be a costly home improvement project, it is in your best interest to consult a professional roofer. Experienced professionals can determine the best ways to keep your roof and your home in tip-top shape. So, if you’re still asking, “Is ice and water shield necessary,” you’ll find that the answer, most likely, is yes!
B&M Roofing: Colorado’s Top Roofing Experts
Since 1947, B&M Roofing has been Colorado’s most trusted group of roofing experts. Our reliable, and well-seasoned team of roof experts are skilled with various roof types and will ensure your roof does its job as a safeguard for your home.
We can assess the current state of your roof, identify repairs and provide you with a reasonable budget. Request a free estimate on our website or give us a call today!
Fall Gutter Cleaning
Fall is a lot of people’s favorite season for a variety of reasons. The weather’s starting to cool down, there are all sorts of great fall activities to do, and, depending on where in the country you live, you could get treated to some incredible colors from the leaves changing.
Although fall means that the leaves are changing into pretty colors, it also means that those leaves are falling and can start clogging up your gutters. If you’re not proactive and don’t take the proper steps to clean these leaves from your gutters, you could run into a lot of trouble. Regular fall gutter cleaning can help prevent any long-term damage to your gutters.
Falling Leaves and Damage
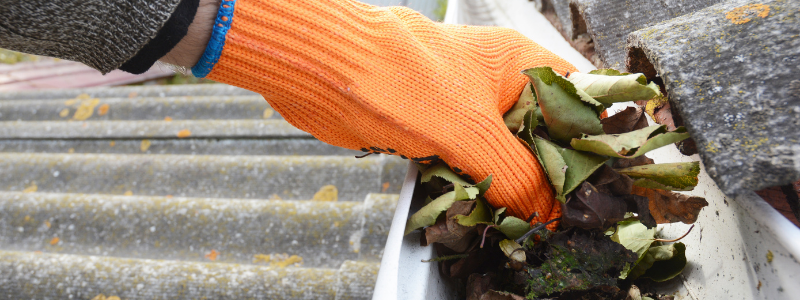
Leaving leaves in your gutters can lead to some serious problems. Gutters have the extremely important role of funneling and removing rainwater from your roof and home. If these gutters can’t do their job, there is a possibility that your home could suffer water damage. At a high enough volume, wet leaves do a great job of acting like a dam, preventing any rainwater from funneling through and down your downspout.
As the water continues to back up, more serious damage can occur. The backed-up water will eventually overflow out of your gutters and can push underneath your roof shingles. This will cause damage to your roof deck over time. This is a very serious and expensive problem to have, as fixing it will require the work of a professional contractor.
One additional problem that can happen from not partaking in fall gutter cleaning will occur when the weather gets cold. Wet leaves can freeze, and since water expands when it turns into ice, this extra pressure can cause your gutters to crack or warp.
Importance of Fall Gutter Cleaning
Fall gutter cleaning, especially when the leaves are falling off their trees frequently, can help save your gutters and home from the potential issues we’ve detailed above. Although it may not be a fun chore, it is undoubtedly one of the best ways you can protect your home and make sure that your gutters are working properly. Even if you don’t live somewhere with a lot of leaves falling, your home and gutters will still benefit from somewhat regular gutter cleaning.
How to Clean Your Gutters Safely
Gutter cleaning can be an extremely dangerous activity, especially if you aren’t properly trained or don’t know what you’re doing. Often, cleaning your gutters requires either the use of a ladder or going onto your roof. If you don’t know what you’re doing, there’s the potential that you can slip or fall and end up with a serious injury.
Therefore, it’s extremely important to learn how to clean your gutters safely. Down below, we’ve shared a few different methods that you can use to make sure that you’re staying safe while doing your fall gutter cleaning.
Option A: Hire Experienced Professionals
In truth, the way for you to be the safest while getting the leaves removed from your gutters is to hire an experienced professional. This might be the only option you’re comfortable with, especially if you have a two- or three-story home.
This option ensures that you won’t be in danger, and will also ensure that you are getting top-quality gutter cleaning. Depending on the size of your home, physical health, and whether or not you have a fear of heights, this might be the best idea for you.
Option B: Do It Yourself
Performing gutter cleaning yourself is a good way to learn how to take care of a crucial part of your home and to do so while saving money. Down below, we’ve listed out the steps you should follow.
1: Determine what you will need.
Typically, most people will clean gutters by going on a ladder, as opposed to going onto their roof and walking around. Therefore, you’ll want to get a properly sized ladder for the height of your gutters. You’ll also want work gloves, yard debris bags, a garden hose, and gutter sealant in case you find any leaking seams or joints.
2: Practice ladder safety.
If you’ve decided to take fall gutter cleaning into your own hands, it’s imperative that you understand how to safely use a ladder. Typically, this means that you’ll want to have someone else holding and stabilizing the ladder as you’re on it. Additionally, you need to be aware of what angle to set the ladder to the home so that it’s not too vertical or too horizontal. It’s important to move slowly and deliberately while going up and down the ladder, in addition to having the ladder firmly secured.
3: Clear debris from your gutters.
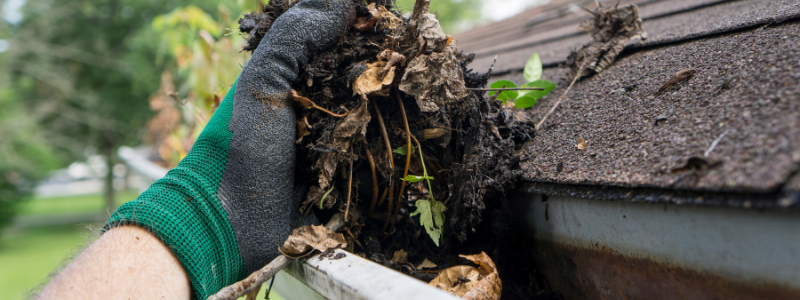
This step is really the main part of the process. Essentially, you will need to go around all of your gutters and use your hands to yank any debris, such as leaves and dirt, out of the gutter. It’s a good idea to wait a couple of days after rain to do this since dry debris will be much easier to remove than wet debris.
4: Flush the gutters.
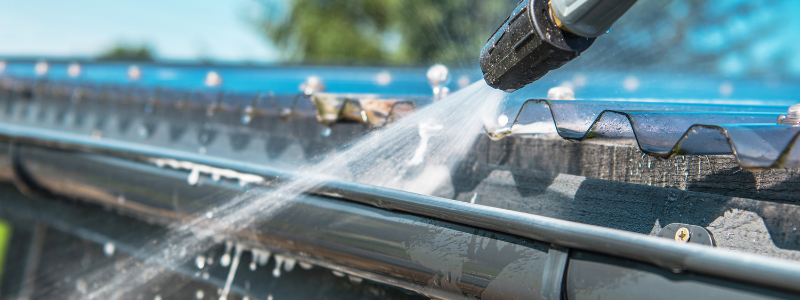
Once you’ve removed most of the debris, you should use a garden hose to flush the gutters. This way, you’ll get all of the smaller particles out, and your gutters will be nice and clean. It’s important to have someone checking the downspouts as you’re doing this. Check if the water is flowing freely to ensure that there’s no clog in the downspout, either.
5: Complete your gutter cleaning.
Lastly, you’ll want to check for any leaking seams, joints, cracks, or any sort of further damage to your gutters. Depending on the severity of these issues, you could either apply some gutter sealant. If the damage is extensive or severe, you may need to hire a professional to repair your gutters.
B&M Roofing: Colorado’s Top Roofing Company
Cleaning your gutters regularly is a good way to extend the life of your roof. However, roofs, just like anything else in your home, will need to be repaired and replaced eventually.
If you’re interested in installing a new roof for your home or business or having your roof repaired, look no further than B&M Roofing. B&M Roofing are true experts in roofs, having skillfully provided reliable roof coverings since 1947. They can give you a free estimate, & will work with you every step of the way, from determining which roof (metal or not) is best for you, installing your new roof, and providing regular maintenance.
How to Inspect Your Roof for Hail Damage
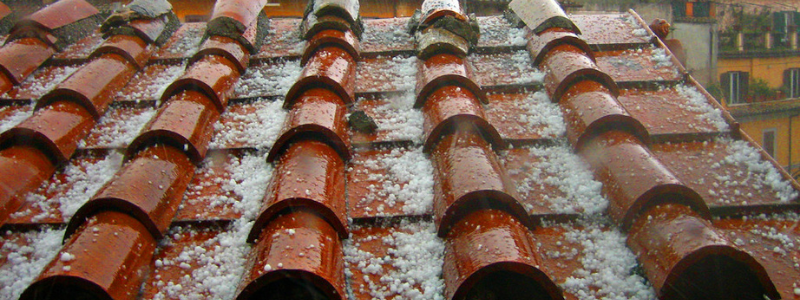
Summer in Colorado oftentimes means late afternoon thunderstorms and hail. While pea-sized hail is unlikely to do any damage, hail 1” in diameter (quarter-sized) and larger can be detrimental to your roof. If you’ve recently had a storm roll through your area with decent-sized hail, you may be curious to know if there was any hail damage to your roof. Depending on the extent of the damage, you may need some repairs.
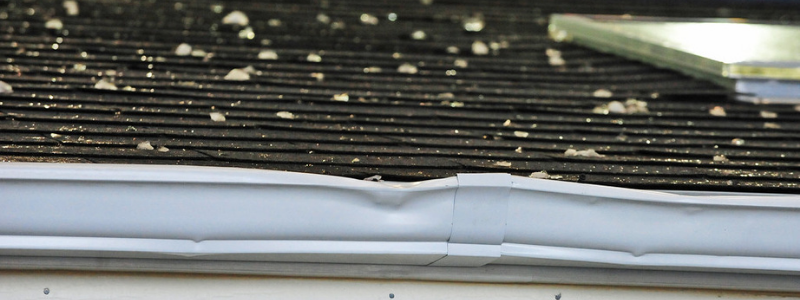
There are a few things you need to think about before assessing your hail damage roof. Firstly, you need to ensure that you are safe. That is why hail damage roof assessments are often left to experienced professionals. Secondly, you must know there may not be damage to just your roof, but also to gutters and downspouts. That’s a good place to start when assessing the damage. It’s important to check roof elements such as chimneys and roof vents, as well.
What Hail Can Do to Your Roof
Hail can do a lot to damage your roof. Not only can it damage the roof itself, but it can also damage roof elements like vents, chimneys, skylights, gutters, and more. A hail damage roof can be compromised depending on the extent of the damage. Hail damage to your roof can cause things like:
- Loss of protective shingle granules
- Cracks in shingles
- Exposed sub-surface materials
- Weakened seals
All of these things can lead to leaks in your roof, or worse. That’s why it’s important to be on top of the damage so that you get it assessed and repaired before it becomes a major issue.
Inspecting Your Roof for Hail Damage
Once you understand what hail damage can look like and the effects it may have on your home, you can start to inspect your hail damage roof. However, if you are uncertain about the safety of your inspection or are unsure how much damage was caused, it’s a good idea to call a professional. Here is how to inspect your roof for hail damage:
Safety First
Before you get up on your roof, we want to remind you that safety should be your first priority. Plan on wearing soft-soled shoes or roofing boots for safe walking on your roof. Always check that your ladder is in perfect working condition and bring some chalk to mark up any damaged areas. Never go up on your roof alone, always have someone outside with you!
Start With Obvious Damage
By looking for damage to gutters and downspouts, you can bet that your roof sustained some damage, too. Make your way around your home to take inventory of damage on some of those items. You may also look for damage to window sills, siding, and even your air conditioner.
Inspect the Roof Features
Once you’ve inspected damage around the roof, it’s time to get on the roof. In addition to the roof itself, it’s also important to inspect roof features on your hail damage roof that may have also been impacted. Check all of the features that could have sustained damage, like roof vents, chimneys, and skylights.
For hard to inspect areas like chimney covers, or other places where the damage isn’t obvious, there is an easy solution. Bring a stick of chalk up to the roof with you. Turn your chalk sideways and run it over the surface. This will show you where there are dents and divots, thus uncovering hail impact points.
Inspect the Shingles
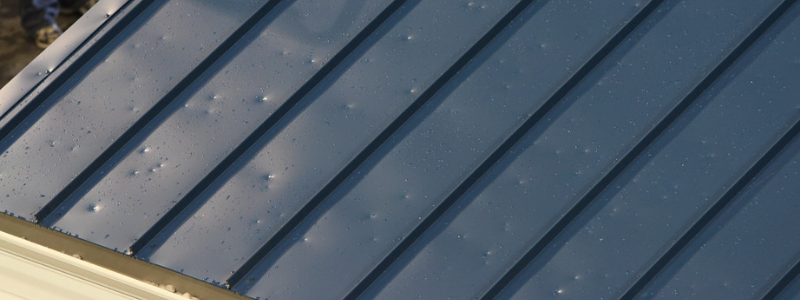
Hail damage to shingles isn’t always completely obvious. Figuring out the extent of the damage usually takes a trained eye. However, if you are choosing to inspect the damage yourself, here is what to look for:
- Obvious dents or divots
- Random round impact areas
- Dark-colored circles
- Areas where granules have been knocked off the shingle
If granules have been knocked off a shingle, this means that the hail has compromised the integrity of the shingle. This can cause leaks can develop over time. Circle each impact spot that you find with chalk to keep track of the extent of the damage.
When to Call a Professional
It is important to understand that roof inspection and repair are not things that can always be safely and easily done by anyone. Roofing professionals are trained and experienced in inspecting damaged roofs, assessing the damage, and coming up with an appropriate plan for repair. Whether a single shingle is damaged, or the entire roof and its features have been compromised by hail, it’s best to leave the assessment to experienced professionals.
How B&M Roofing Can Help
B&M Roofing has been in the business of repairing roofs since its inception in 1947. We specialize in roof analysis, leak identification, preventative maintenance, repair, and more. We even offer emergency repairs for when your roof has been seriously compromised by harsh Colorado storms.
Once you’ve done some hail damage inspection of your own, it’s time to call in some experts to take a second look to determine what your next step will be. The roofing experts at B&M Roofing are happy to provide you a free estimate after a hail storm. You can contact us by calling or by submitting a free estimate request online!
Passive Roof Vents
Roof vents are necessary for your home or commercial property. They protect buildings in many ways. Without roof vents, your home or office may be too hot in the summer and too cold in the winter. This makes your heating/cooling system work overtime. There are many different types of roof vents you can use, including passive roof vents.
Inadequate roof ventilation may also result in unhealthy living conditions. When deciding on what kind of roof vents will be best for your property, it is important to know and understand your options.
What are Roof Vents?
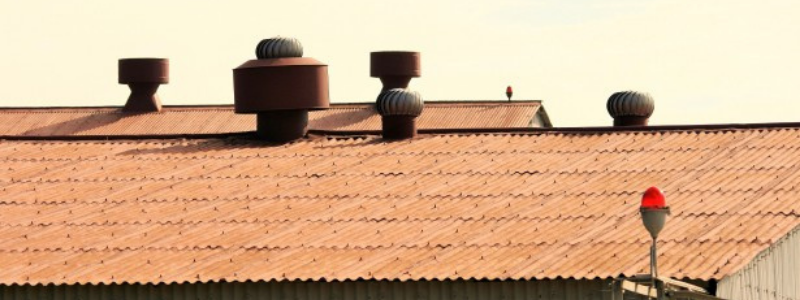
Roof vents or exhaust vents are installed at the top of the roof. The roof ventilation in your property lets air circulate through the attic of the building. Regulating the air in this space can have many benefits.
Why are Roof Vents Important?
Roof vents are mainly installed to allow heat, hot air, moisture, and odors to escape from your attic. Roof turbines have blades that spin in the breeze. This motion pulls air up through the house into the attic and out through the vents.
Roofing ventilation systems work year-round. They balance the intake of cool air and the outflow of warm air. Roof vents are often located at the peak of your roof because hot air accumulates there.
Roof Vents Year-Round
Combined with attic fans, roof vents can significantly cut the cost of heating and cooling your home. Warm months intensify heated air because outside temperatures rise. If your home is not properly vented, your air conditioner may get overloaded trying to replace warm air with cool. During cooler months, your heating system produced warm aid. This heated air mixes with water vapor from activities like cooking, showers, and bathing. If this warm, moist air lingers in your attic, it can cause mold, mildew, damage to roofing studs, and even ice dams when temperatures drop outdoors.
Roof Vents for Protection
Roof vents can also protect your home from costly structural damage caused by ice dams, moisture buildup, tapped heat and mold, or poor indoor air quality. Poor ventilation can eventually cause shingles to fail, resulting in roof leaks. If this occurs, the structure of your building may be compromised.
Roof vents extend the life of your roof. This can allow for huge savings. Vents also regulate the temperature of your property. Thus, they reduce energy costs. If an attic is well ventilated, it will reduce the chances of rot, mildew, mold, and peeling paint.
Types of Roof Vents
The goal of roof vents is to equalize the inflow of cool air and the outflow of warm air. Multiple types of roof vents used in combination can achieve this effect.
Intake Vents
Intake vents improve exhaust vents’ ability to reduce attic heat. They draw in cooler air from the outside. As the cooler air enters, it forces warmer air to rise and exit.
Intake vents should be evenly distributed along the roof of the house. The most common intake vents include:
- Soffit vents. These are placed on the material under the eaves or between the joists on your roof.
- Ridge vents. These are installed at the peak of a sloped roof. They allow warm, damp air to escape from the attic.
- Gable vents. These are installed in the two gabled ends of your attic. Ideally, they are placed so they take advantage of the prevailing winds. Depending on the wind, gable vents can serve as both intake and exhaust vents.
Exhaust Vents
Exhaust vents are located at the top of the roof. They provide an easy exit for heated air, odors, and moisture to escape from the attic. If this air does not get out, the result can be a buildup of heat and moisture. Besides poor air quality, roof damage and peeling paint may occur.
Common types of exhaust vents include the following.
- Ridge vents run along the top edge of the roof. When the wind blows across their ridges, this results in uniform air movements.
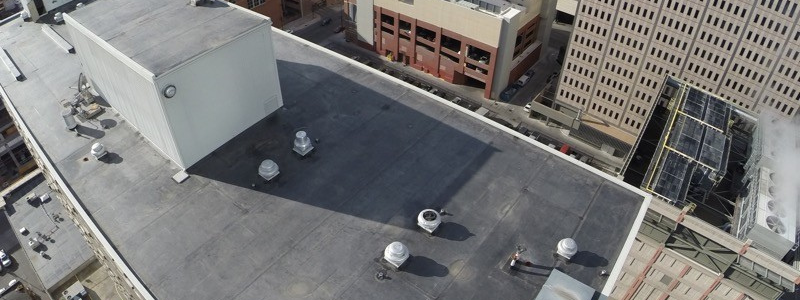
- Roof turbines have blades that spin in the wind. This pulls air through the intake vents. Roof turbines are evenly spaced across the roof.
- Static roof vents are often called roof louvers. These fit into the highest peaks of a roof.
- Gable vents are one type of louvered vent. Depending on wind direction, they may be intake or exhaust vents.
Are Fans Necessary?
Fans on ridge or gable vents help blow hot, humid air out of an attic. Attic ventilation fans are energy-efficient and don’t cost much to operate.
They help cool air and prevent hot air from remaining in your attic while pulling in cool air.
Attic ventilation fans tend to be quite energy-efficient. Many of them are solar-powered and require no additional electrical work.
However, some argue against attic ventilation fans because:
- Attics with good insulation shouldn’t need fans.
- Fans can cause loss of conditioned air if the attic is not airtight.
Why Choose Passive Roof Vents?
Passive roof vents use natural elements like wind to move the air through the attic and out of your home. They do not rely on fans. Thus, they are environmentally friendly.
Most homes have some degree of passive attic venting. Cooler air enters through soffit vents. Air that heats up inside the attic rises and exits through gable vents or ridge vents. Warm air leaving the attic creates negative pressure sucking in cool air.
There are several advantages to using passive roof ventilation:
- You don’t have to buy any fancy equipment.
- Passive roof ventilation is quiet.
- When you do not rely on fans, you reduce your carbon footprint.
- Passive roof vents result in cleaner air.
- Maintenance and replacement costs stay low.
- Passive roof vents produce more consistent heating/cooling of the air in the building.
- Energy bills will be lower.
- Natural ventilation provides more efficient humidity control.
Using the most effective combination of roof vents can improve your home’s livability. Well-selected and maintained roof vents can reduce your energy costs. They can also increase the life of your roof and reduce costly repairs.
How Can B&M Roofing Help?
It is important that roof vents be installed properly and checked regularly by roofing professionals. Colorado’s many days of sunshine, brisk winters, and high winds create unique weather challenges. B&M Roofing has been installing, inspecting, and repairing roof vents in Colorado since 1947. Our roofing specialists are proud to provide their valued clients with reliable, meticulous service. B&M roofers are experienced, licensed, and insured. We have a guaranteed commitment to excellence. To let us know how we can help you choose the most effective roof vents and placement for your home, contact us today!
Are Gutter Screens Worth It?
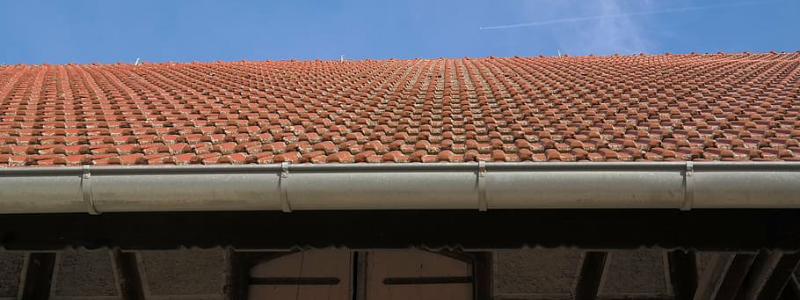
Clogged gutters can be a nightmare. They can lead to overflowing, which can then lead to water intrusion, which further leads to extensive, and expensive, water damage within your home. Gutter screens, also called gutter guards, are designed to sit on top of your gutter to prevent debris from falling inside them. This allows for rainwater to pass through freely, as the screens prevent clogs and blockages.
There is a variety of different kinds of gutter screens available on the market. Gutter screens can be made from:
- Vinyl
- PVC
- Steel
- Aluminum
Each type is engineered differently and has its own pros and cons. The most common type of gutter screen is a rounded screen that attaches to shingles on a roof, covering the gutters. The mesh captures debris and prevents it from entering the gutters.
Another type of gutter screen design is made from micro-mesh stainless steel, which allows rainwater to run through small holes while blocking leaves, sticks, and debris from falling in. Other types of gutter screens include surface tension guards, brush guards, and foam guards.
So, you’re probably asking yourself: are gutter screens worth it? The question is more complicated than it seems.
Depending on which type of gutter screen you choose, they can become quite costly. However, they can also significantly reduce gutter maintenance efforts and prevent blockages.
To help answer the question, “Are gutter screens worth it,” we’ve put together some of the benefits and drawbacks of having them installed on your home. Here are some of the pros and cons.
Are Gutter Screens Worth It: Pros
They make gutters easier to clean.
Gutter screens do a very good job at preventing the accumulation of branches, leaves, and shingle granules in your gutters. Therefore, you’ll find yourself having to clean your actual gutters less often. Gutter screens themselves must still be cleaned and maintained to keep them working efficiently. Cleaning gutter screens involves removing accumulated materials off the guards and potentially hosing them down. Gutter screens reduce the time it takes to clean your gutters. They are especially worth it if you have large trees surrounding or near your home.
They reduce ice dam formation.
Since gutter screens direct water away from your home and prevent the accumulation of stagnant water, the chance of ice dams forming inside the gutters is reduced. This is especially true if your gutter screens are heated. Ice can damage your gutter system and can be quite costly to repair. Heated gutter screens might be beneficial if you live in areas with harsh winters with cold temperatures and lots of snow.
They help to prevent animal infestation.
Gutter screens can prevent wildlife such as squirrels, birds, mice, and insects from nesting and breeding in your gutters. This is because they reduce the amount of stagnant water sitting inside your gutters.
Stagnant water attracts vermin and insects which can lead to infestation inside the home if the problem is not handled immediately. Gutter screens also work as a physical barrier for rodents who can navigate their way inside the home.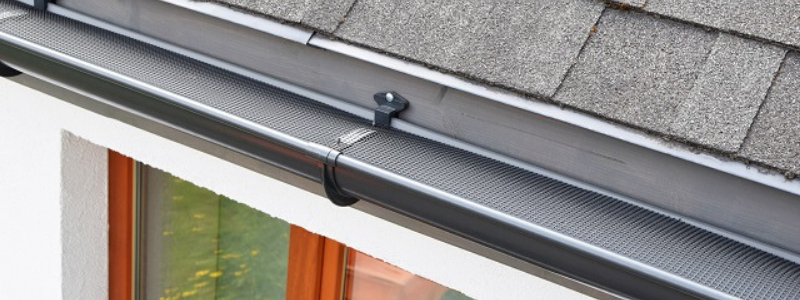
Installation can be easy and inexpensive.
Gutter screens can be easily installed without altering your existing gutter system. These are some of the most affordable gutter guard options. The price of gutter screens usually starts under $1 per linear foot, depending on the material used.
They prevent blockages and clogs.
Because gutter screens reduce the amount of debris that collects inside your gutters, the chances for clogs and blockages are diminished. Blockages and clogs can lead to water damage, erosion, and the formation of rust. It can also lead to water entering the home, causing mold and mildew to grow. Additionally, blockages and clogs that lead to overflowing can result in unattractive water stains on your home’s exterior.
Are Gutter Screens Worth It: Cons
Gutter screens need cleaning, as well.
Yes, it’s true gutter screens remove a huge load of cleaning your gutters manually, but it doesn’t remove the need for maintenance entirely. It is important to clean your gutter screens every so often, if they are left uncleaned, debris can accumulate on the screen and prevent water from passing through the mesh. Additionally, the added weight of debris build-up on your gutter screens can cause your actual gutters to become loose and sag, or even fall off completely.
They might not be effective if not installed properly.
Gutter screens are extremely effective when installed properly. However, poorly installed gutter screens might end up being a waste of your investment. Poorly installed gutter screens can dislodge during intense weather. Make sure you hire a reputable roofing company, such as B&M Roofing, and leave it to the experts. Installing gutter screens yourself can be a dangerous task, and it can result in poor installation and future damages.
They don’t last forever.
Nothing lasts forever, and that’s especially true for gutter screens. Basic gutter screens, such as those made from plastic can last 6 to 8 years depending on the climate you live in and how well you maintain your gutter system. The longevity of gutter screens also depends on how well they are installed and what materials are used. Screens made from metals such as aluminum, copper, and stainless steel will last much longer than screens made from plastic and foam.
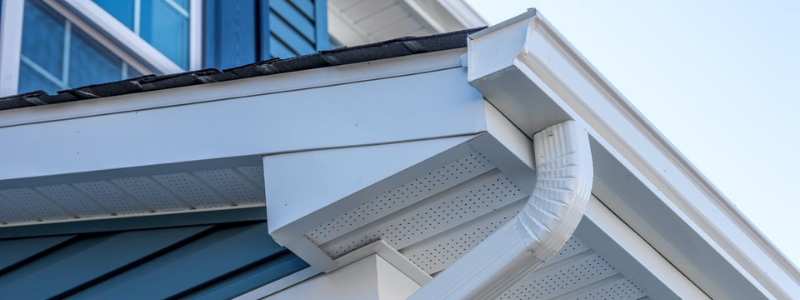
B&M Roofing: Colorado’s Best
Since 1947, B&M Roofing has been proudly serving homes throughout Colorado. Our team of expert roofers can help you decide which gutter system is best for your home and budget using extensive knowledge and best practices. We understand the challenges that roofs face in Colorado’s climate. We know how to restore and protect your roof and gutters to keep your home structurally sound. If you’ve asked yourself, “Are gutter screens worth it,” and your answer is yes, we can certainly help.
When it comes to our reputation, B&M Roofing is known for being fast, efficient, and cost-effective. Whether it’s maintenance, repair, or replacement, our roofing experts will do the job right. Contact us today for a consultation and an initial free estimate. We can provide well-backed suggestions to help you make well-informed decisions about your roof. Call us today!
